Adding a Service
Services in Squadcast represent specific systems, applications, components, products, or teams for which an incident is created. To check out some of the best practices on creating Services in Squadcast, refer to the guide here.
Prerequisites
-
The User Role associated with the user in the Team must have required permissions to manage Services.
-
You need to have at least one Escalation Policy before you can add Services.
-
The number of Services that can be added for an Organization is determined by the plan that your account is currently on.
Creating a Service
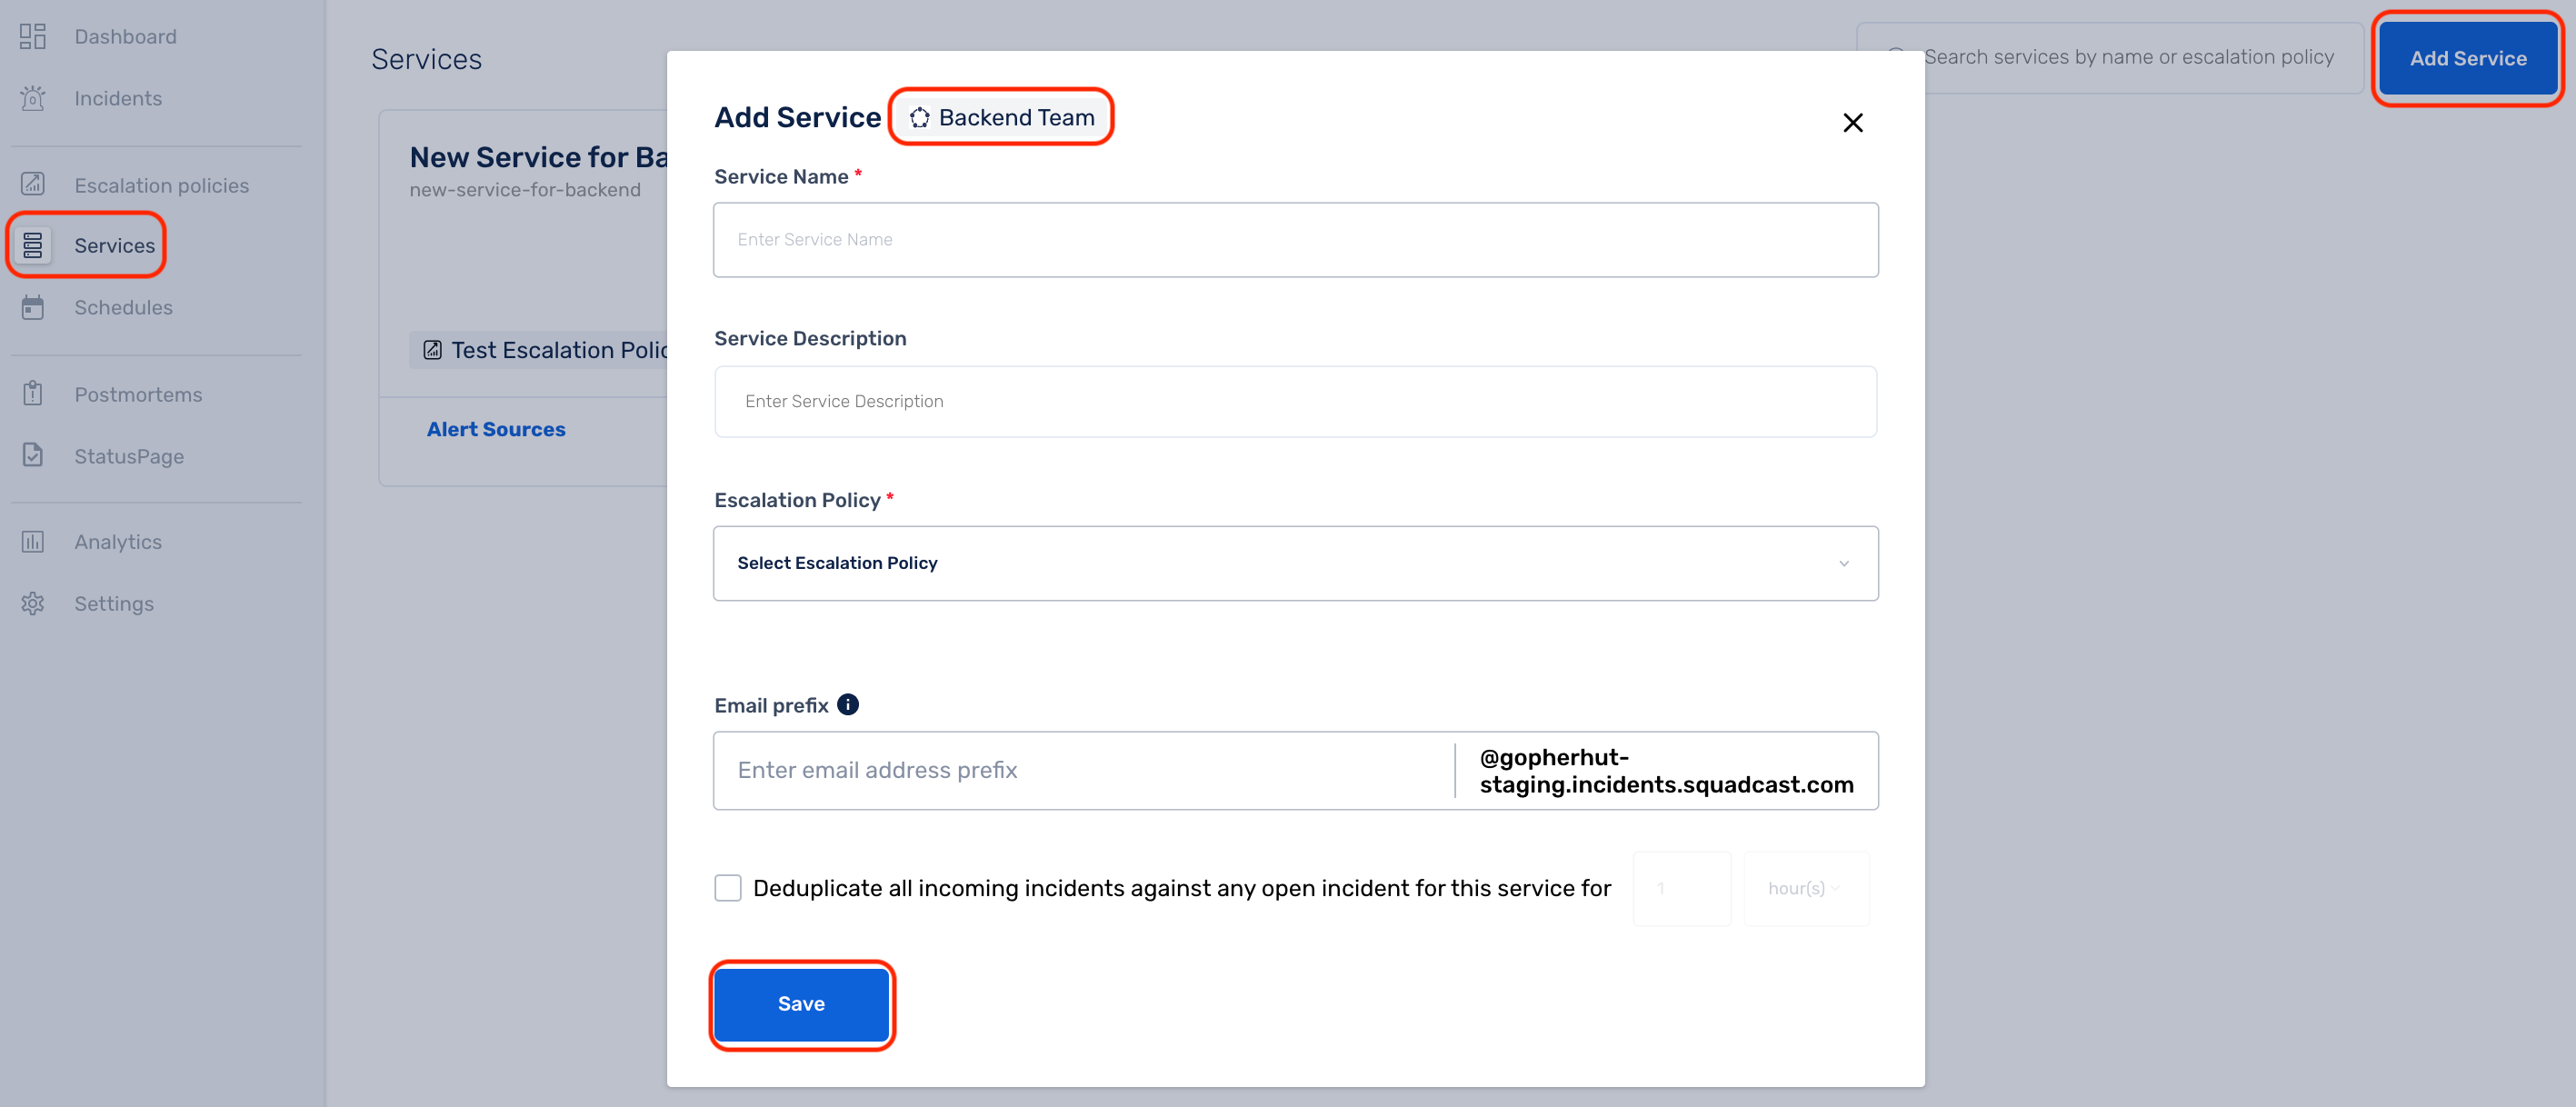
(1) Click on Services in the primary navigation. Then, click on Add Service to create a new Service
Here, add the following information:
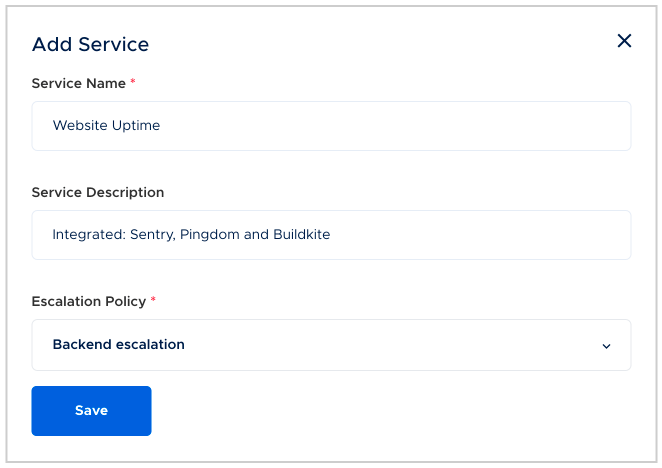
- Service Name - Corresponds to the name of your business service
- Service Description (optional) - A simple description of the service
- Escalation Policy - The Escalation Policy that you assign to a service. This will be its default Escalation Policy
- Email Prefix (optional) - You can choose to add an email address prefix to the Service for it to function as an alternative alert source for that Service. If you leave it blank, Squadcast will automatically fill in the prefix-key which you can use
- Status Based Deduplication (optional) - This can be enabled by checking the box with the information message and choosing the appropriate time window for which you would like this deduplication rule to hold true. This can be enabled/modified even after the Service is created
Note: Ensure that the right Team is chosen from the team picker on the top of the screen (which is also visible as a display tag against on the top of the Create Service modal).
(2) Finally, click on Save to create the Service
Deleting a Service
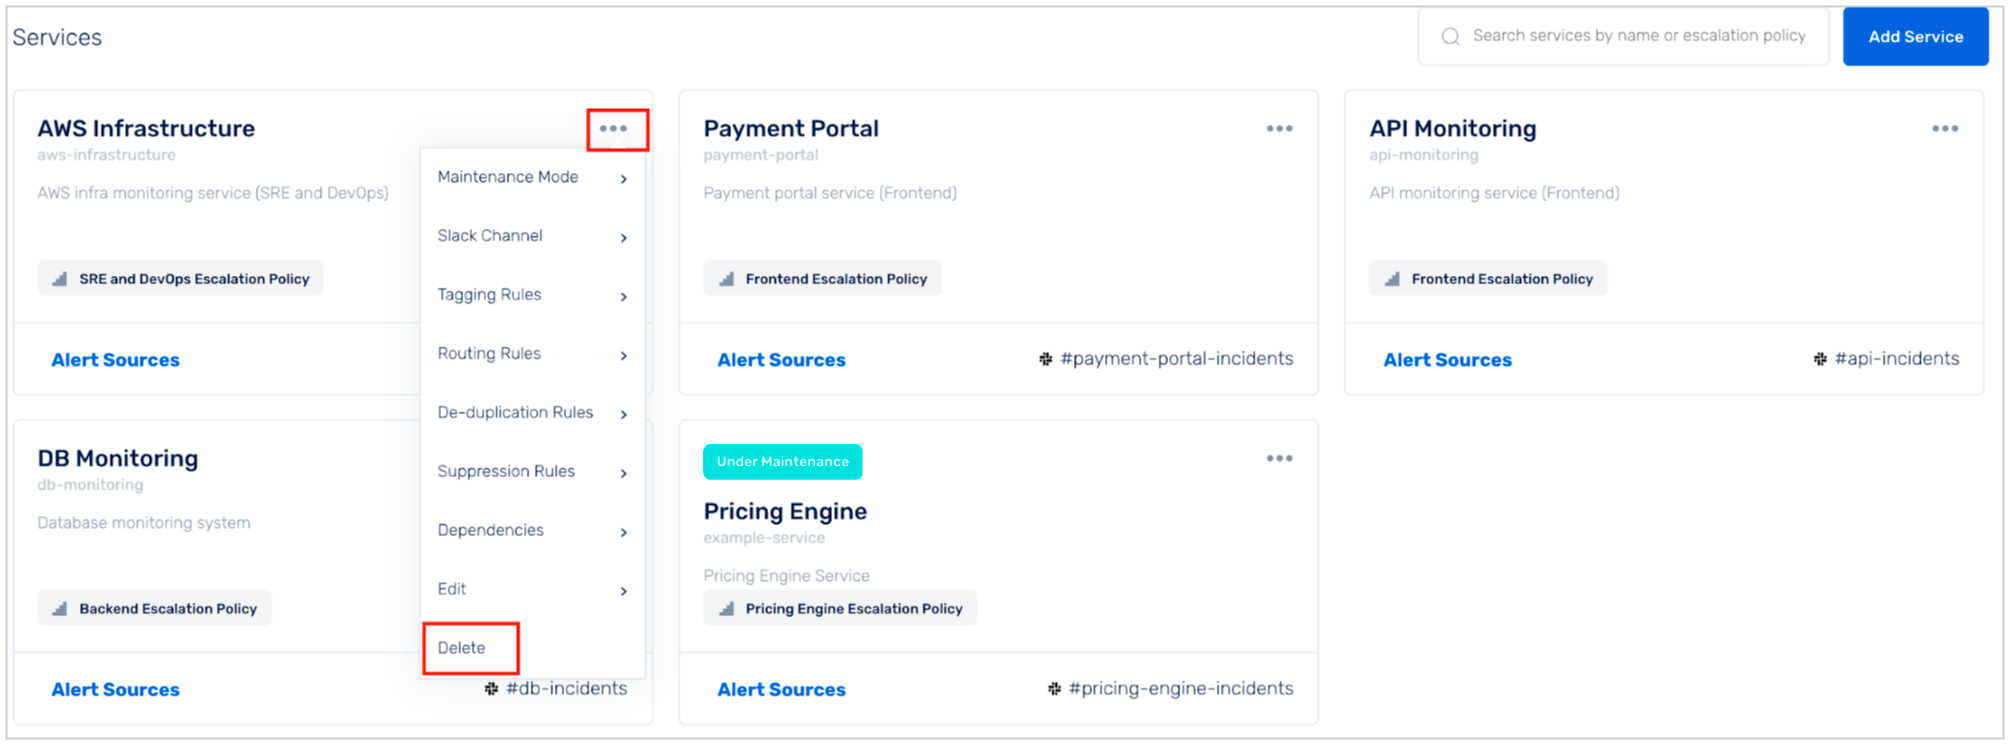
(1) Move over to the Service that you wish to delete. Click on the More Options icon and select Delete from the drop-down
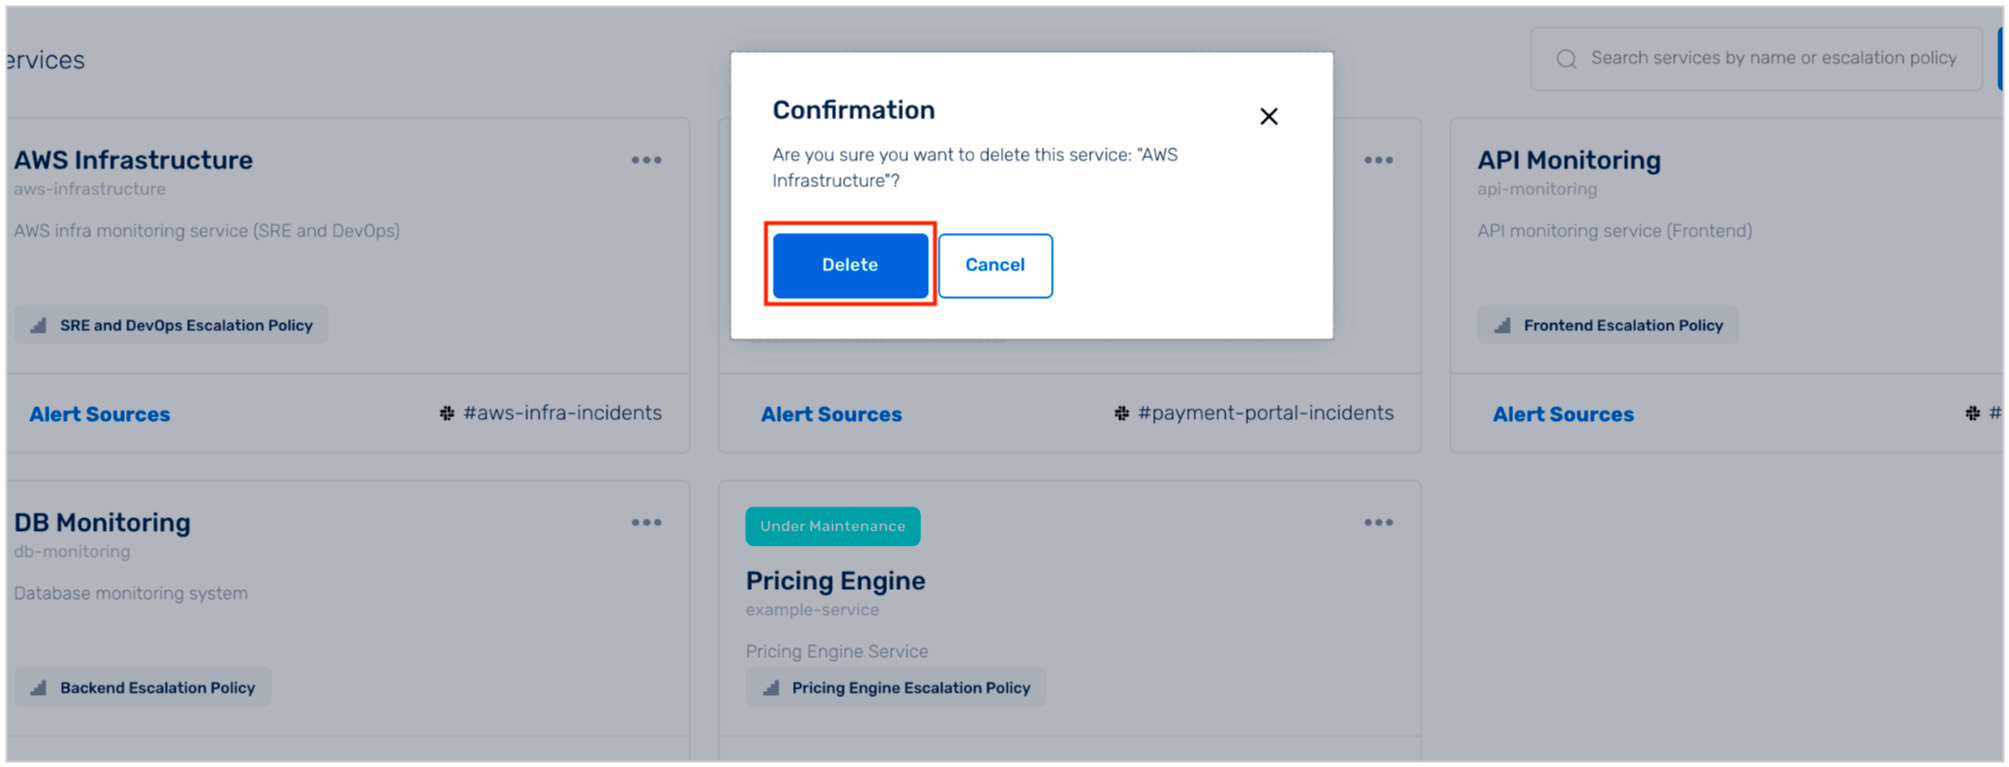
(2) You will then see a confirmation pop-up and you can click on Delete to delete the service. This action is irreversible
Unable to delete a Service and an error message is thrown
In cases where there are open (Triggered / Acknowledged) incidents for a Service, the system will not allow you to delete the service without resolving these incidents.
You will be able to see a similar error message in cases like these.
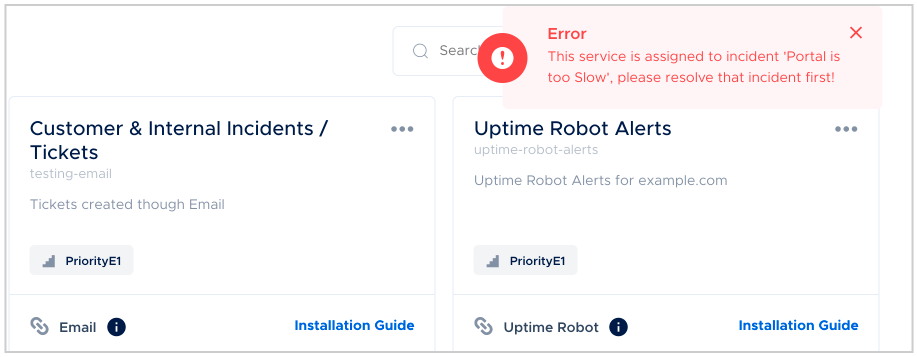
You will have to resolve all the open incidents and then follow the same process stated above to delete the service.
To resolve multiple incidents at one shot, check out the Take Bulk Actions documentation.
Alert Sources (Integrations)
A single Service can receive alerts from multiple sources. The list of supported alert source integrations is available here.
Adding Multiple Alert Sources for one Service
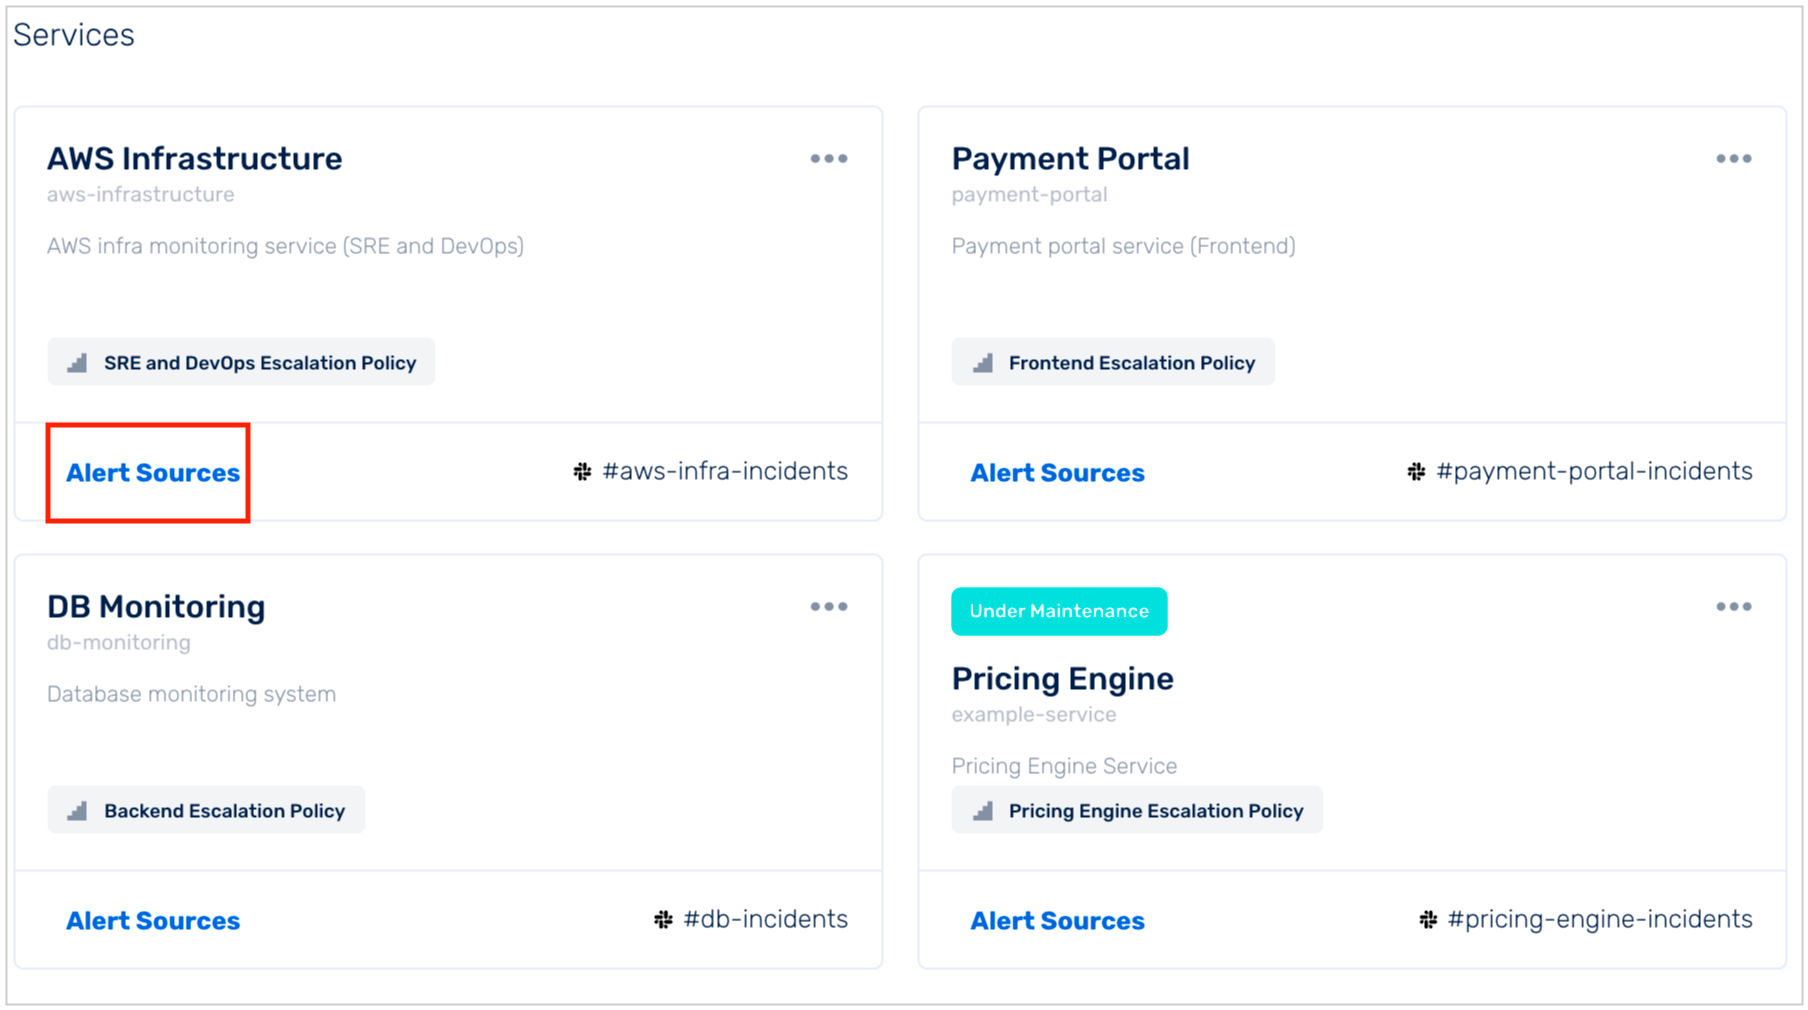
(1) Click on Alert Sources for a Service
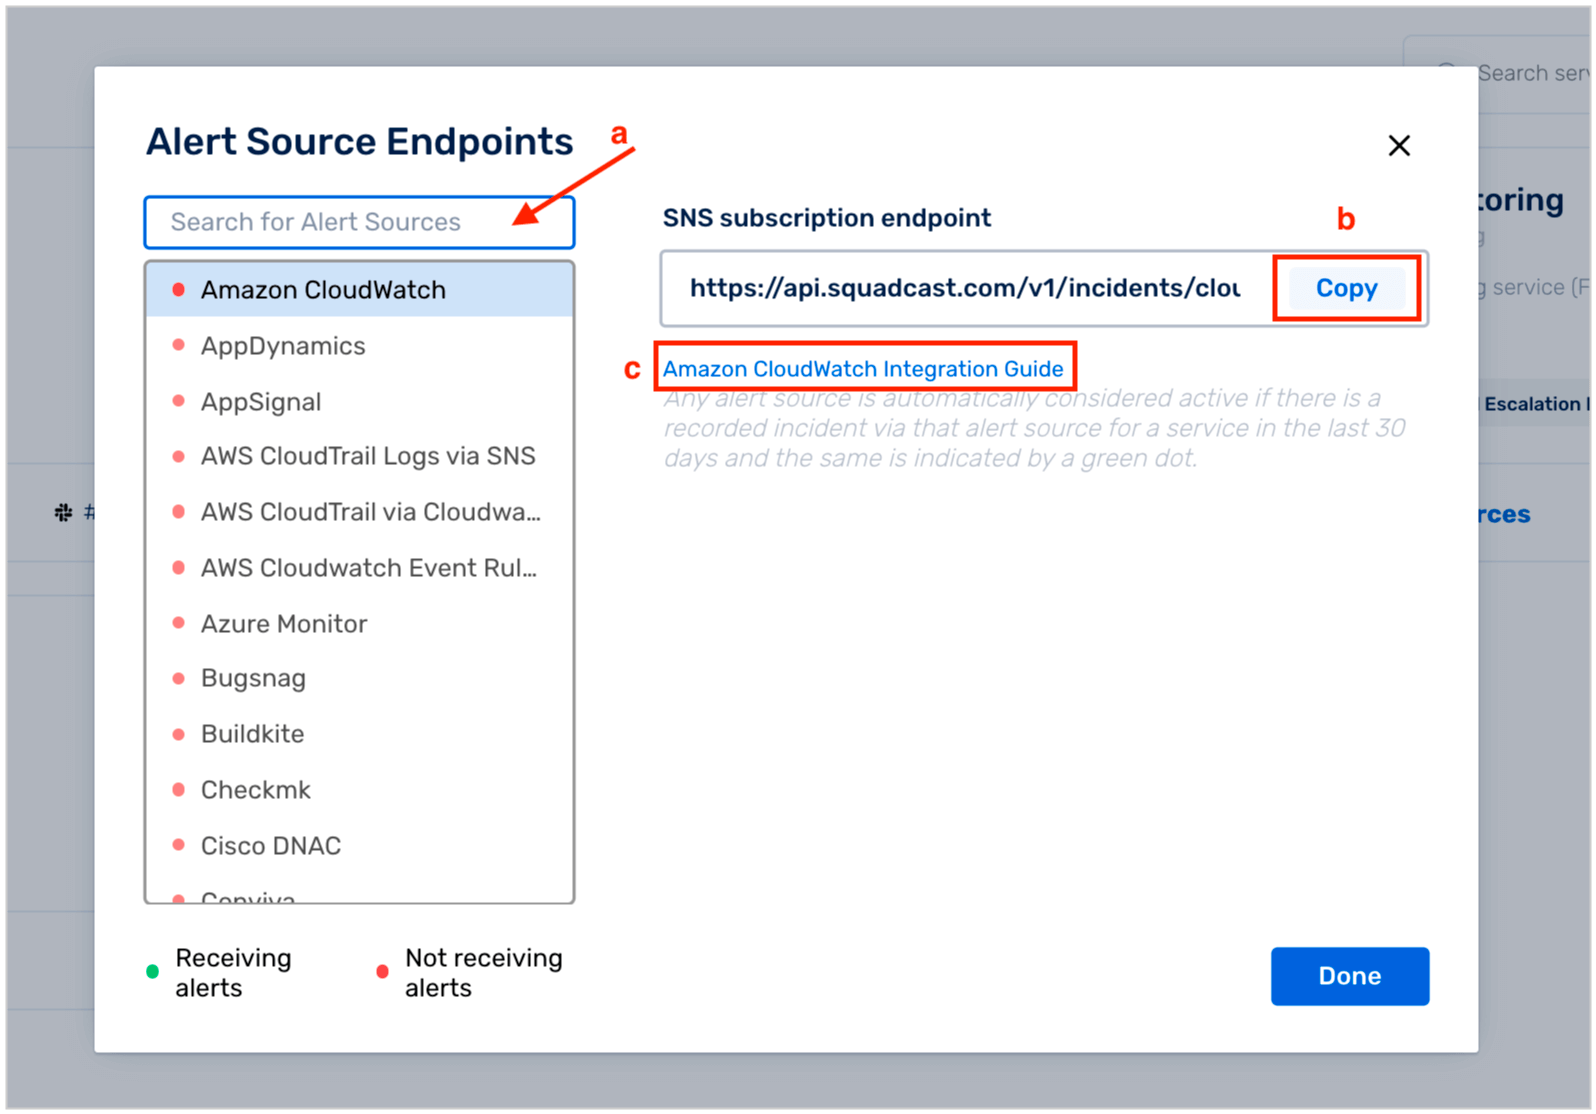
(2) Follow the steps below to integrate with an Alert Source:
(a) Select the type of Alert Source from the drop-down that lists all the available integrations
(b) Copy the end point (which is generally either a Webhook URL or an Email)
(c) Click on integration guide to integrate with the Alert Source
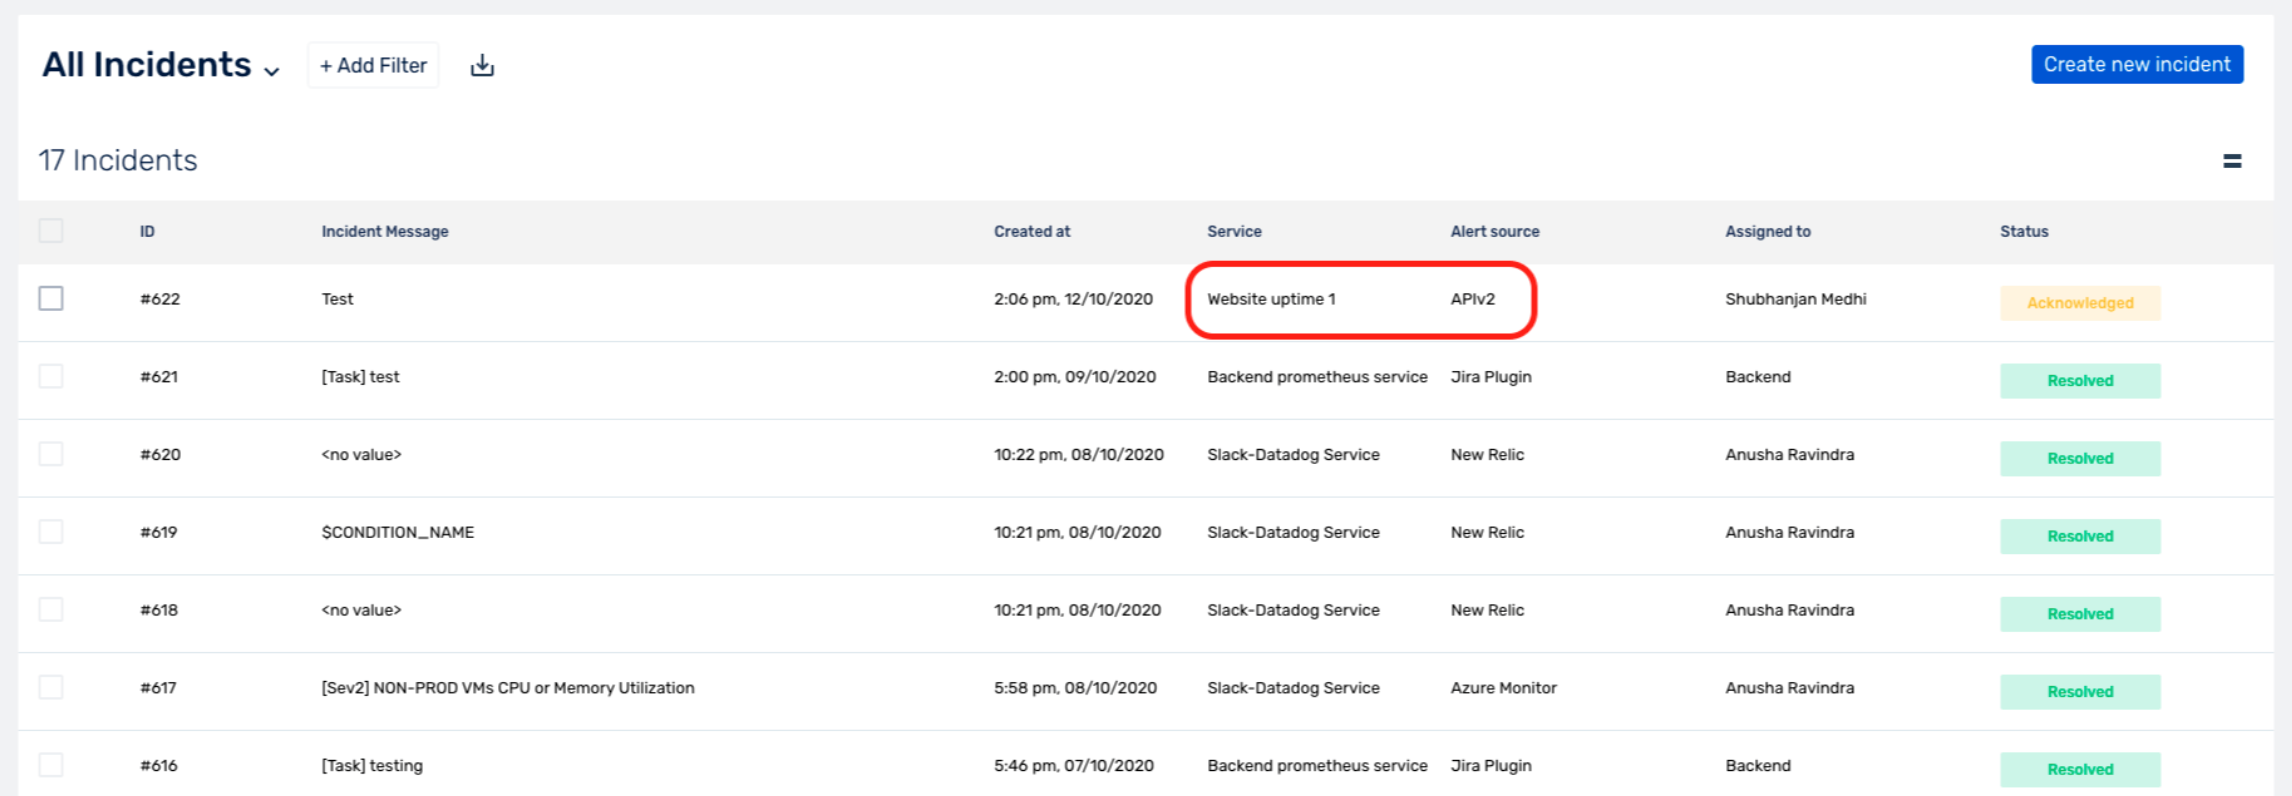
Now, when an incident comes for a Service via an integrated Alert Source, you can see the affected Service and the Alert Source information in:
- The Dashboard

- The Incidents page
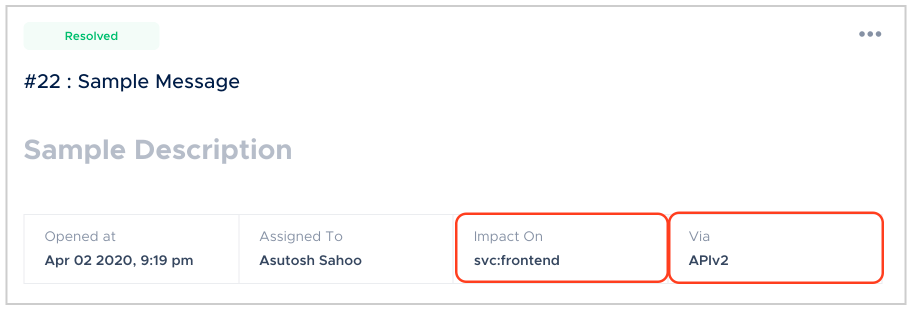
- The Incident Details page
We are working on improving the Services UI to show you the list of integrated Alert Sources for each Service with just a quick glance.
Pro-tip: We recommend adding the names of the integrated Alert Sources under the Service’s Description so as to easily keep a note of all the configured end-points.