Incident Webhook
This document will help you configure Incident Webhook to route alerts from monitoring tools or your internal (bespoke) systems into Squadcast. Incident Webhook can do both, trigger and resolve incidents in Squadcast, through HTTP POST requests.
Route detailed monitoring alerts coming in via Incident Webhook to the right users in Squadcast.
Note:
We also support outgoing webhooks. You can find detailed information on how to configure them here.
How to configure Incident Webhook
In Squadcast: Using Incident Webhook as an Alert Source
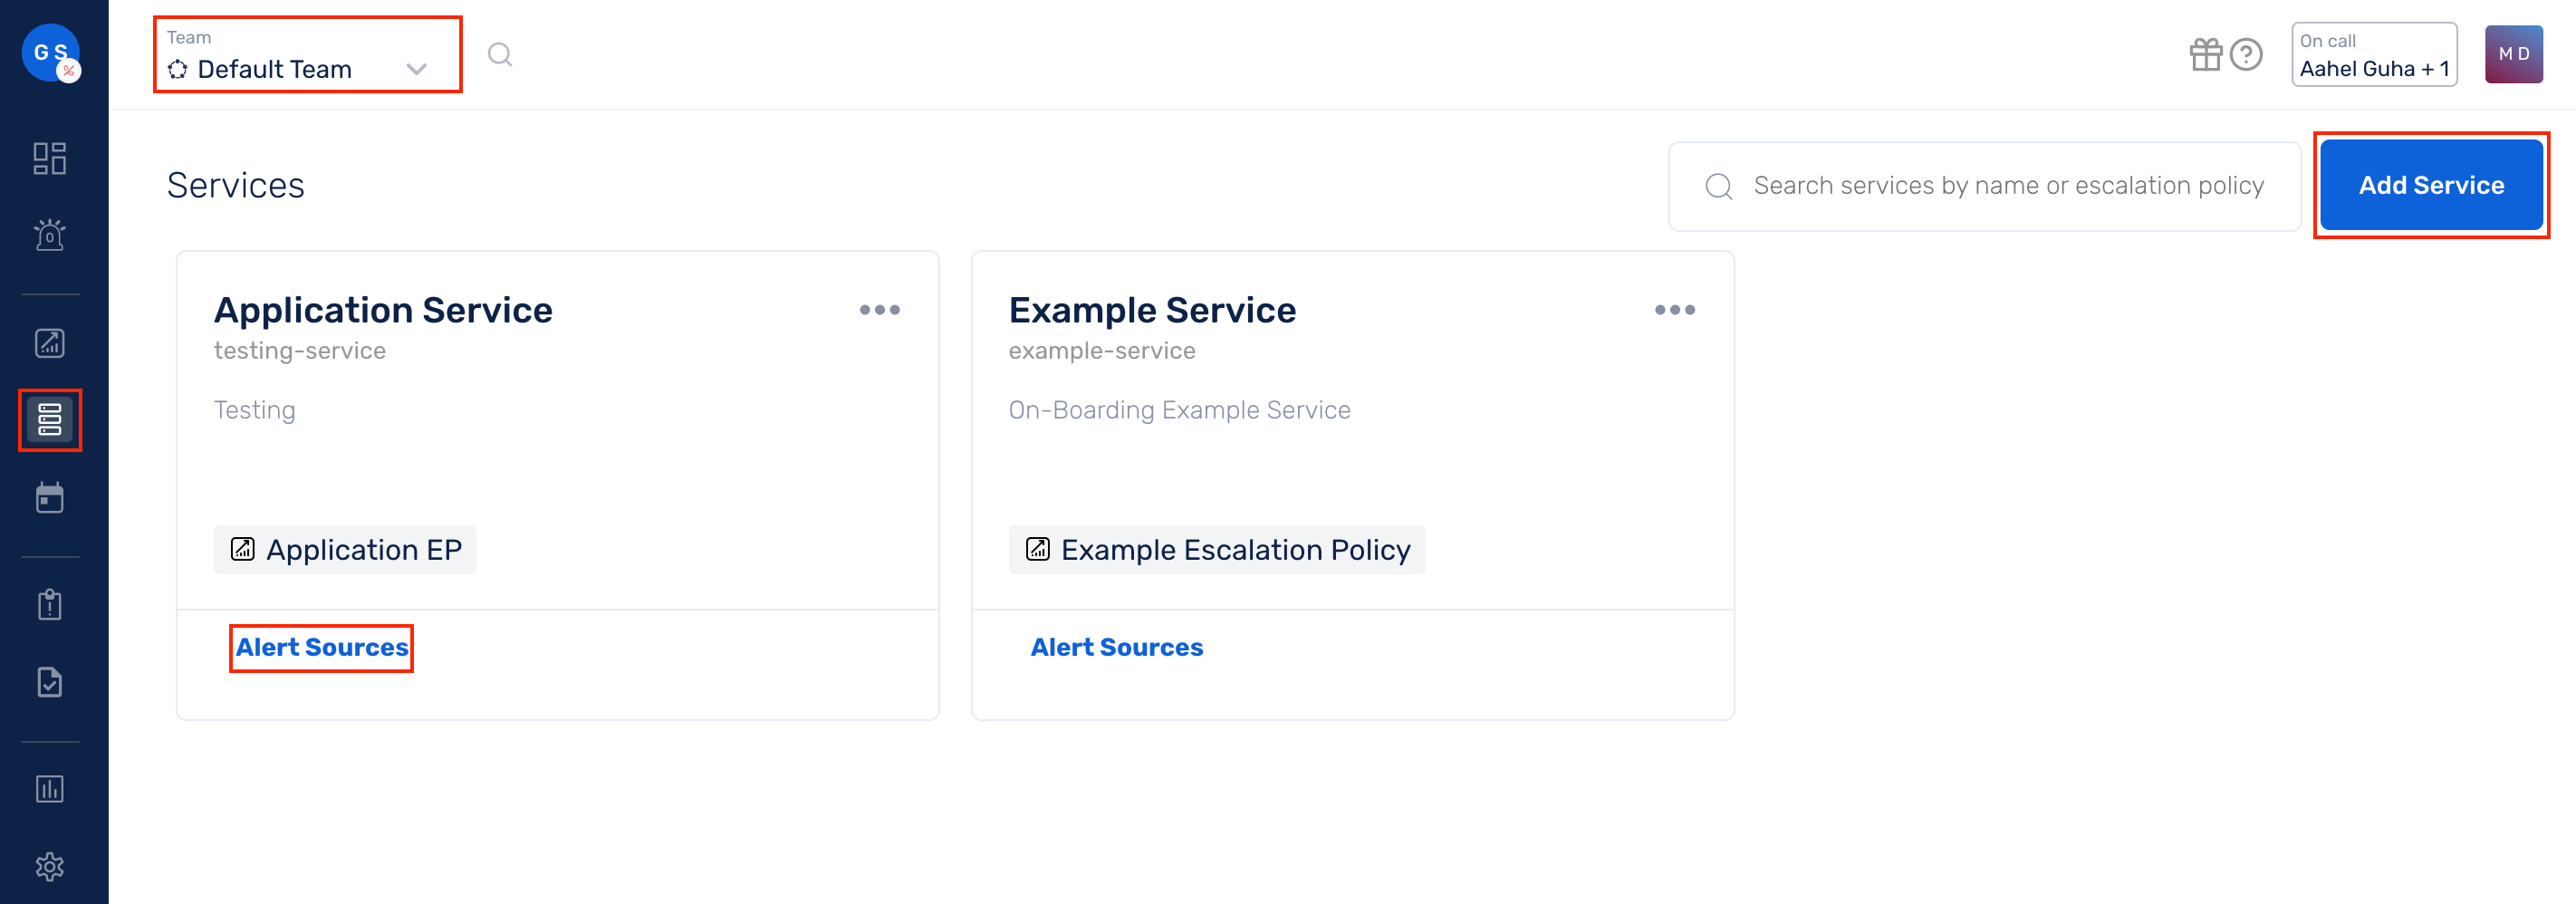
(1) From the navigation bar on the left, select Services. Pick the applicable Team from the Team-picker on the top. Next, click on Alert Sources for the applicable Service
(2) Search for Incident Webhook from the Alert Source drop-down and copy the Webhook URL. Use this Webhook URL endpoint to send HTTP POST requests
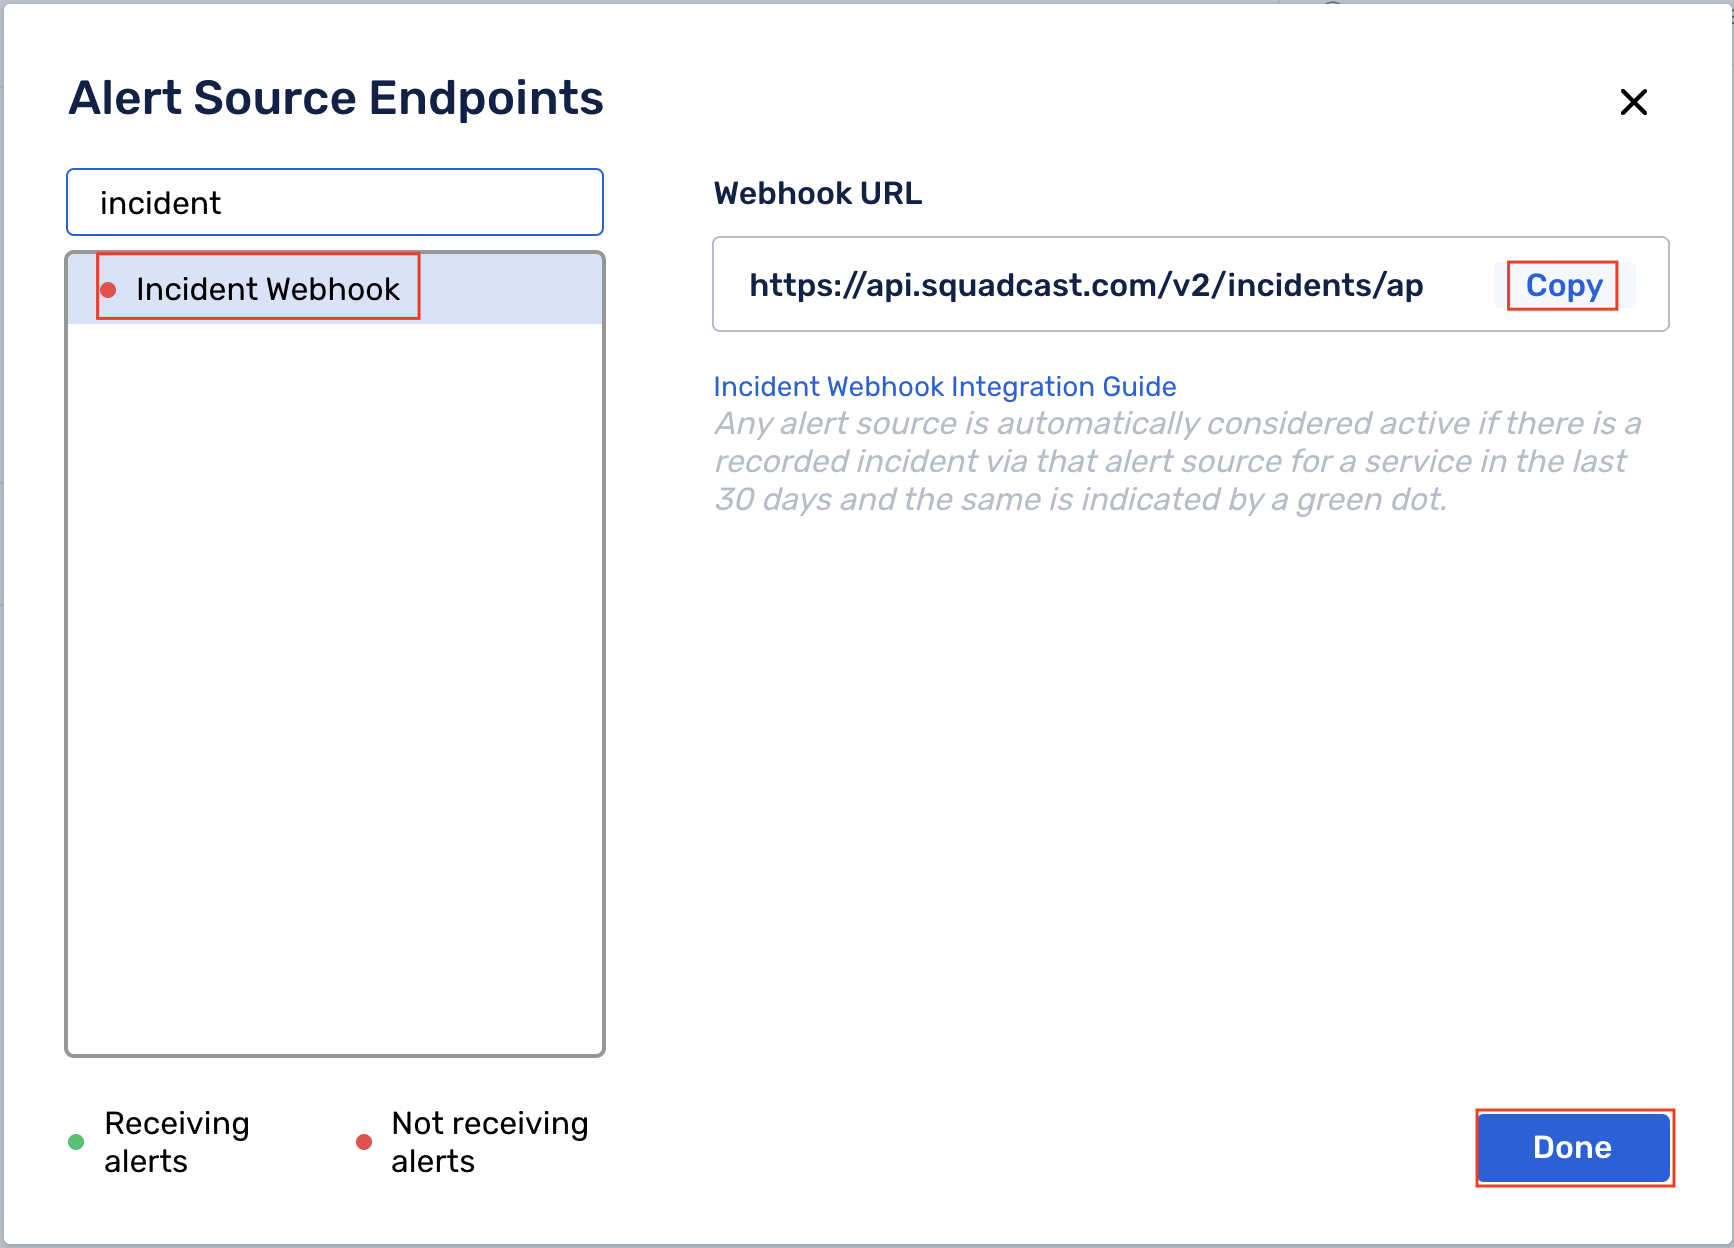
For an Alert Source to turn active (indicated by a green dot - Receiving alerts against the name of the Alert Source in the drop-down), you can either generate a test alert or wait for a real-time alert to be generated by the Alert Source.
An Alert Source is active if there is a recorded incident via that Alert Source for the Service in the last 30 days.
Ensure that you add a header Content-Type with value application/json while making the HTTP POST request
The body of the POST request should contain the details of your incident in the following format:
{
  "message": "This will be the incident message",
  "description": "This will be the incident description",
  "tags" : {
    "tagname1":"Tag value#1",
     "tagname2":"Tag value#2",
     "tagname3": {
       "color": "Valid HTML HEX Colour Notation goes here",
       "value":"Tag value#3"
     }
  },
  "status": "trigger",
  "event_id": "6"
}
Kindly note that the message and description fields in the JSON are mandatory to trigger an incident in Squadcast. You can enrich your incidents by adding other details optionally, in the same format as seen above in the example JSON
The payload size is limited to 30KB. Any payload that crosses this limit will not be processed.
You will receive [HTTP Status Code 413](https://developer.mozilla.org/en-US/docs/Web/HTTP/Status/413) to notify you of this.
Event Identification and Resolution
This section will give you an understanding of how one can associate alerts with Squadcast incidents and resolve them with an API call.
Typical Incident JSON
{
  "message": "This will be the incident message",
  "description": "This will be the incident description",
  "status": "trigger",
  "event_id": "6"
}
This triggers an incident and associates the incident with the event_id value as specified. This event_id can be used to resolve the above created incident with an API call.
To resolve an incident, a JSON with the format as shown below should be sent.
{
  "status": "resolve",
  "event_id": "6"
}
- The
statusfield should be set to value"resolve" - The associated
event_idshould also be sent along with this
To resolve an incident, message and description fields are not required to be sent.
Add a Tag From directly Incident JSON
This section will give you an understanding of how you can add tags to an incident straight from the Incident JSON using the Incident Webhook.
Typical Incident JSON:
{
   "message":"This will be the incident message",
   "description": "This will be the incident description",
   "tags": {
     "tagname1":"Tag value#1",
     "tagname2":"Tag value#2",
     "tagname3": {
       "color": "Valid HTML HEX Colour Notation goes here",
       "value":"Tag value#3"
     }
   }
}
Example 1: Using tags to set Severity for the incident
{
  	"message": "Error rates higher than usual",
    "description": "HTTP Error rates for srv_90 is above 90 counts/hour",
    "tags": {
    	"severity": "high"
    }
}
If a colour code is not mentioned explicitly, then the system takes the default colour "#808080" (gray) for tags
To specify a colour explicitly for tags:
{
	"message": "Error rates higher than usual",
  "description": "HTTP Error rates for srv_90 is above 90 counts/hour",
	"severity": {
  	"colour": "#FF0000",
  	"value":"backend"
  }
}
Example 2: Adding different tags to an incident
{
	"message": "Error rates higher than usual",
  "description": "HTTP Error rates for srv_90 is above 90 counts/hour",
	"tags" : {
   	"priority": "P1",
	  "impact_level": 5,
   	"classification": {
    	"color":"#FF0000",
     	"value":"backend"
     }
 	}
 }