Nagios
Follow the steps below to configure a service so as to push related alert data from Nagios onto Squadcast.
Squadcast will then process this information to create incidents for this service as per your preferences.
Using Nagios as an Alert Source
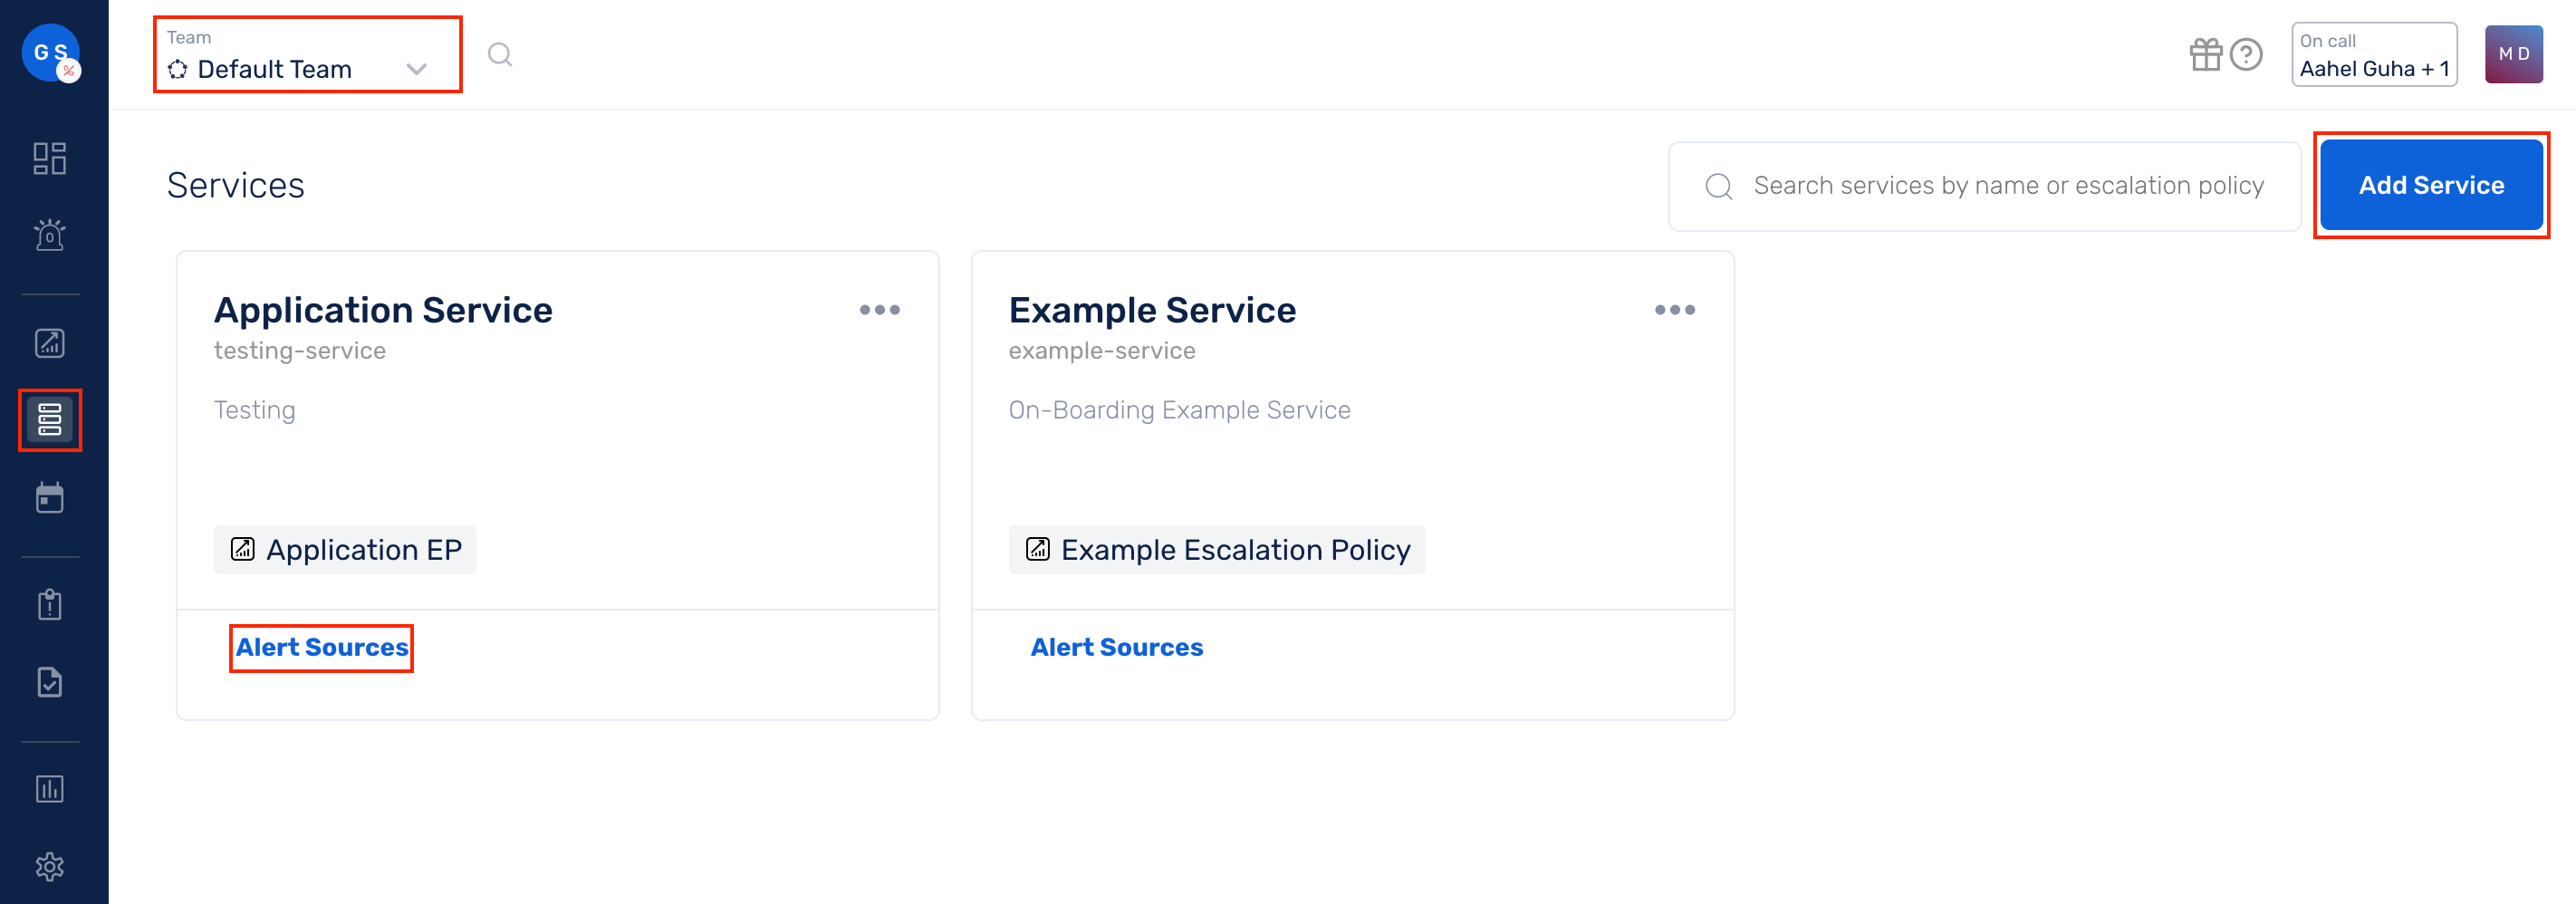
(1) From the navigation bar on the left, select Services. Pick the applicable Team from the Team-picker on the top. Next, click on Alert Sources for the applicable Service

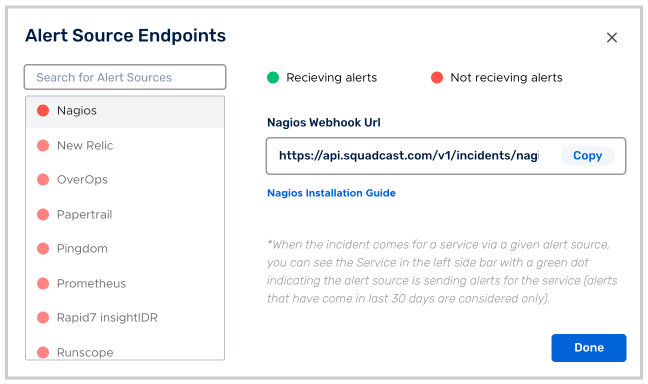
(2) Search for Nagios from the Alert Source drop-down and copy the Webhook URL

For an Alert Source to turn active (indicated by a green dot - Receiving alerts against the name of the Alert Source in the drop-down), you can either generate a test alert or wait for a real-time alert to be generated by the Alert Source.
An Alert Source is active if there is a recorded incident via that Alert Source for the Service in the last 30 days.
Create a Squadcast Webhook in Nagios
-
Log in to your Nagios server and go to your nagios.cfg file (usually in
/usr/local/nagios/etc/or/etc/nagios). Make sure enable_environment_macros=1. You can find the path of all your object config files and resource config file here. Go to $USER1$ directory. You can find the value of this macro in your resource.cfg file. -
Once you’re inside the directory, run the following commands:
sudo wget https://raw.githubusercontent.com/squadcastHub/squadcast-nagios-script/master/sq-nagios-service.py
sudo wget https://raw.githubusercontent.com/squadcastHub/squadcast-nagios-script/master/sq-nagios-host.py
- Once the file is downloaded please make sure that the file has execute permissions for your Nagios user. If not, then please provide the same using the following commands:
sudo chmod +x sq-nagios-service.py
sudo chmod +x sq-nagios-host.py
- Go to commands.cfg file. Then add the following two commands:
# 'service-alert' command definition
define command{
        command_name    service-alert
        command_line    $USER1$/sq-nagios-service.py 'https://api.squadcast.com/v1/incidents/nagios/c2165ee4e7635e337b3ae529ec5c851e6876e5a8' '$HOSTNAME$' '$SERVICEDESC$' '$SERVICESTATE$' '$SERVICEOUTPUT$' '$HOSTADDRESS$'
}

# 'host-alert' command definition
define command{
        command_name    host-alert
        command_line    $USER1$/sq-nagios-host.py 'https://api.squadcast.com/v1/incidents/nagios/c2165ee4e7635e337b3ae529ec5c851e6876e5a8' '$HOSTNAME$' '$HOSTSTATE$' '$HOSTOUTPUT$' '$HOSTADDRESS$'

}
- Go to contacts.cfg file.
Create a new contact and set your notification_options and notification_period for service and host according to your preference.
Enable host_notifications and service_notifications
Set service_notification_commands to service-alert and host_notification_commands to host-alert
Ex:
define contact {
        contact_name squadcast
        alias Squadcast
        host_notifications_enabled      1
        service_notifications_enabled   1
        service_notification_period 24x7
        host_notification_period 24x7
        service_notification_options w,u,c,r
        host_notification_options d,u,r
        service_notification_commands service-alert
        host_notification_commands host-alert
}
- Then add the contact to your preferred contact group.
Ex:
define contactgroup{
        contactgroup_name       admins
        alias                   Nagios Administrators
        members                 nagiosadmin,squadcast
        }
- Finally restart Nagios using the following command:
service nagios restart
Now whenever an event is triggered in Nagios, an incident will be automatically created in Squadcast. Also, once the event that triggered the incident(s) is resolved in Nagios, the relevant Squadcast incidents created would get resolved automatically.