Checkmk
Follow the steps below to configure a service so as to extract its related alert data from Checkmk, which is built on top of Nagios. Squadcast will then process this information to create incidents for this service as per your preferences.
Note that you must be logged in as root to complete the installation.
These instructions might need to be altered based on your exact Linux distribution and your Checkmk version and configuration.
Please drop our Support Team a line if you have any trouble completing the integration
Using Checkmk as an Alert Source
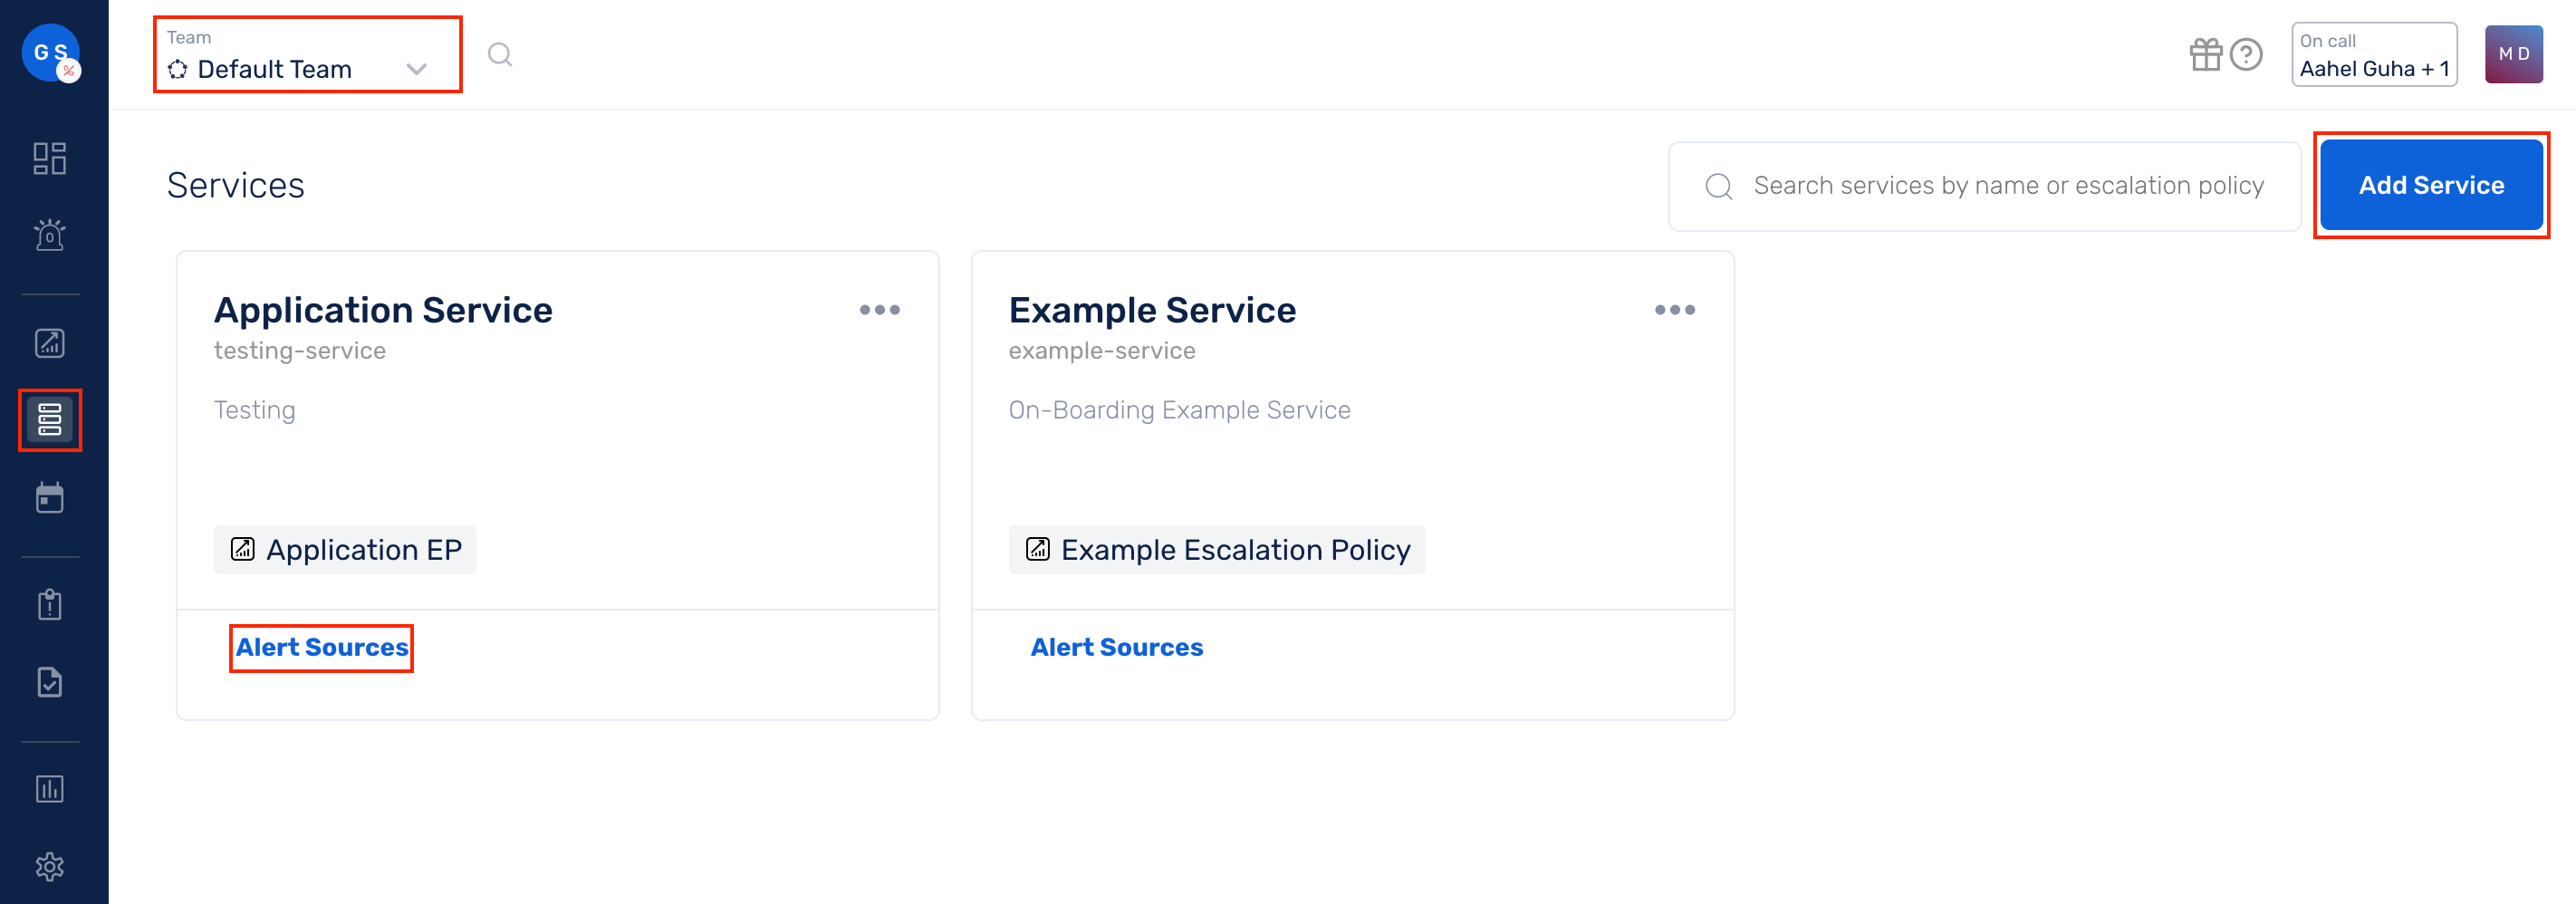
(1) From the navigation bar on the left, select Services. Pick the applicable Team from the Team-picker on the top. Next, click on Alert Sources for the applicable Service
(2) Search for Checkmk from the Alert Source drop-down and copy the Webhook URL
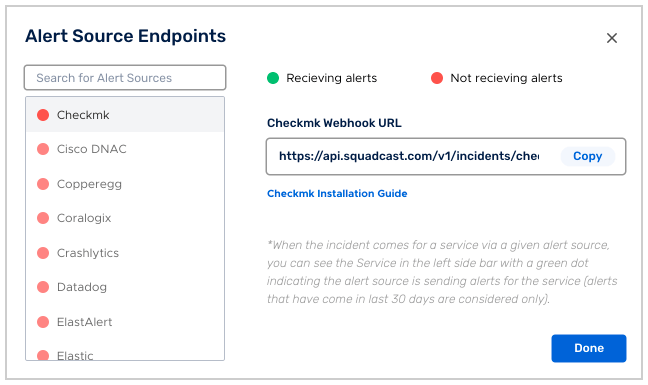
For an Alert Source to turn active (indicated by a green dot - Receiving alerts against the name of the Alert Source in the drop-down), you can either generate a test alert or wait for a real-time alert to be generated by the Alert Source.
An Alert Source is active if there is a recorded incident via that Alert Source for the Service in the last 30 days.
Steps for integrating Checkmk
- Go to your Checkmk server.
- Download the Squadcast notification script.
wget https://raw.githubusercontent.com/SquadcastHub/squadcast-checkmk-script/master/sq-script.py
- Move the notification script into place.
For the standalone version of Checkmk, this is usually in the below path:
/usr/share/check_mk/notifications
mv sq-script.py /usr/share/check_mk/notifications
For the OMD version of Checkmk, this is usually located in
/omd/sites/{site-name-here}/local/share/check_mk/ notifications.
mv sq-script.py /omd/sites/{site-name-here}/local/share/check_mk/notifications
- Then give the script execute permission.
chmod +x sq-script.py
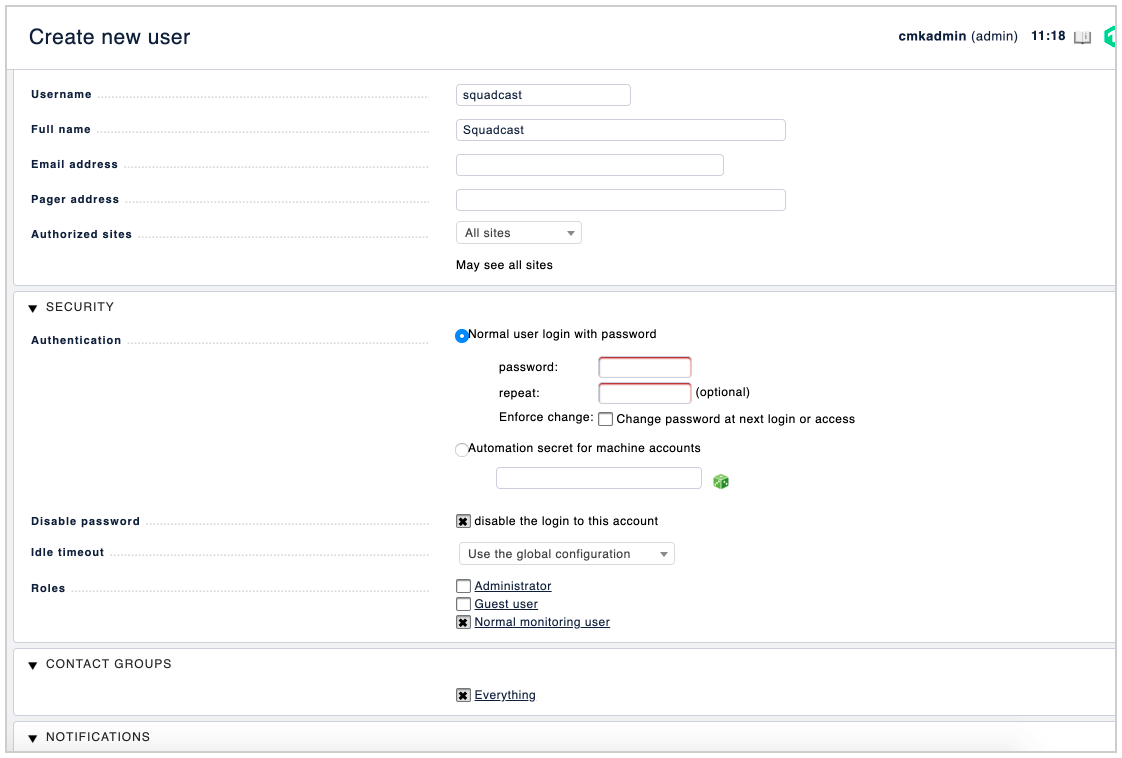
- Log in to the Checkmk web interface, go to Users (located in the WATO· Configuration box) and click New User

- Enter a Username and, optionally, a Full name for the Squadcast user.
You will find it beneficial to set the full name to match the name of your Squadcast service if you will plan to configure Checkmk hosts and services to alert multiple Squadcast services and not just one.
-
Do not enter a password for this user; instead check
disable the login to this account. This step is done as this account exists solely to send notifications to the Squadcast script. -
Set the user’s role to
Normal monitoring user, or any custom role you’ve created with permissions to send notifications. -
Add the user to the Contact Groups which are a part of the hosts/services that you want to receive alerts for. Click Save when you are done.
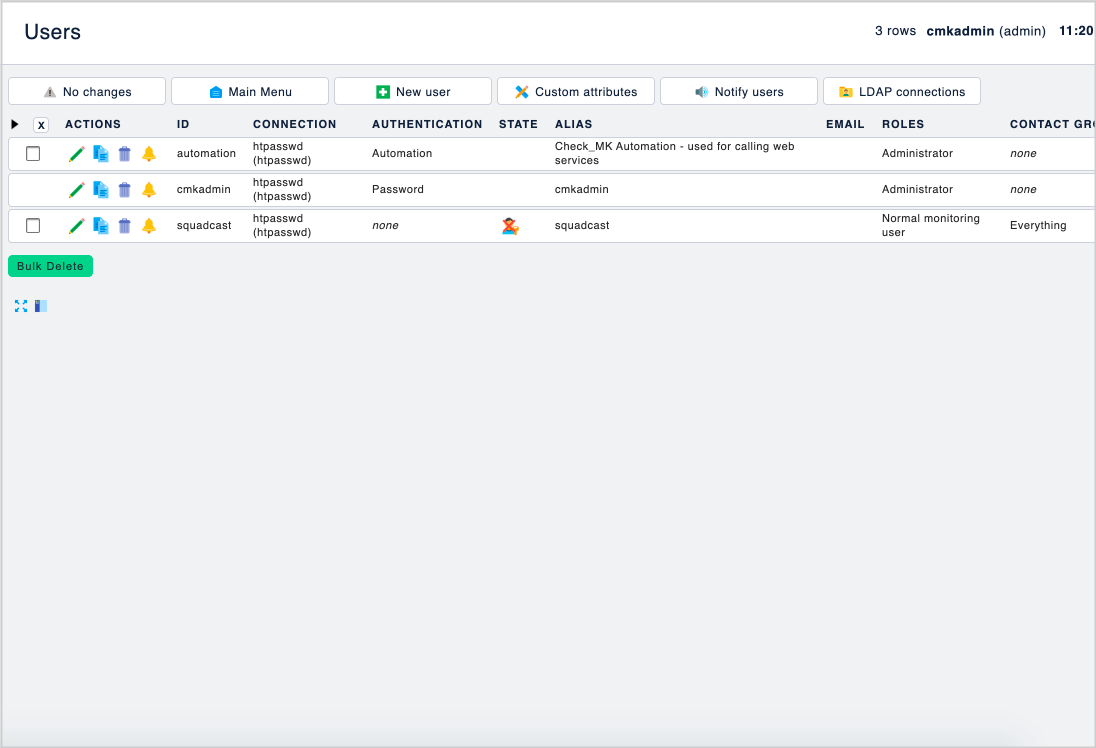
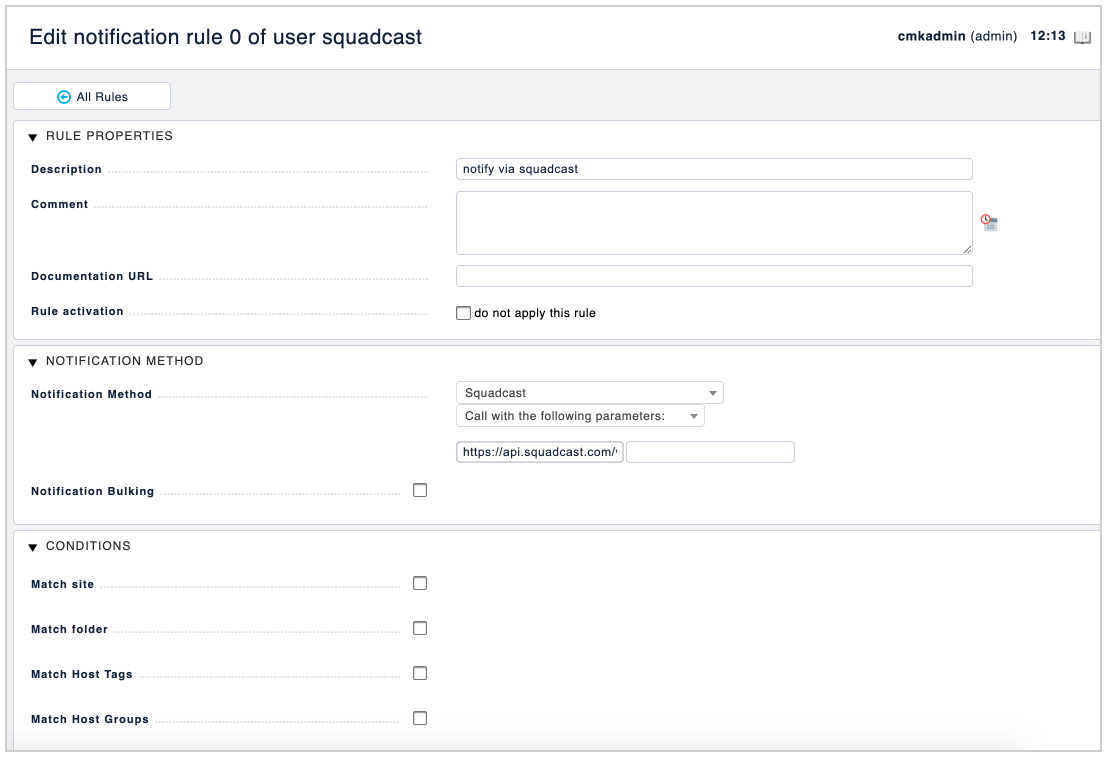
- Click the Notifications icon (bell icon) for the user created.
-
Enter a Description for the new notification method, then set Notification Method to Squadcast.
-
Paste the Webhook URL you copied from Squadcast earlier in the text box that appears once you select Squadcast, and select any desired conditions to limit the alerts that get sent to Squadcast. Click Save when you are done.
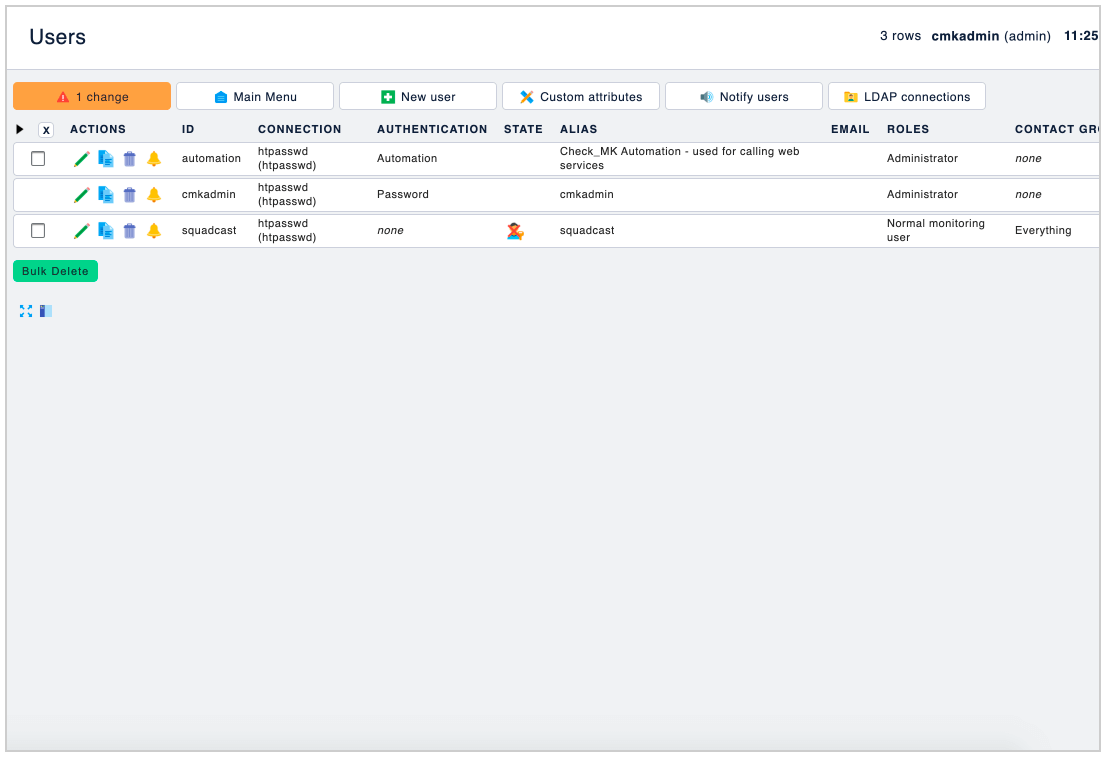
- Go back to the Users list and click Changes, then click Activate Changes.
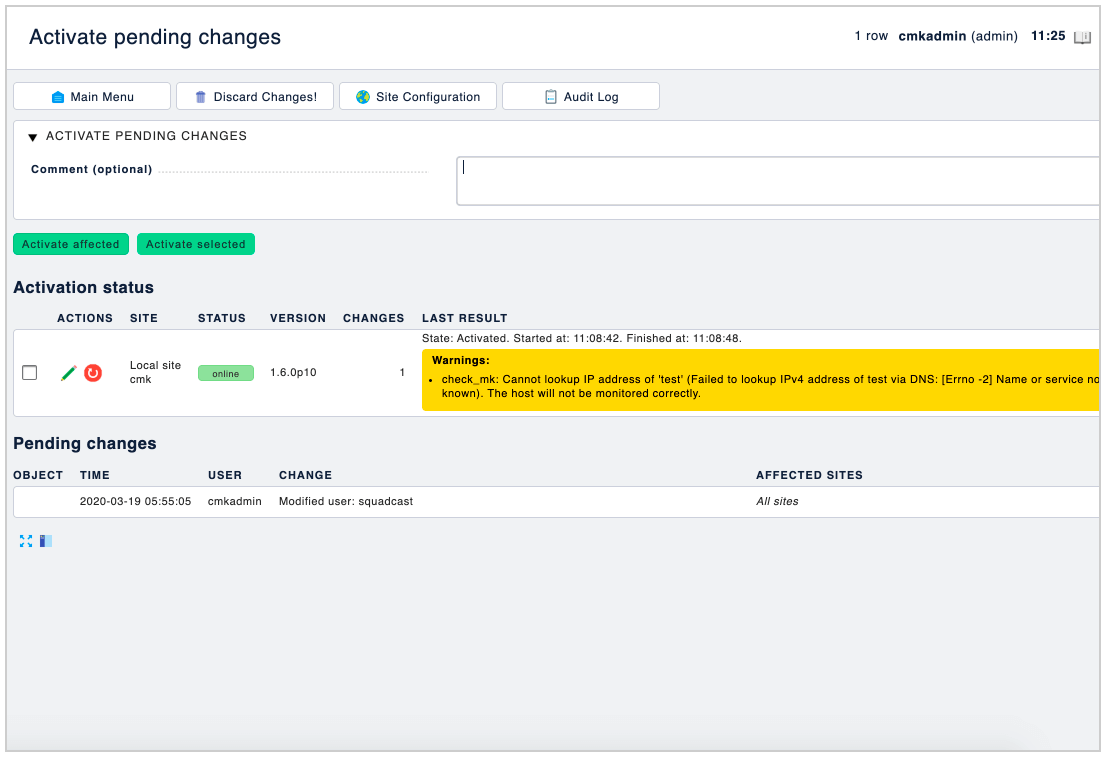
- Congratulations! When you see “Configuration successfully activated” you are done! Checkmk will now be able send alerts into Squadcast.
Testing the Checkmk Integration
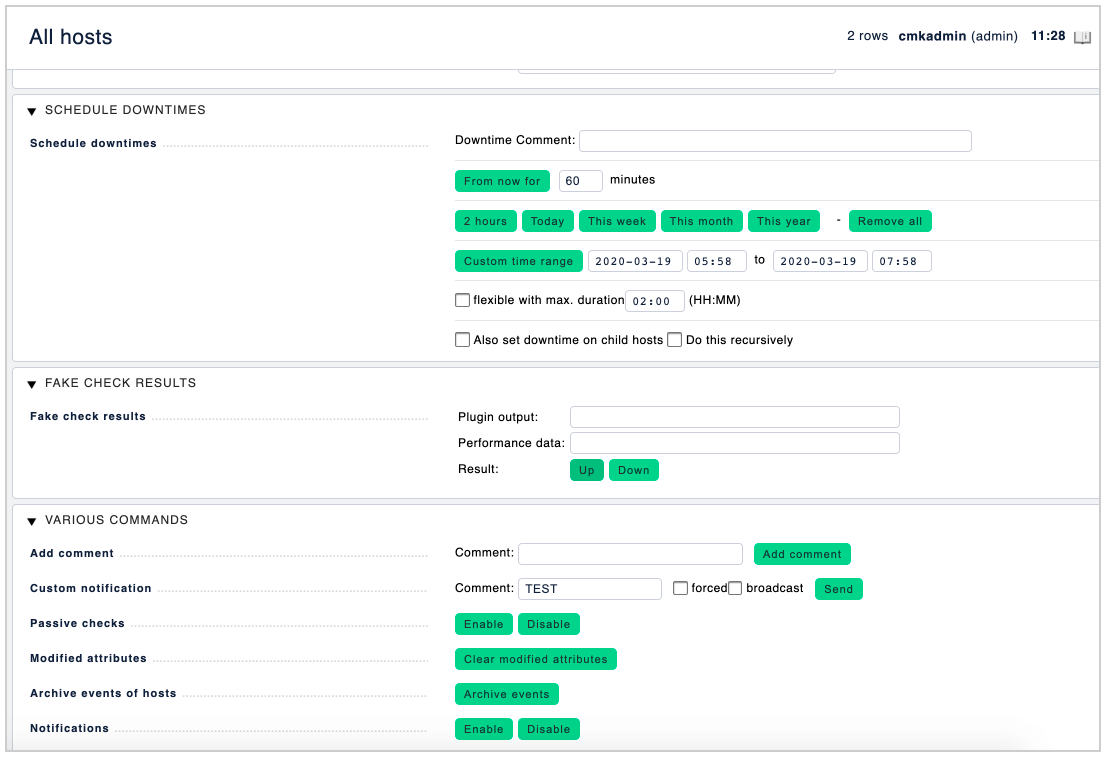
You can test the integration to make sure everything works as expected by going to a host or service in the Checkmk interface and clicking the Execute icon (hammer).
-
In the Fake check results box, click Critical (if on a service) or Down (if on a host), then click
Yes!to confirm that you want to send the fake alert. -
You should see a new incident created in Squadcast.
This integration has been tested with Checkmk version 1.6. However, this integration should work with other existing versions as well, just with slight UI differences.