AWS SSO
Users can use their AWS SSO credentials to sign in to Squadcast via Single Sign-On (SSO).
This page describes how to add Squadcast in AWS SSO Dashboard and configure SSO with SAML 2.0.
1. Only an Account owner or a User with Extension permission can enable and configure Microsoft ADFS SSO for an organisation in Squadcast.
2. Once SSO is enabled, only the Account Owner can use email-password based login by default, although it can be configured to allow Administrators to use enable email-password based login as well.
Setup Instructions
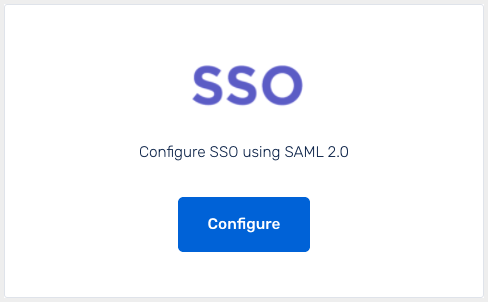
(1) Login to app.squadcast.com and navigate to the Settings > Extensions. Click the Configure button under SSO.
(2) Select the AWS from the dropdown and click Show configuration guide for Custom SAML 2.0
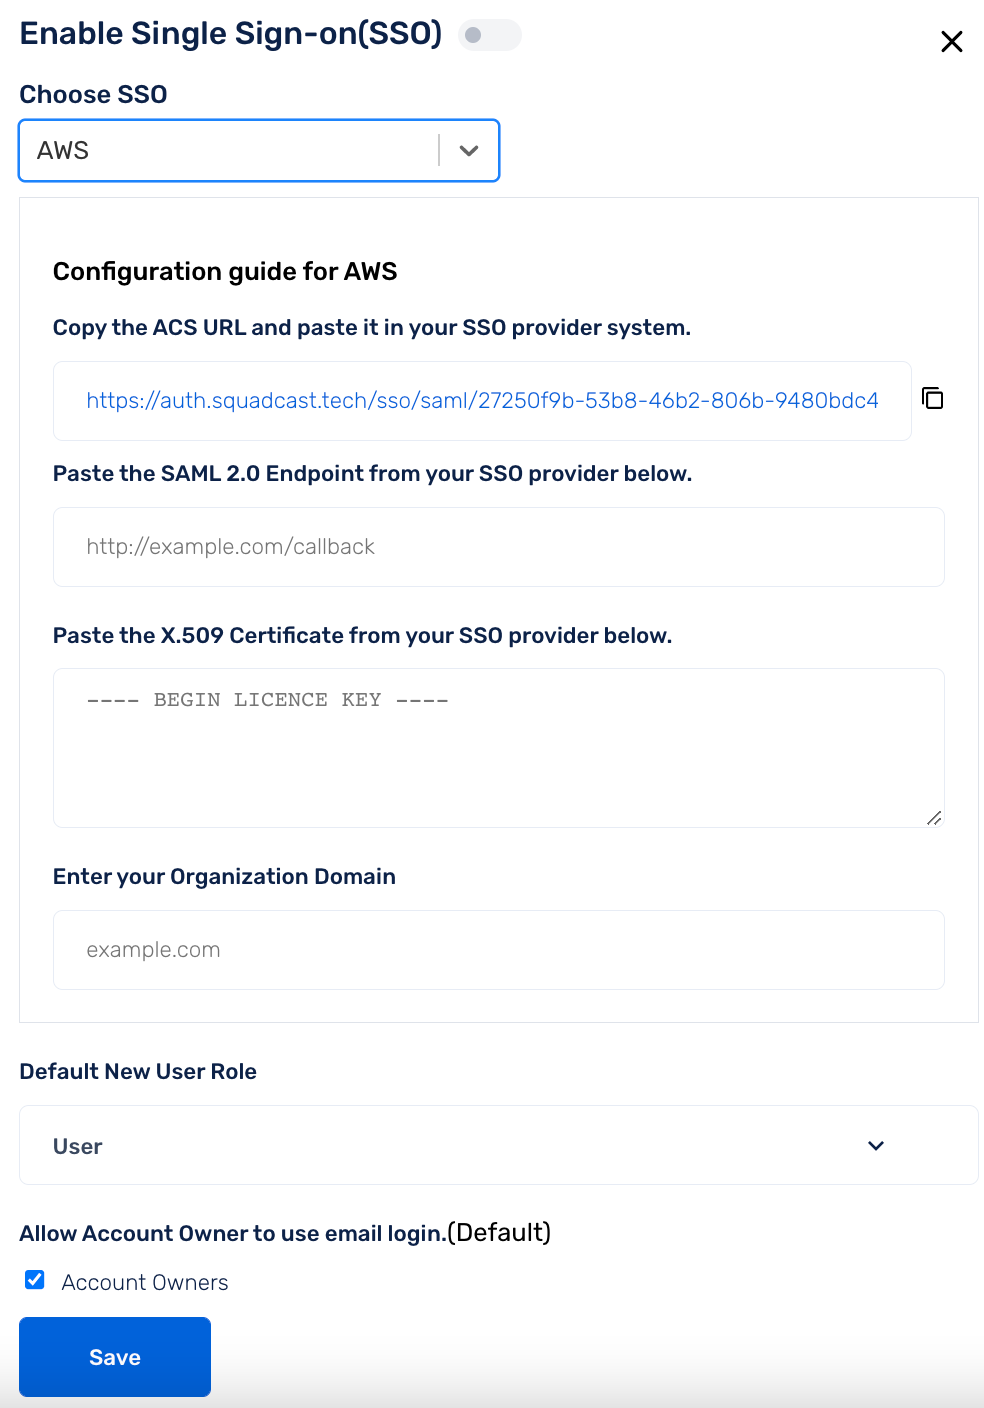
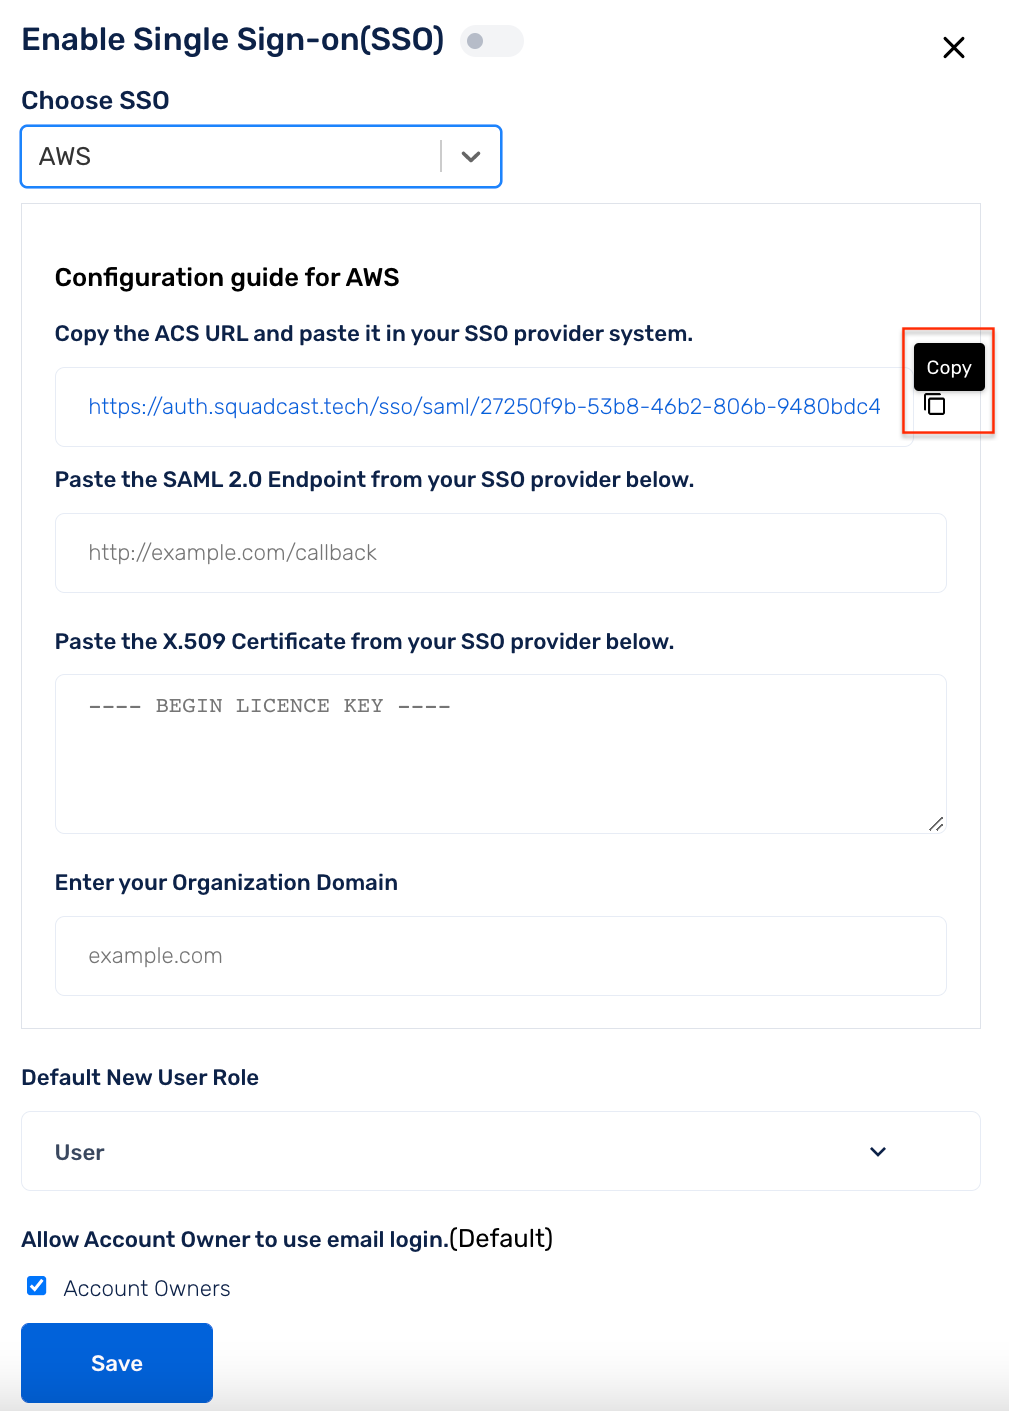
Here, copy the ACS URL to use it in your AWS SSO configuration next
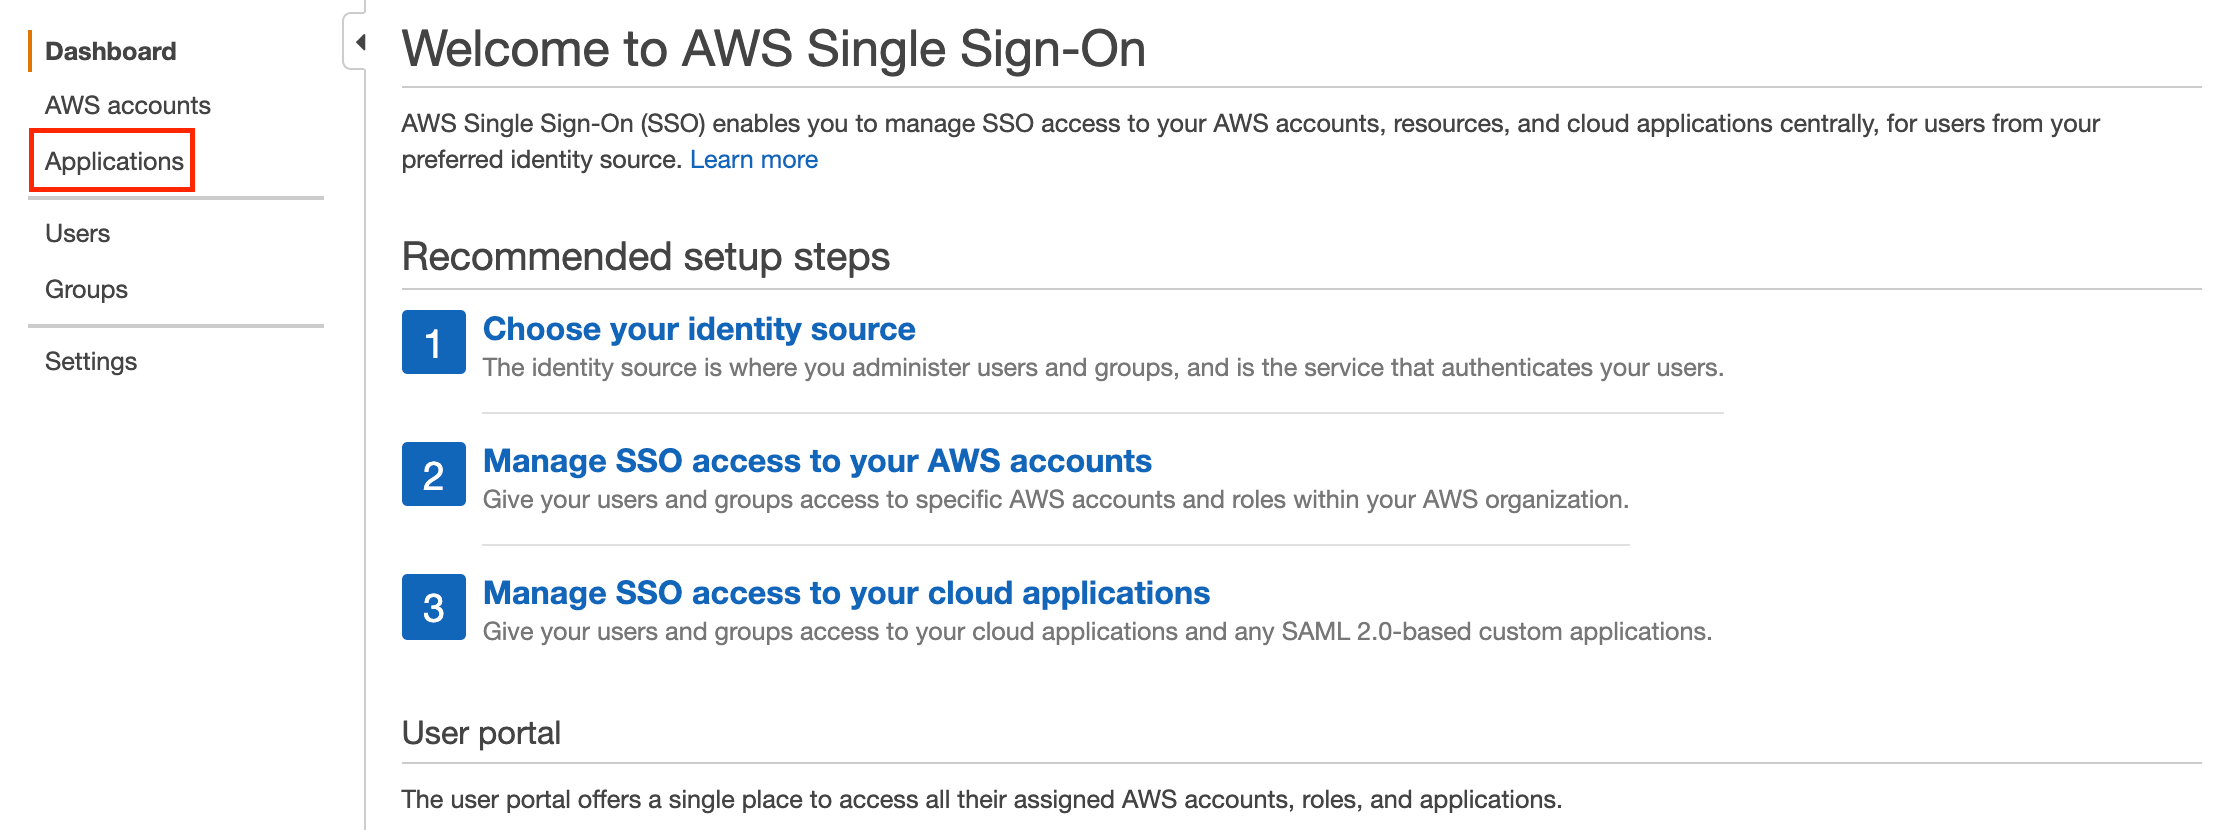
(3) In your AWS account, navigate to AWS Single Sign-On
From the sidebar, select Applications
(4) Click on Add a new application

(5) Search for Squadcast, select it and click on Add application
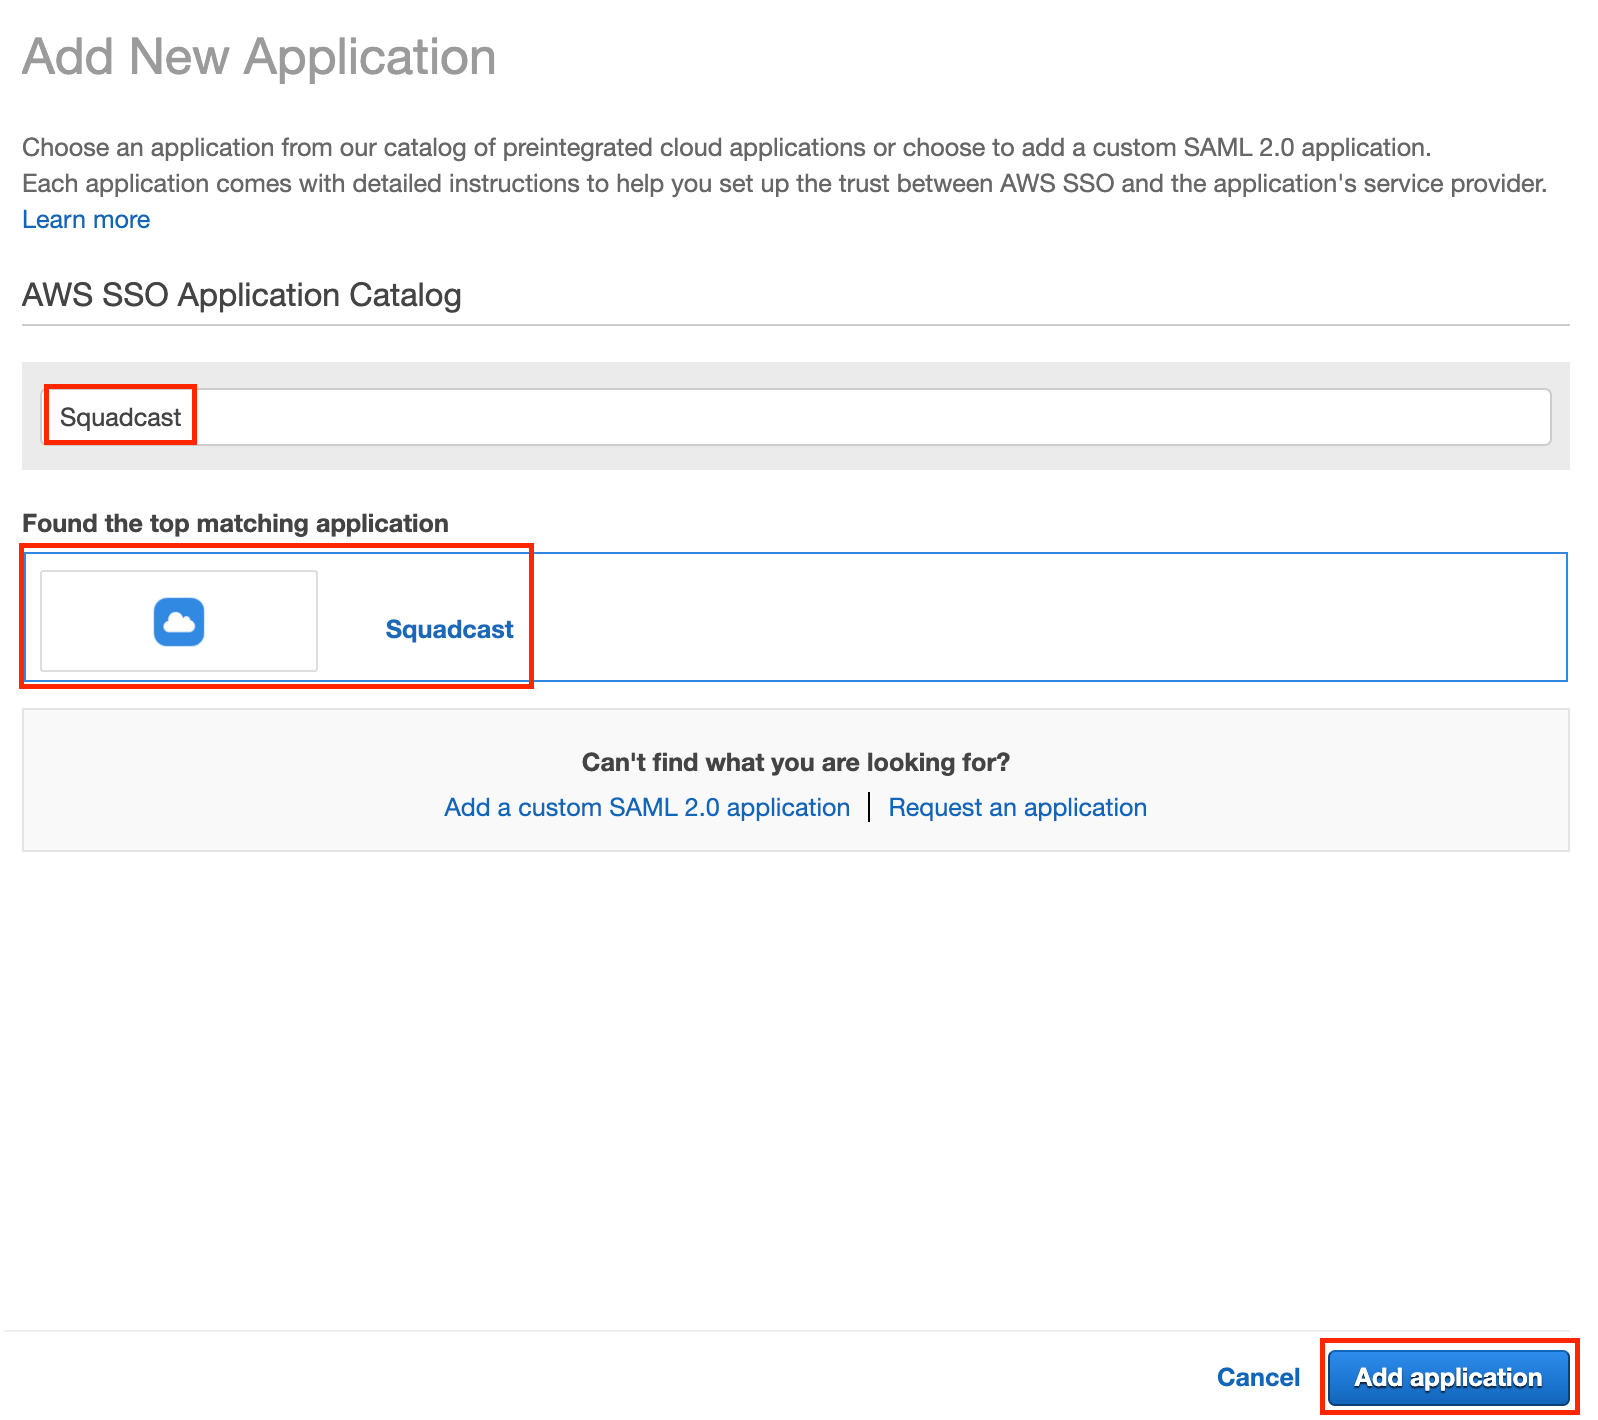
(6) Next:
- In the Application Details section, provide a suitable Name and an optional Description

- In the Application Metadata section, click on If you do not have a metadata file, you can manually type your metadata values

Here, in the placeholders for both Application ACS URL and Application SAML audience, paste the previously copied ACS URL from Squadcast

- In the AWS SSO metadata section, copy the AWS SSO sign-in URL and download the AWS SSO certificate

- Click on Save changes
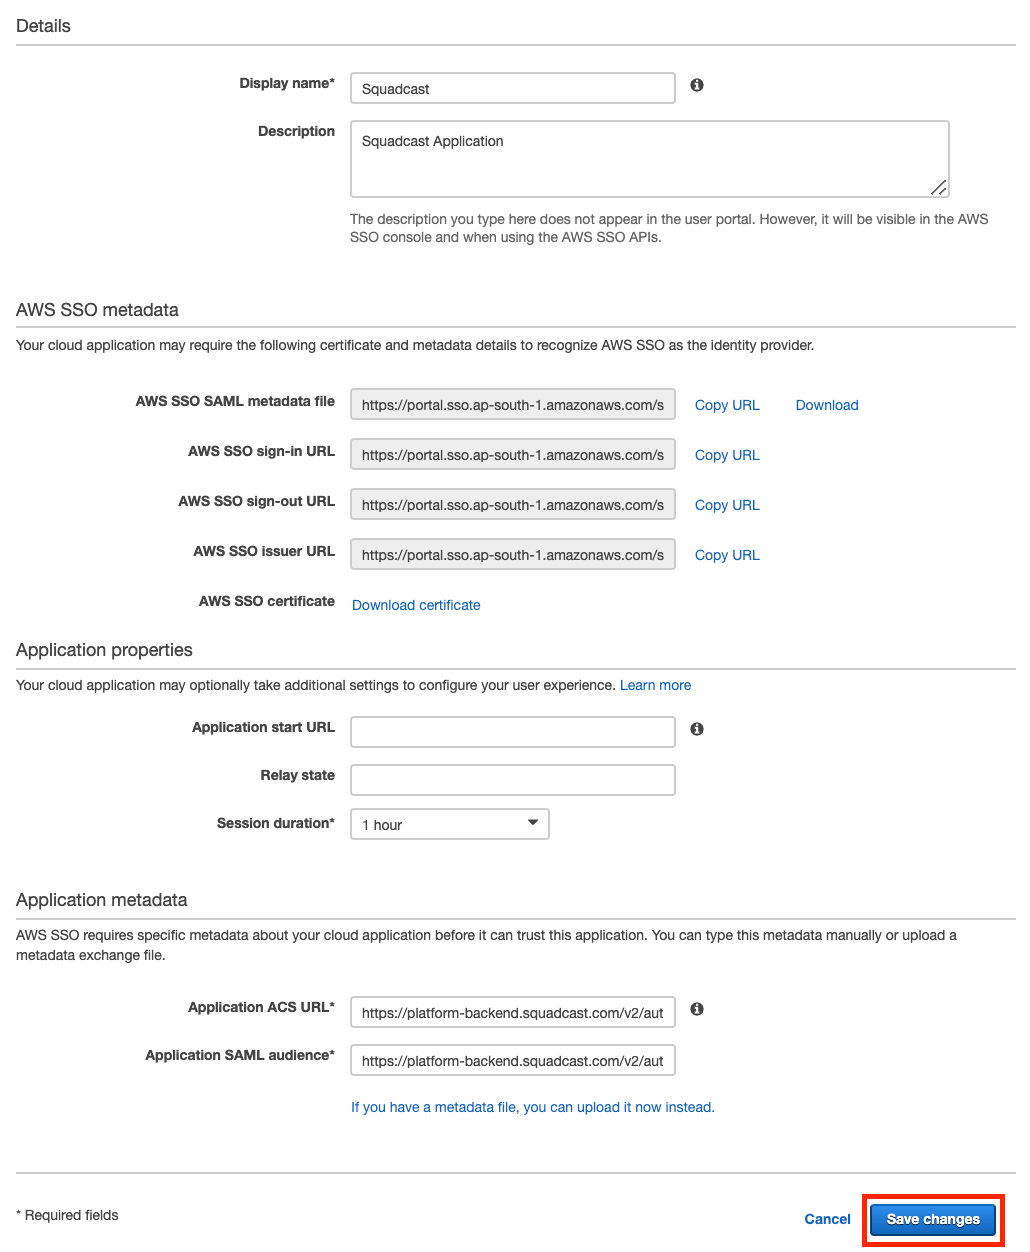
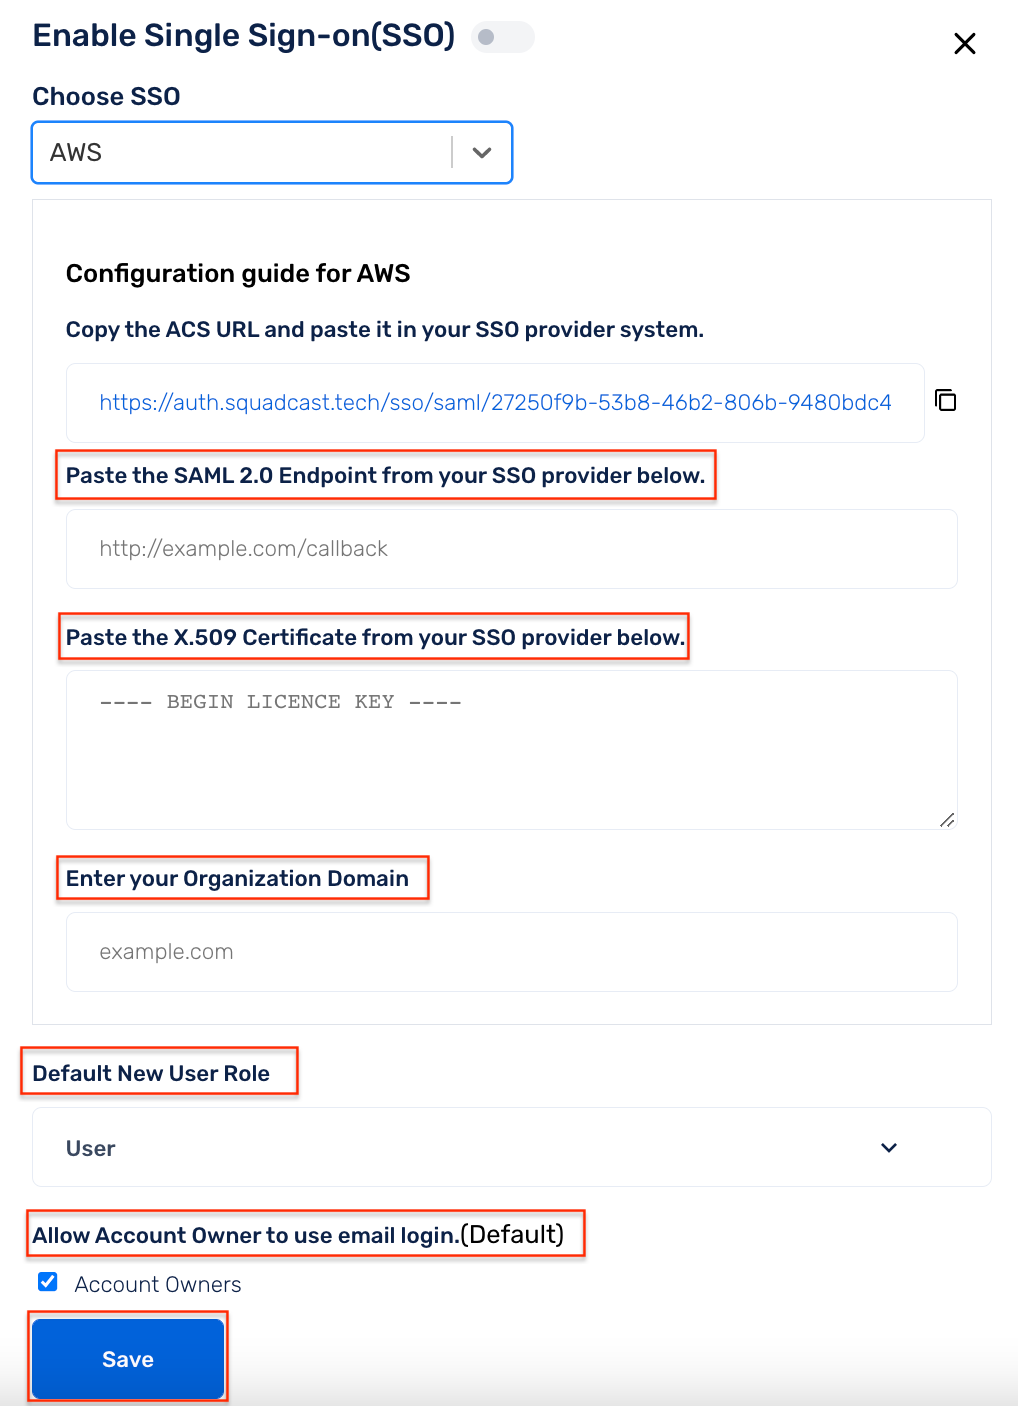
(7) Back in Squadcast, in the previously opened modal:
- Paste the copied AWS SSO sign-in URL under SAML 2.0 Endpoint
- Copy the contents of the downloaded AWS SSO certificate and paste it under X.509 Certificate
- Enter the domain name of your Organization
Note: Make sure to add the Domain Name of your Organization, for SSO login to work
-
Pick the Default New User Role that a newly provisioned user in Squadcast should be assigned as by default. This could be either
User,AdminorStakeholderNote: If required, the
User Roleattribute can be modified manually for users later on from the Users page in Squadcast - If you want the Account Owner and/or Admins to be able to login to Squadcast using email-password aside from SSO, enable the checkboxes accordingly
- Click on Save
(8) Enable the toggle to activate the SSO integration
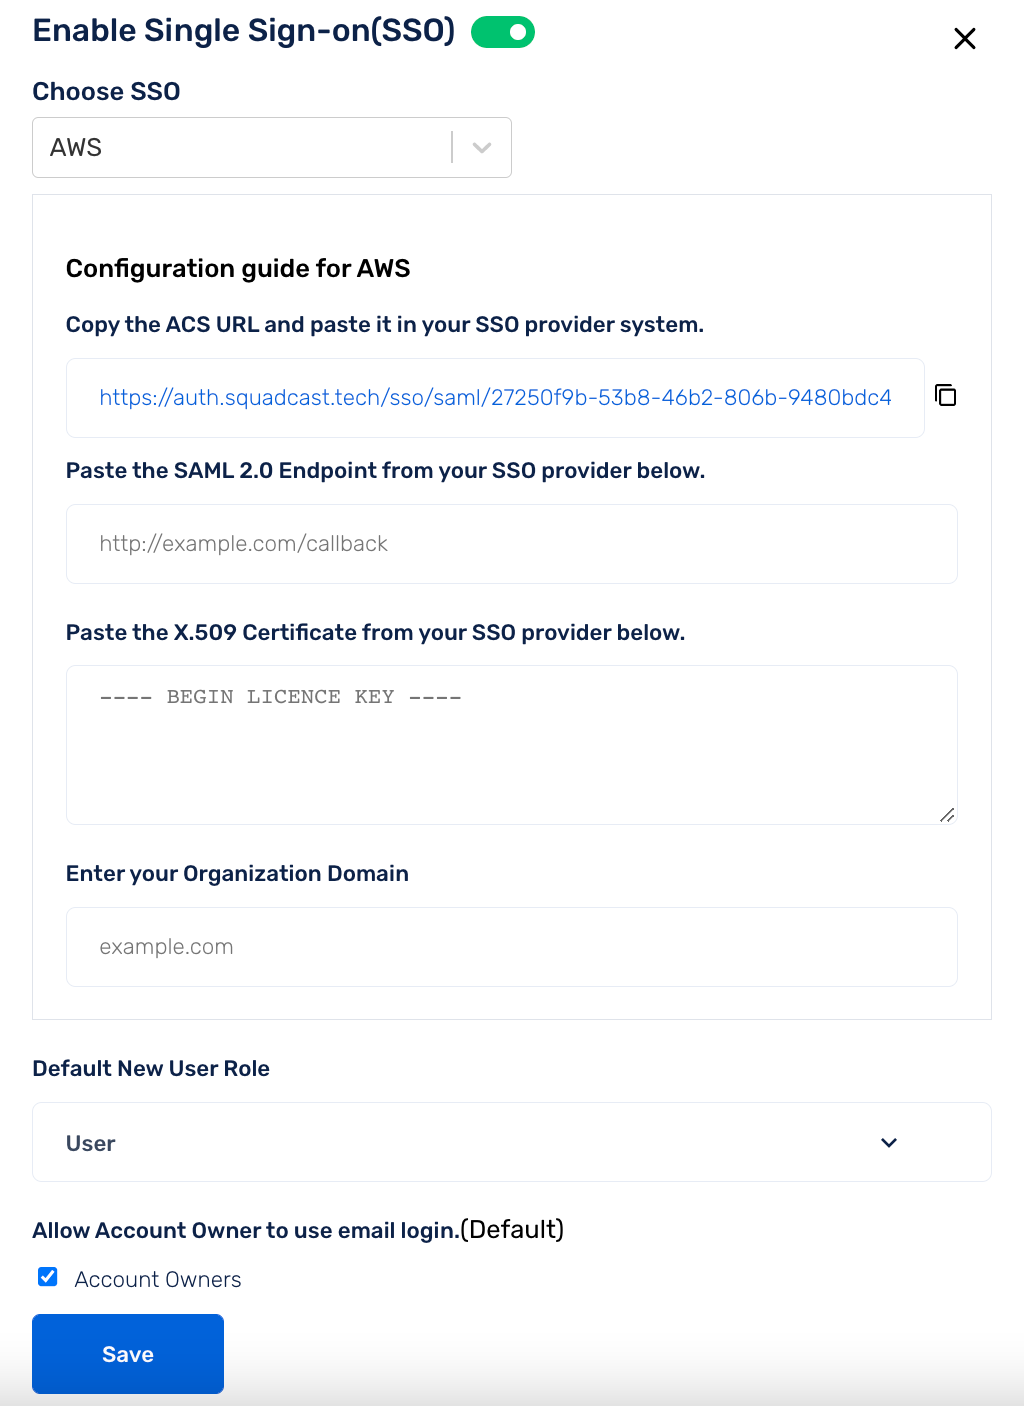
(9) Finally, in AWS SSO:
- In the Applications page, click on Squadcast

-
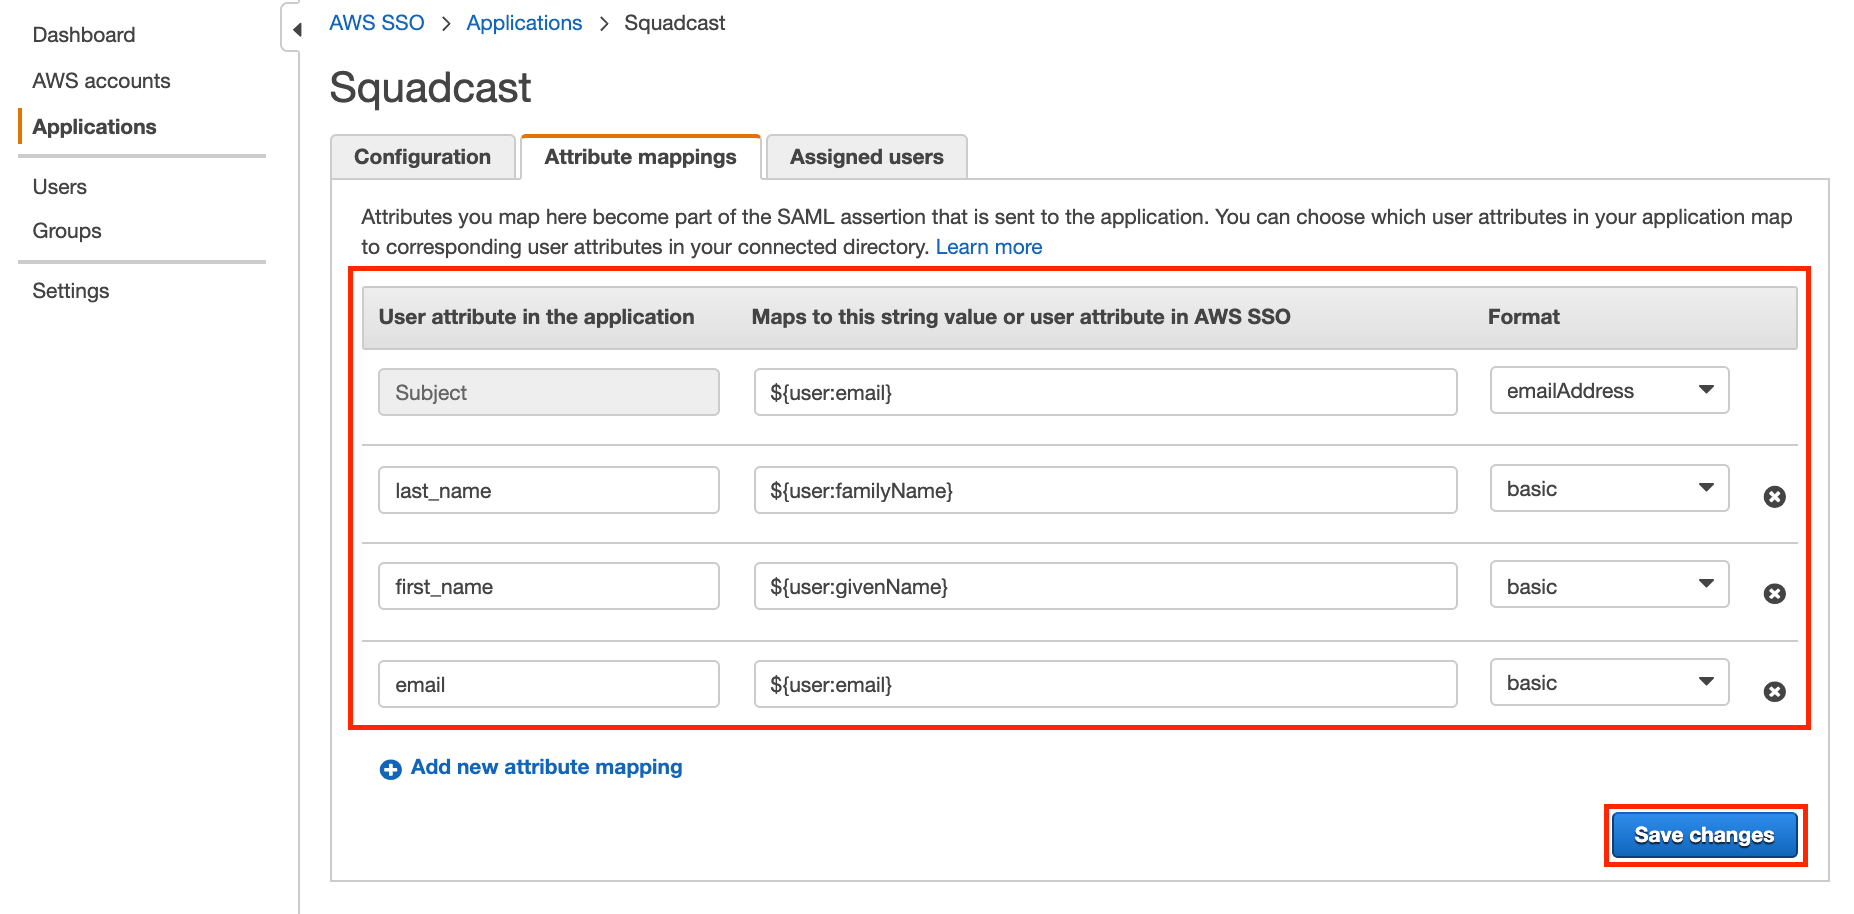
Switch to Attribute mappings tab and create mappings as shown in the screenshot below and click on Save changes
If you can send a custom key,
rolefrom here, with one of these valuesAdmin,UserorStakeholder, the new user will be added with these roles instead of the defaultUser Roleconfigured in Squadcast
- Switch to Assigned users and add your users in here

Note:
For members trying to login to Squadcast through AWS SSO and are not already added as users of Squadcast, will be added to Squadcast by default with User Role: User.
Note:
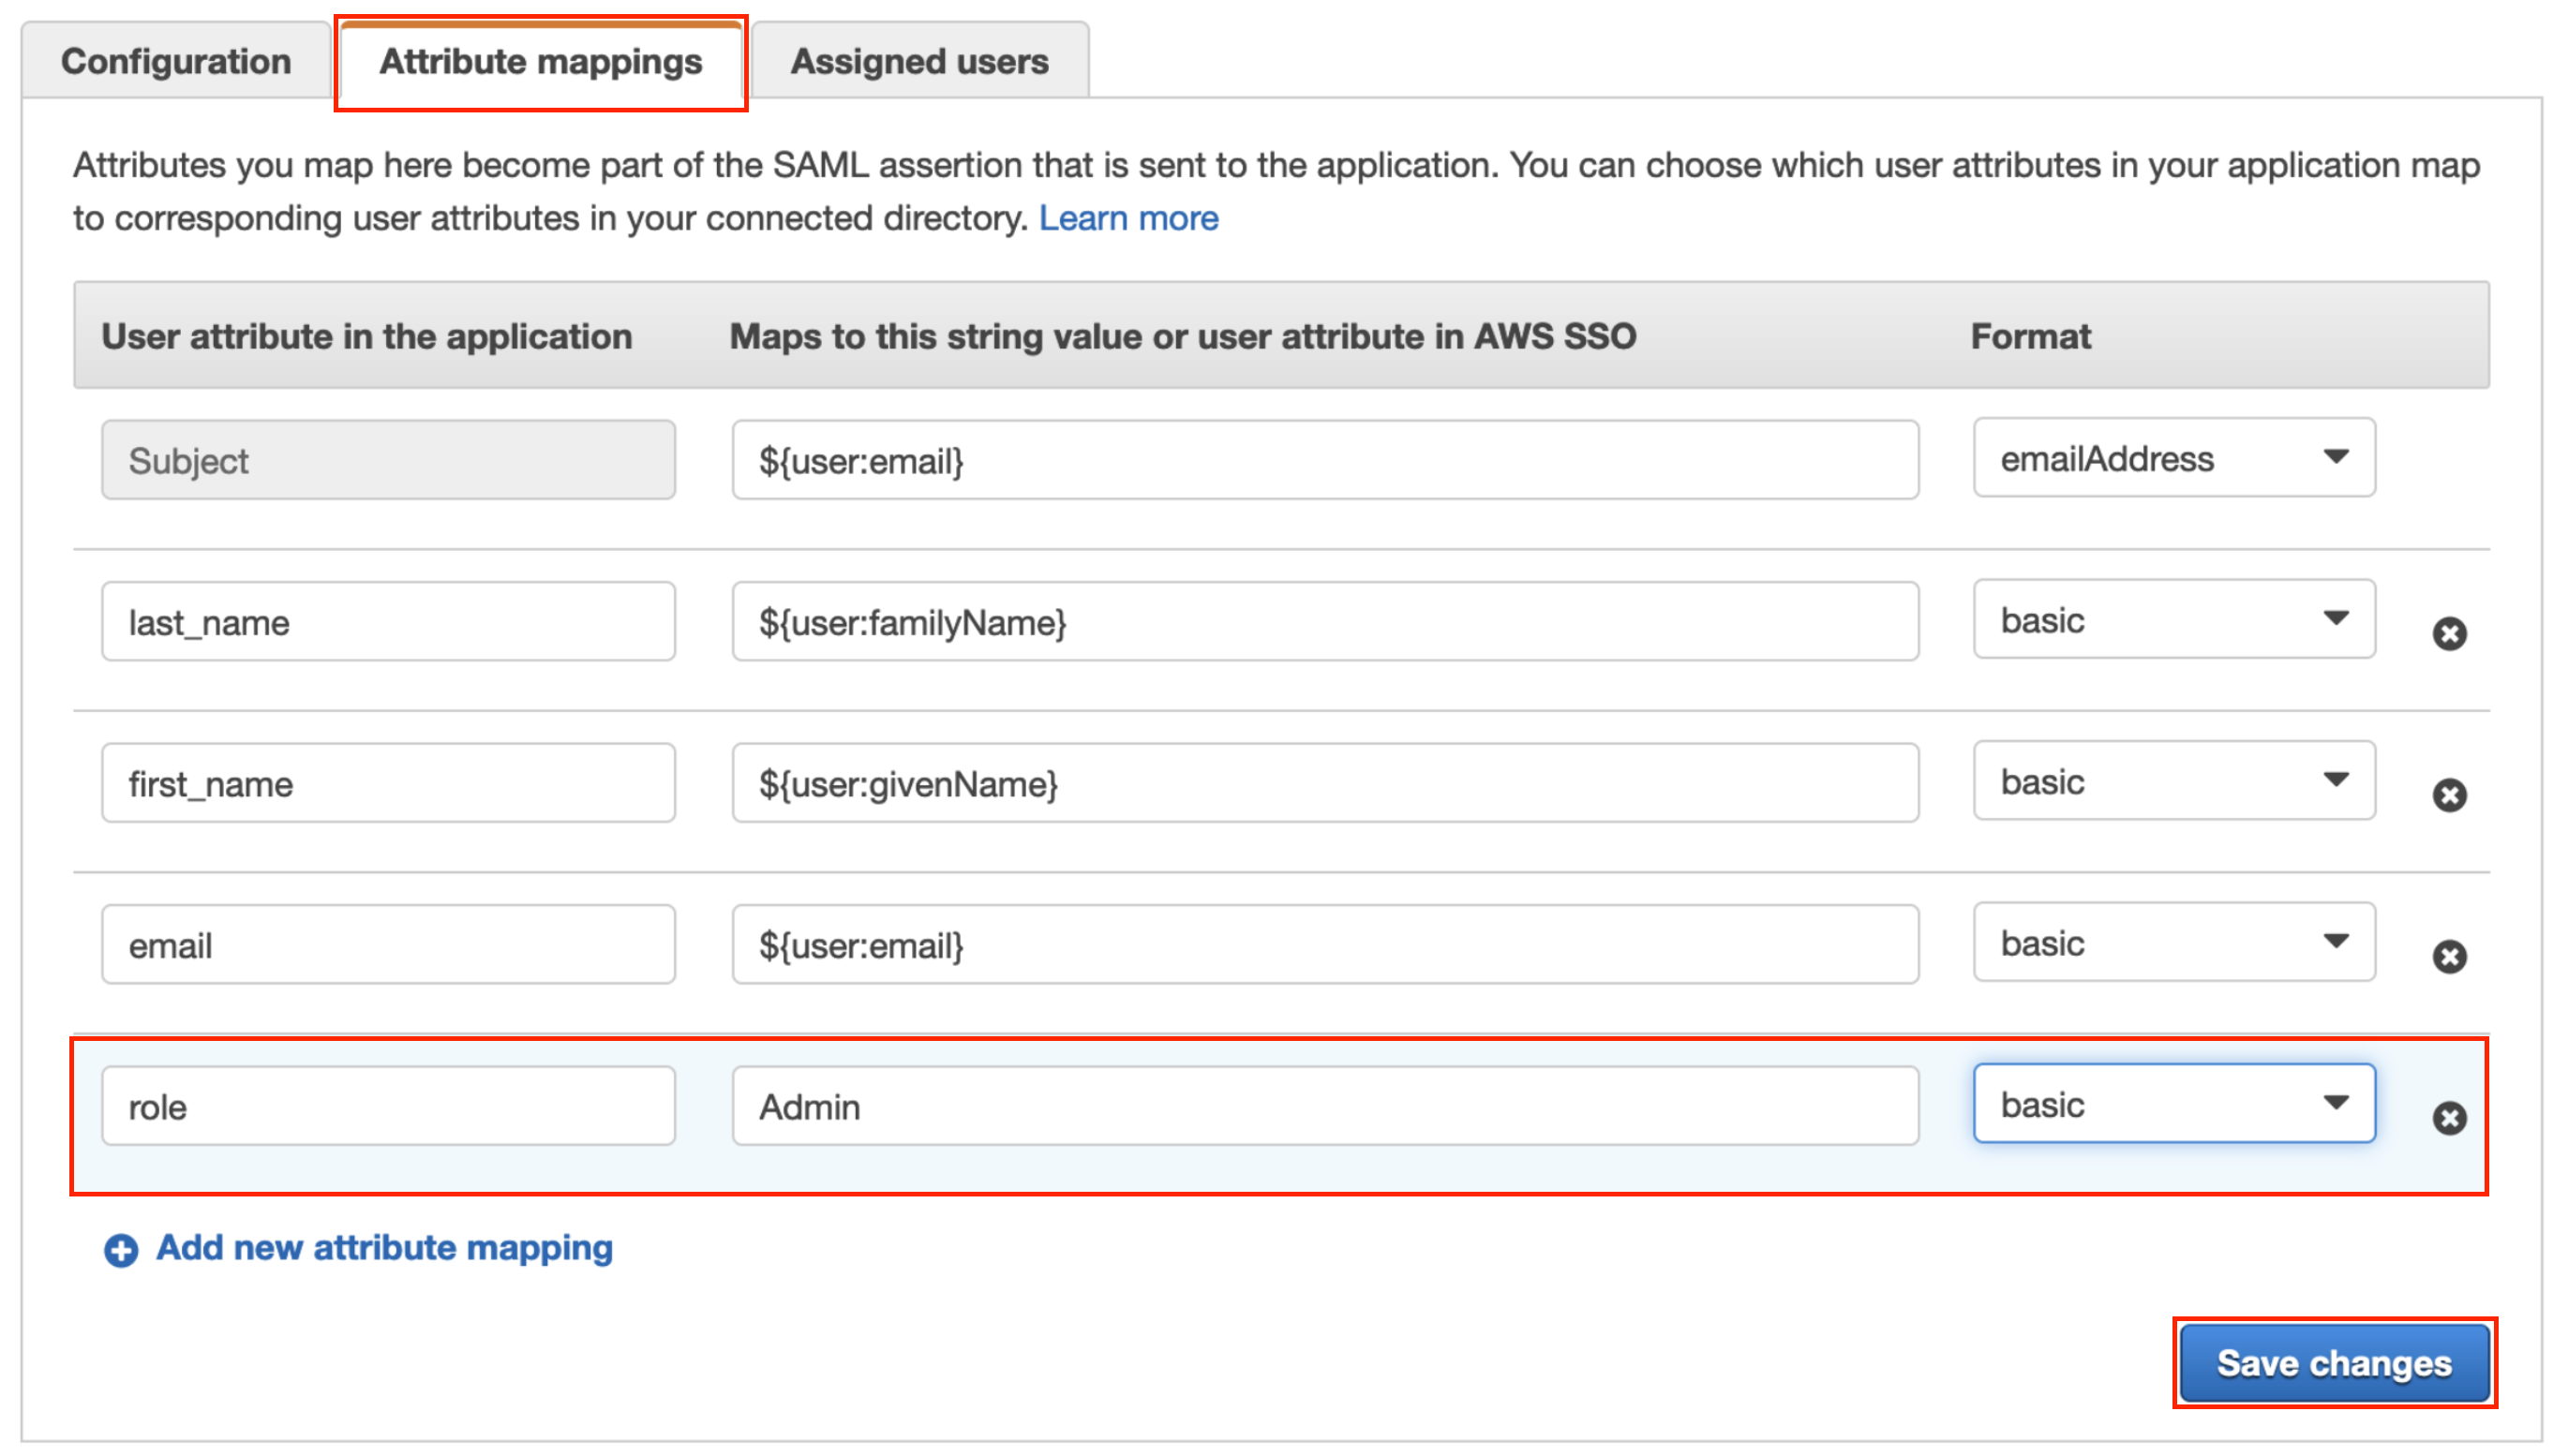
By default, all new users added to Squadcast via AWS SSO will be added with User Role : User anyway. You can add an Attribute Mapping to provision all new users as Admins or Stakeholders, if you wish to do that. In addition the previous Attribute Mappings, you can add User Role as an Attribute Mapping in here, in the same manner and Save changes.
- User attribute in the application : role
- Maps to this string value or user attribute in AWS SSO : either
AdminorStakeholder - Format : basic
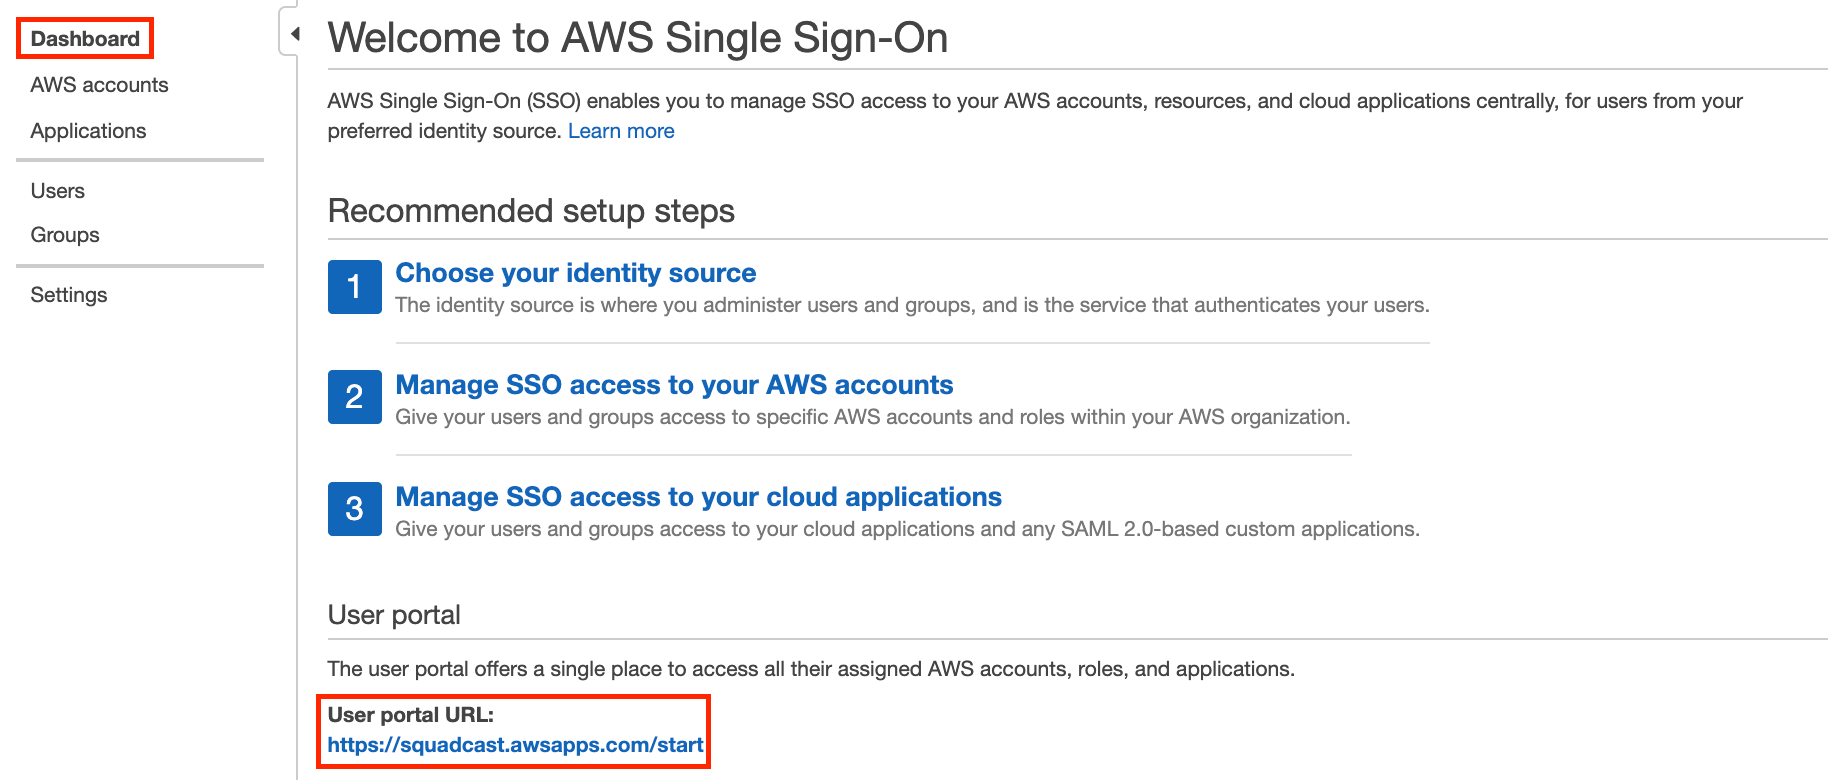
(10) From the sidebar, now navigate to Dashboard. Here, you will be able to see your User portal URL that you can use to login to Squadcast
That is it, your AWS SSO configuration with Squadcast is now complete!