Icinga2
Follow the steps below to configure a service so as to push related alert data from Icinga2 into Squadcast.
Squadcast will then process this information to create incidents for this service as per your preferences.
Using Icinga2 as an Alert Source
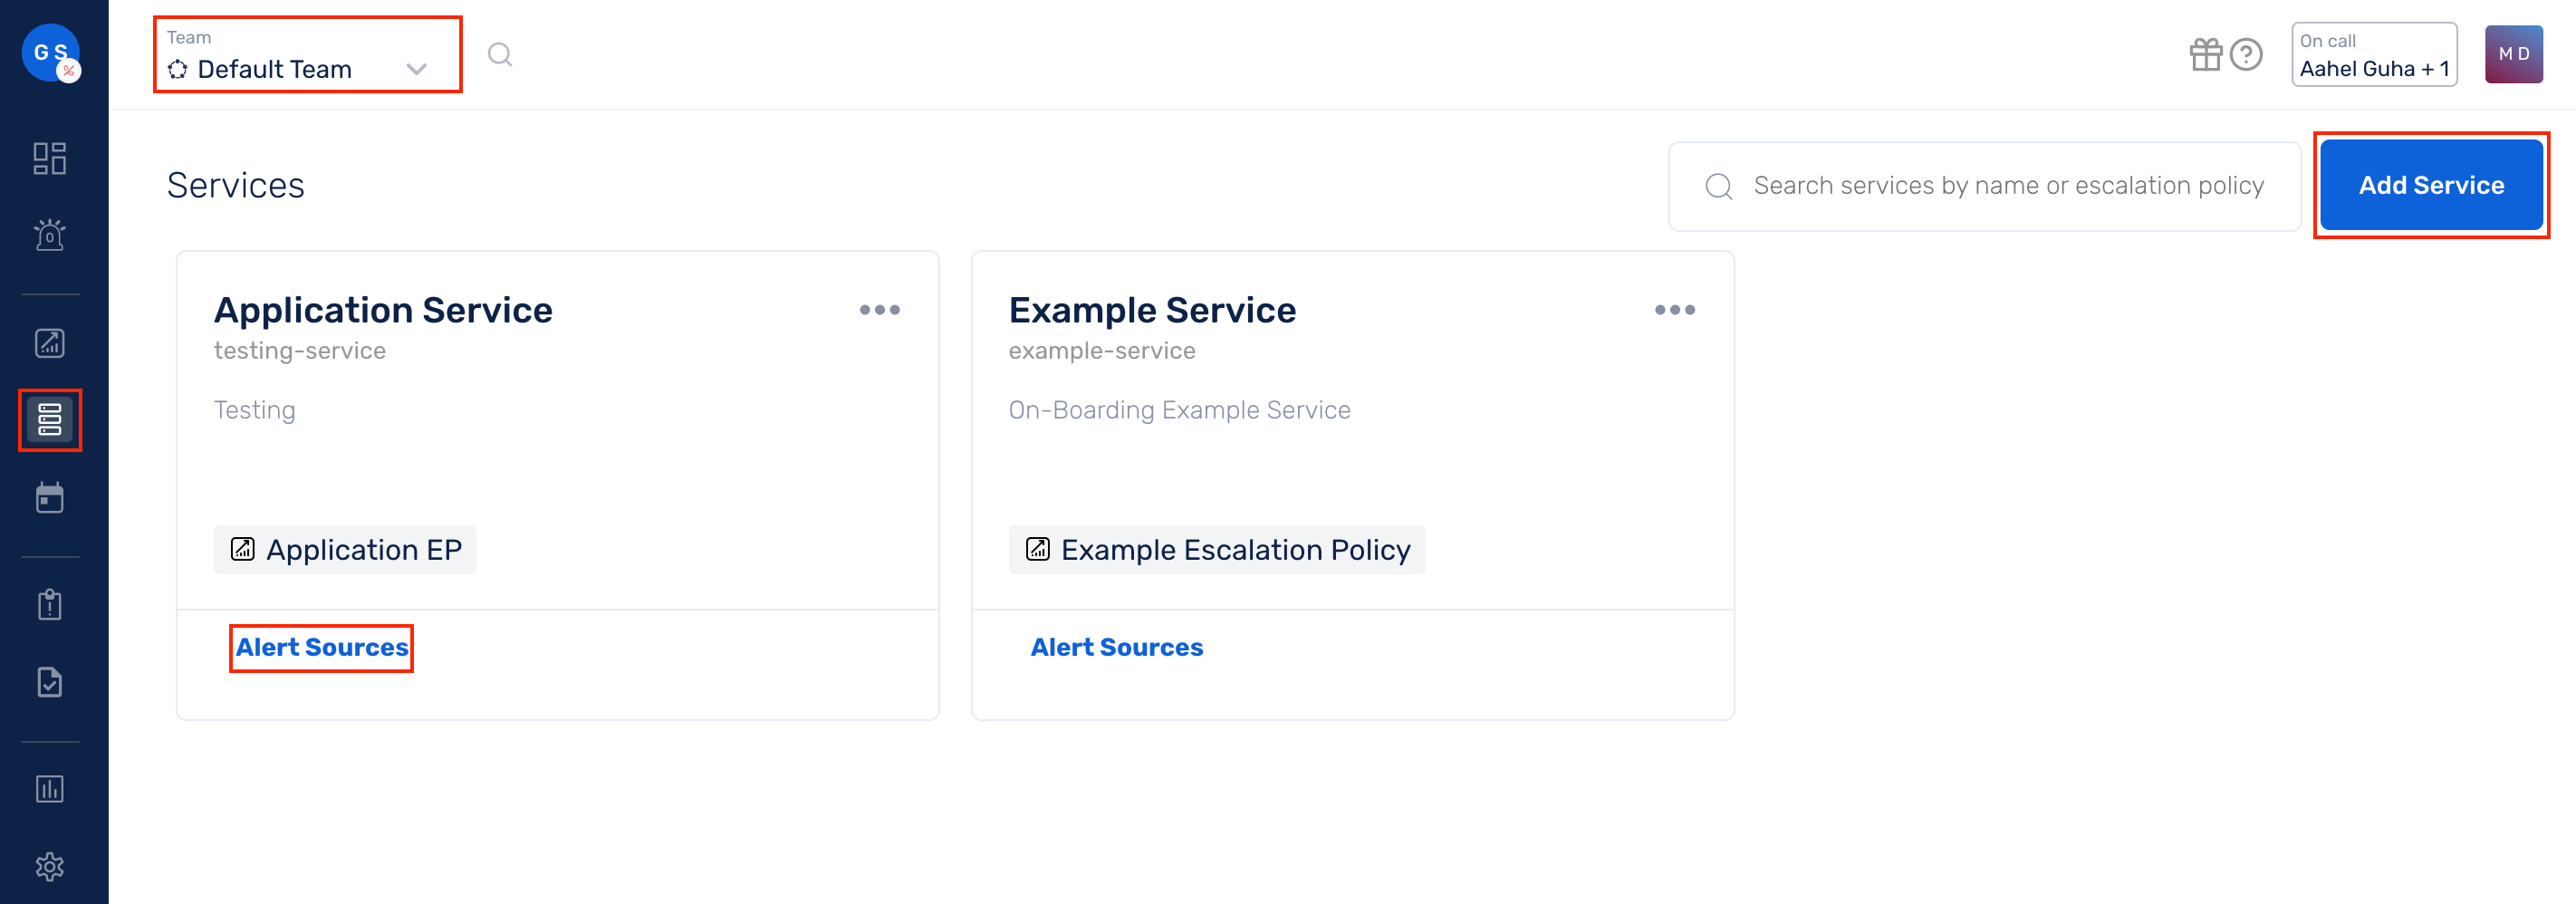
(1) From the navigation bar on the left, select Services. Pick the applicable Team from the Team-picker on the top. Next, click on Alert Sources for the applicable Service

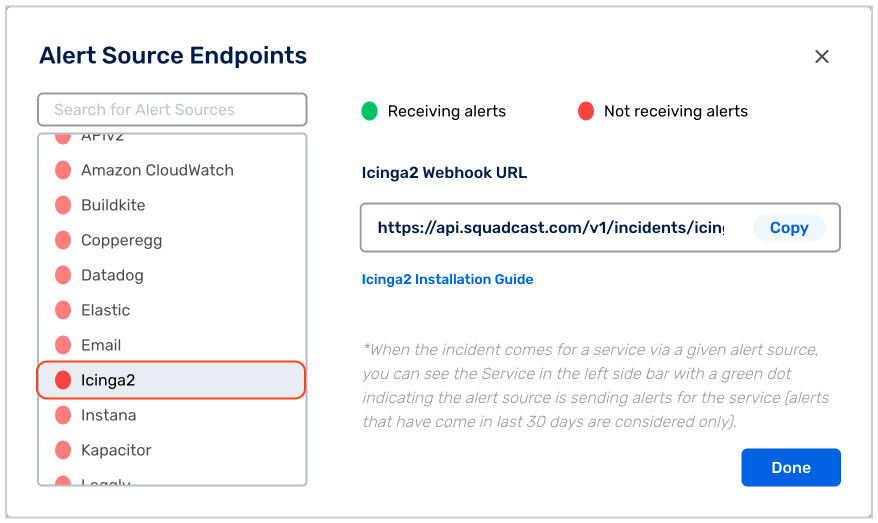
(2) Search for Icinga2 from the Alert Source drop-down and copy the Webhook URL

For an Alert Source to turn active (indicated by a green dot - Receiving alerts against the name of the Alert Source in the drop-down), you can either generate a test alert or wait for a real-time alert to be generated by the Alert Source.
An Alert Source is active if there is a recorded incident via that Alert Source for the Service in the last 30 days.
Create a Squadcast Webhook in Icinga2
(3) In the machine where Icinga2 is installed, go to /etc/icinga2/conf.d/ directory and download squadcast-icinga2.conf from github.
You can also run the command below to get to the directory and download the squadcast-icinga2.conf configuration file.
cd /etc/icinga2/conf.d/
wget https://raw.githubusercontent.com/SquadcastHub/squadcast-icinga2-integration/master/squadcast-icinga2.conf
(4) Open the file with your text editor of choice and replace <SQUADCAST_ICINGA2_WEBHOOK_URL> with the Icinga2 Webhook URL that you copied in step 2.
(5) Copy and paste the line below to the configuration files of all the hosts and services for which the alerts will have to be sent to Squadcast.
vars.enable_squadcast = true
You can manually add this line to all the Hosts and Services for which you want the notifications to get into Squadcast, but, the easiest way to do this is to add it to templates that are used by all of your configuration objects.
For instance, on Debian-based systems, the default configuration has host objects that use the generic-host template and service objects that use the generic-service template. The templates are defined in /etc/icinga2/conf.d/templates.conf and can be modified as follows:
template Host "generic-host" {
 max_check_attempts = 5
 check_interval = 1m
 retry_interval = 30s

 check_command = "hostalive"

 vars.enable_squadcast = true # Add this line
}


template Service "generic-service" {
 max_check_attempts = 3
 check_interval = 1m
 retry_interval = 30s

 vars.enable_squadcast = true # Add this line
}
(6) If you have added enable_squadcast to the template in step 5, ensure that the template is used by your host and service objects. For instance, if you added it to the generic-host or generic-service templates, your objects should have one of the following lines:
import "generic-host" # All host objects should have this line in them
import "generic-service" # All service objects should have this line in them
(7) Go to /etc/icinga2/scripts/ directory and download sq-icinga2.py
cd /etc/icinga2/scripts/
wget https://raw.githubusercontent.com/SquadcastHub/squadcast-icinga2-integration/master/sq-icinga2.py
The above script require Python 3 to be installed on your Icinga2 server.
The script have been tested to work with Python 3.7
(8) Make the scripts executable by running the command below:
chmod +x sq-icinga2.py
(9) Restart Icinga2 server. You can also use the command below to do so.
/etc/init.d/icinga2 restart
The Restart Command might differ depending on the Icinga2 version and the host operating system used.
Please refer to the documentation of your specific deployment.
Your Icinga2 Alert Source integration is good to go. Whenever an alert is triggered in Icinga2, an incident will be triggered in Squadcast as well.
Squadcast will Auto-Resolve the incident, if the alert gets resolved in Icinga2 and doesn’t require any manual intervention from the user.