Checkly
This document will help you integrate Checkly with Squadcast.
Checkly is an API monitoring and synthetic monitoring solution aimed at development and operations teams, giving teams a broad, deep and exact control over how APIs and web apps should be monitored. Route detailed monitoring alerts from Checkly to the right users in Squadcast.
How to integrate Checkly with Squadcast
In Squadcast: Using Checkly as an Alert Source
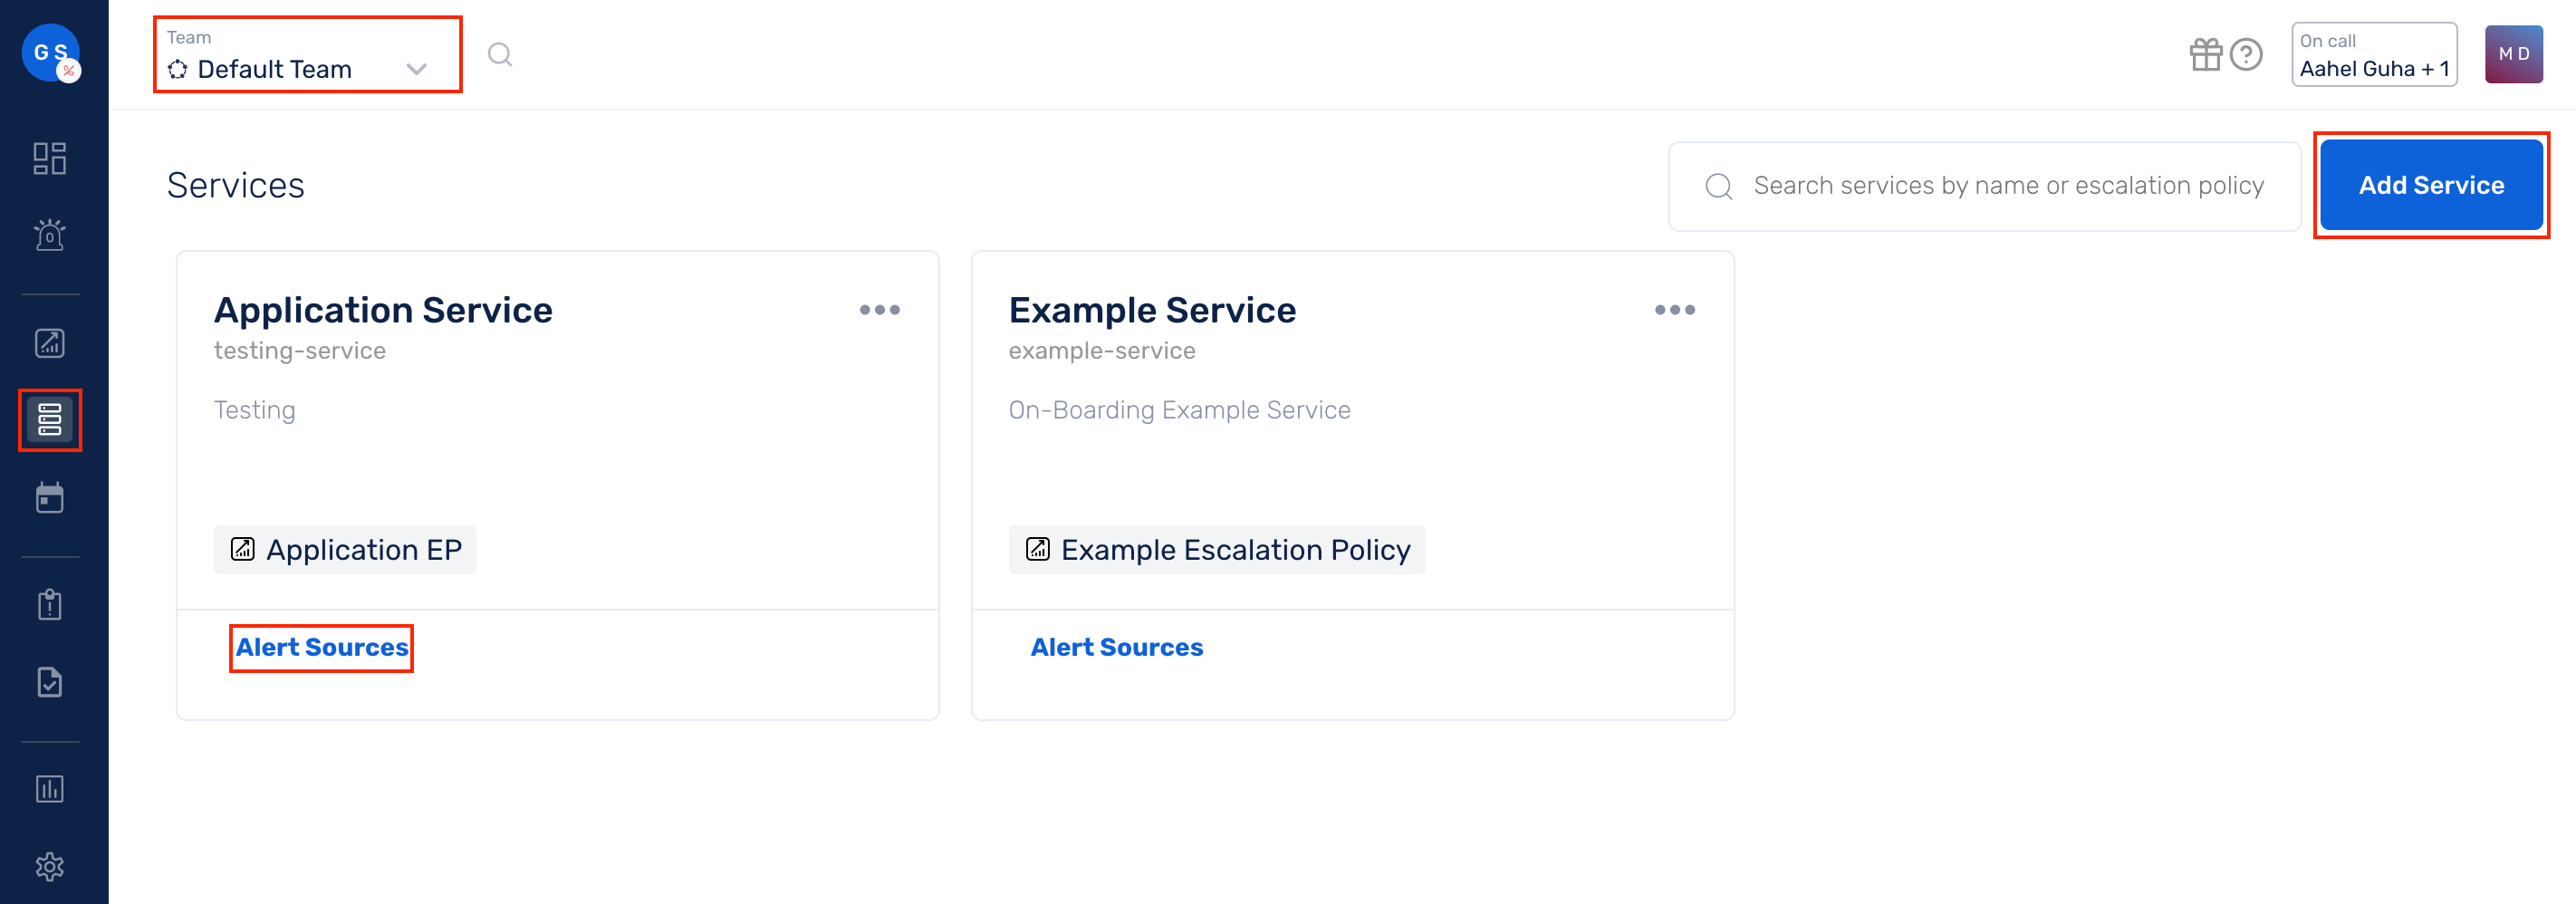
(1) From the navigation bar on the left, select Services. Pick the applicable Team from the Team-picker on the top. Next, click on Alert Sources for the applicable Service

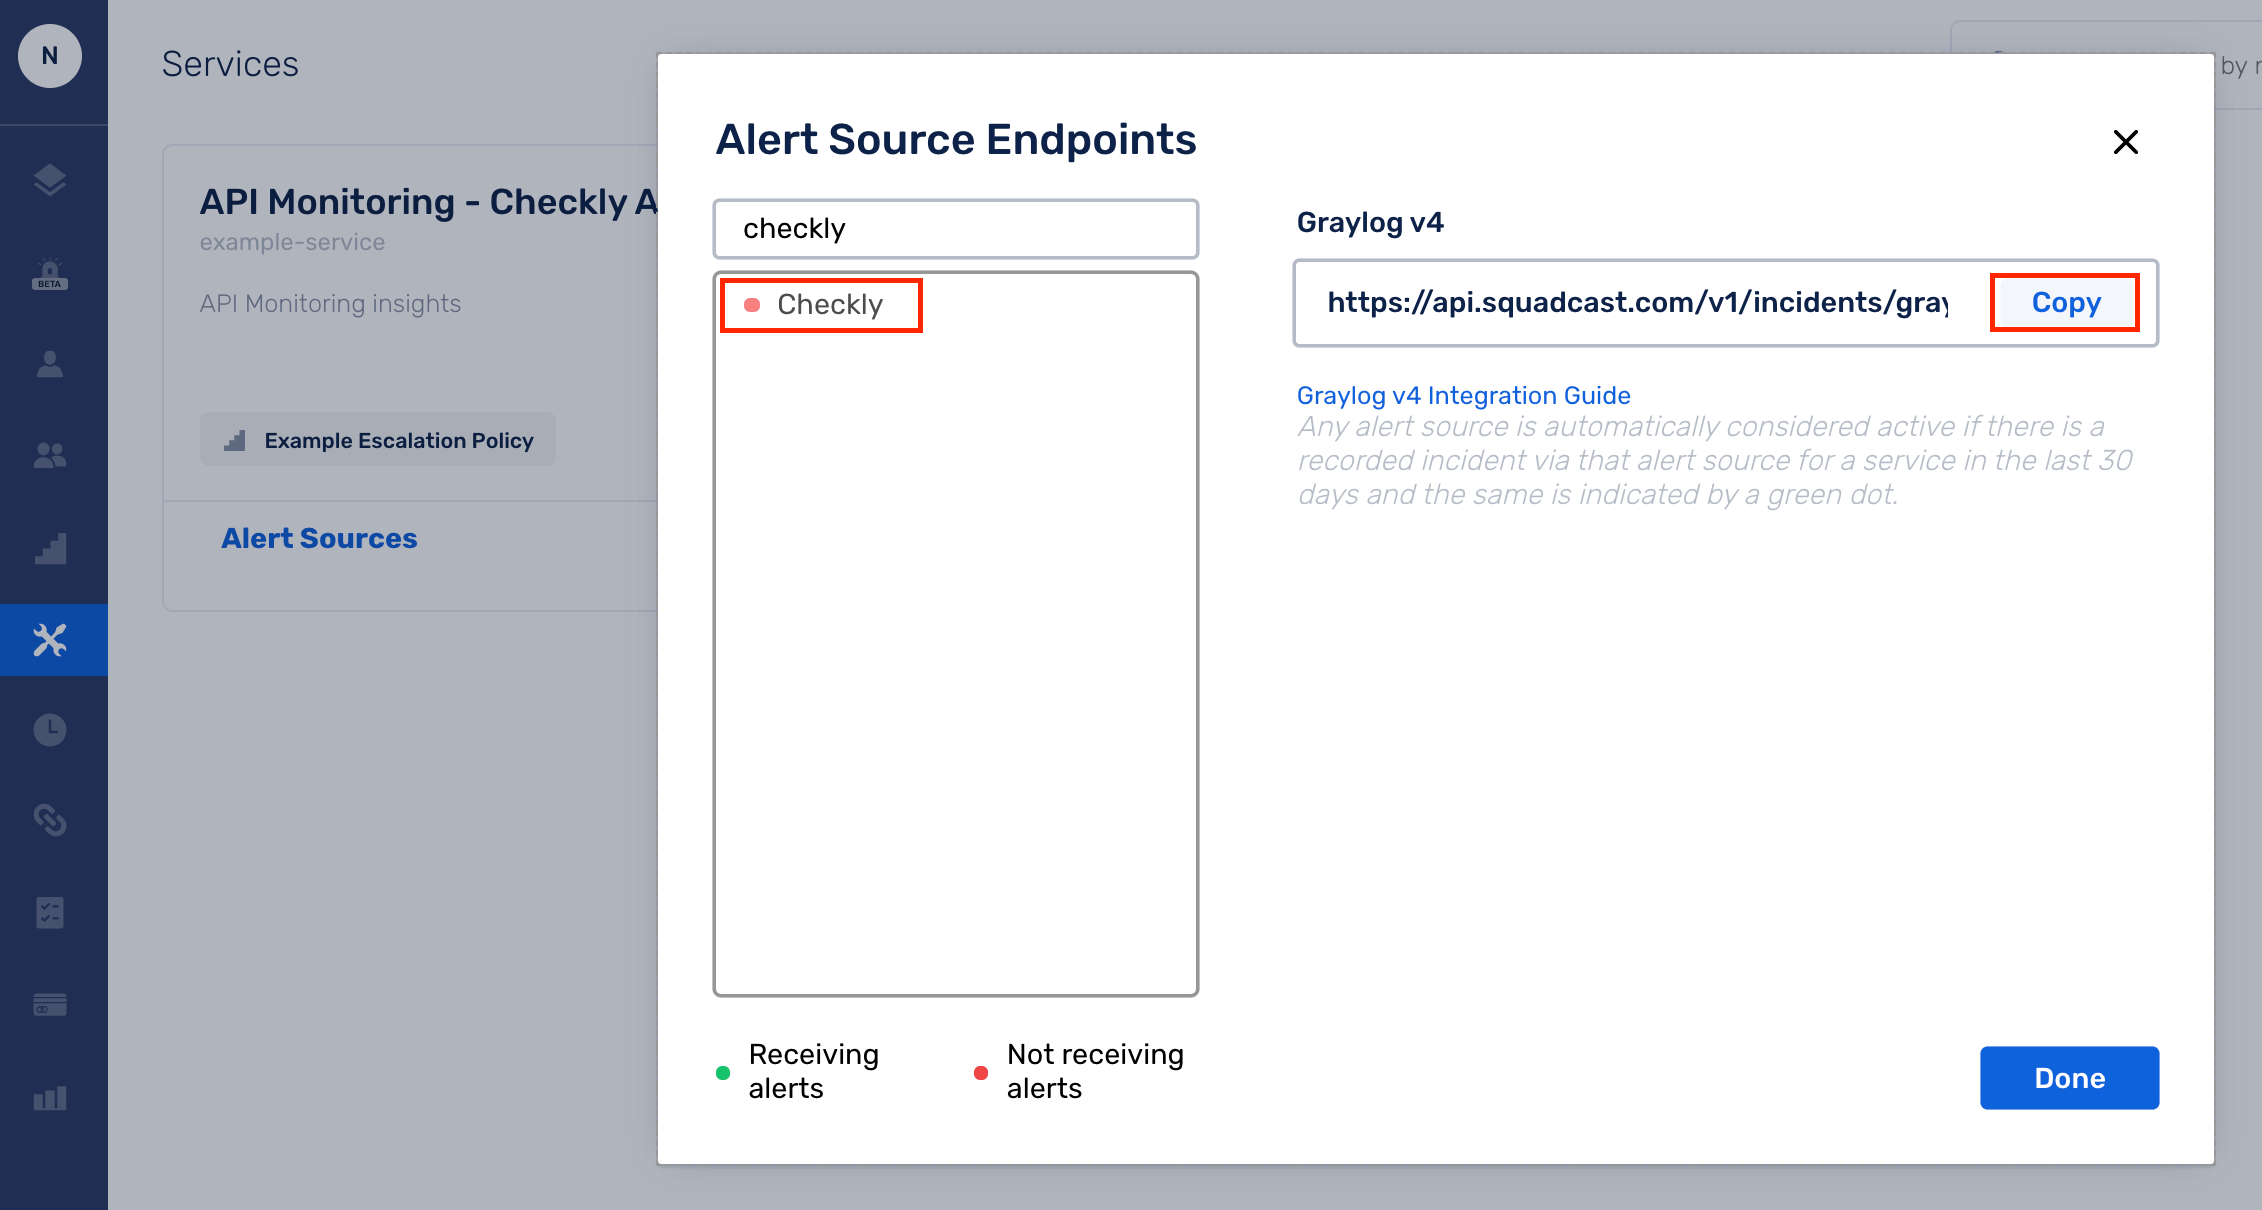
(2) Search for Checkly from the Alert Source drop-down and copy the Webhook URL

For an Alert Source to turn active (indicated by a green dot - Receiving alerts against the name of the Alert Source in the drop-down), you can either generate a test alert or wait for a real-time alert to be generated by the Alert Source.
An Alert Source is active if there is a recorded incident via that Alert Source for the Service in the last 30 days.
In Checkly: Create a Squadcast Webhook
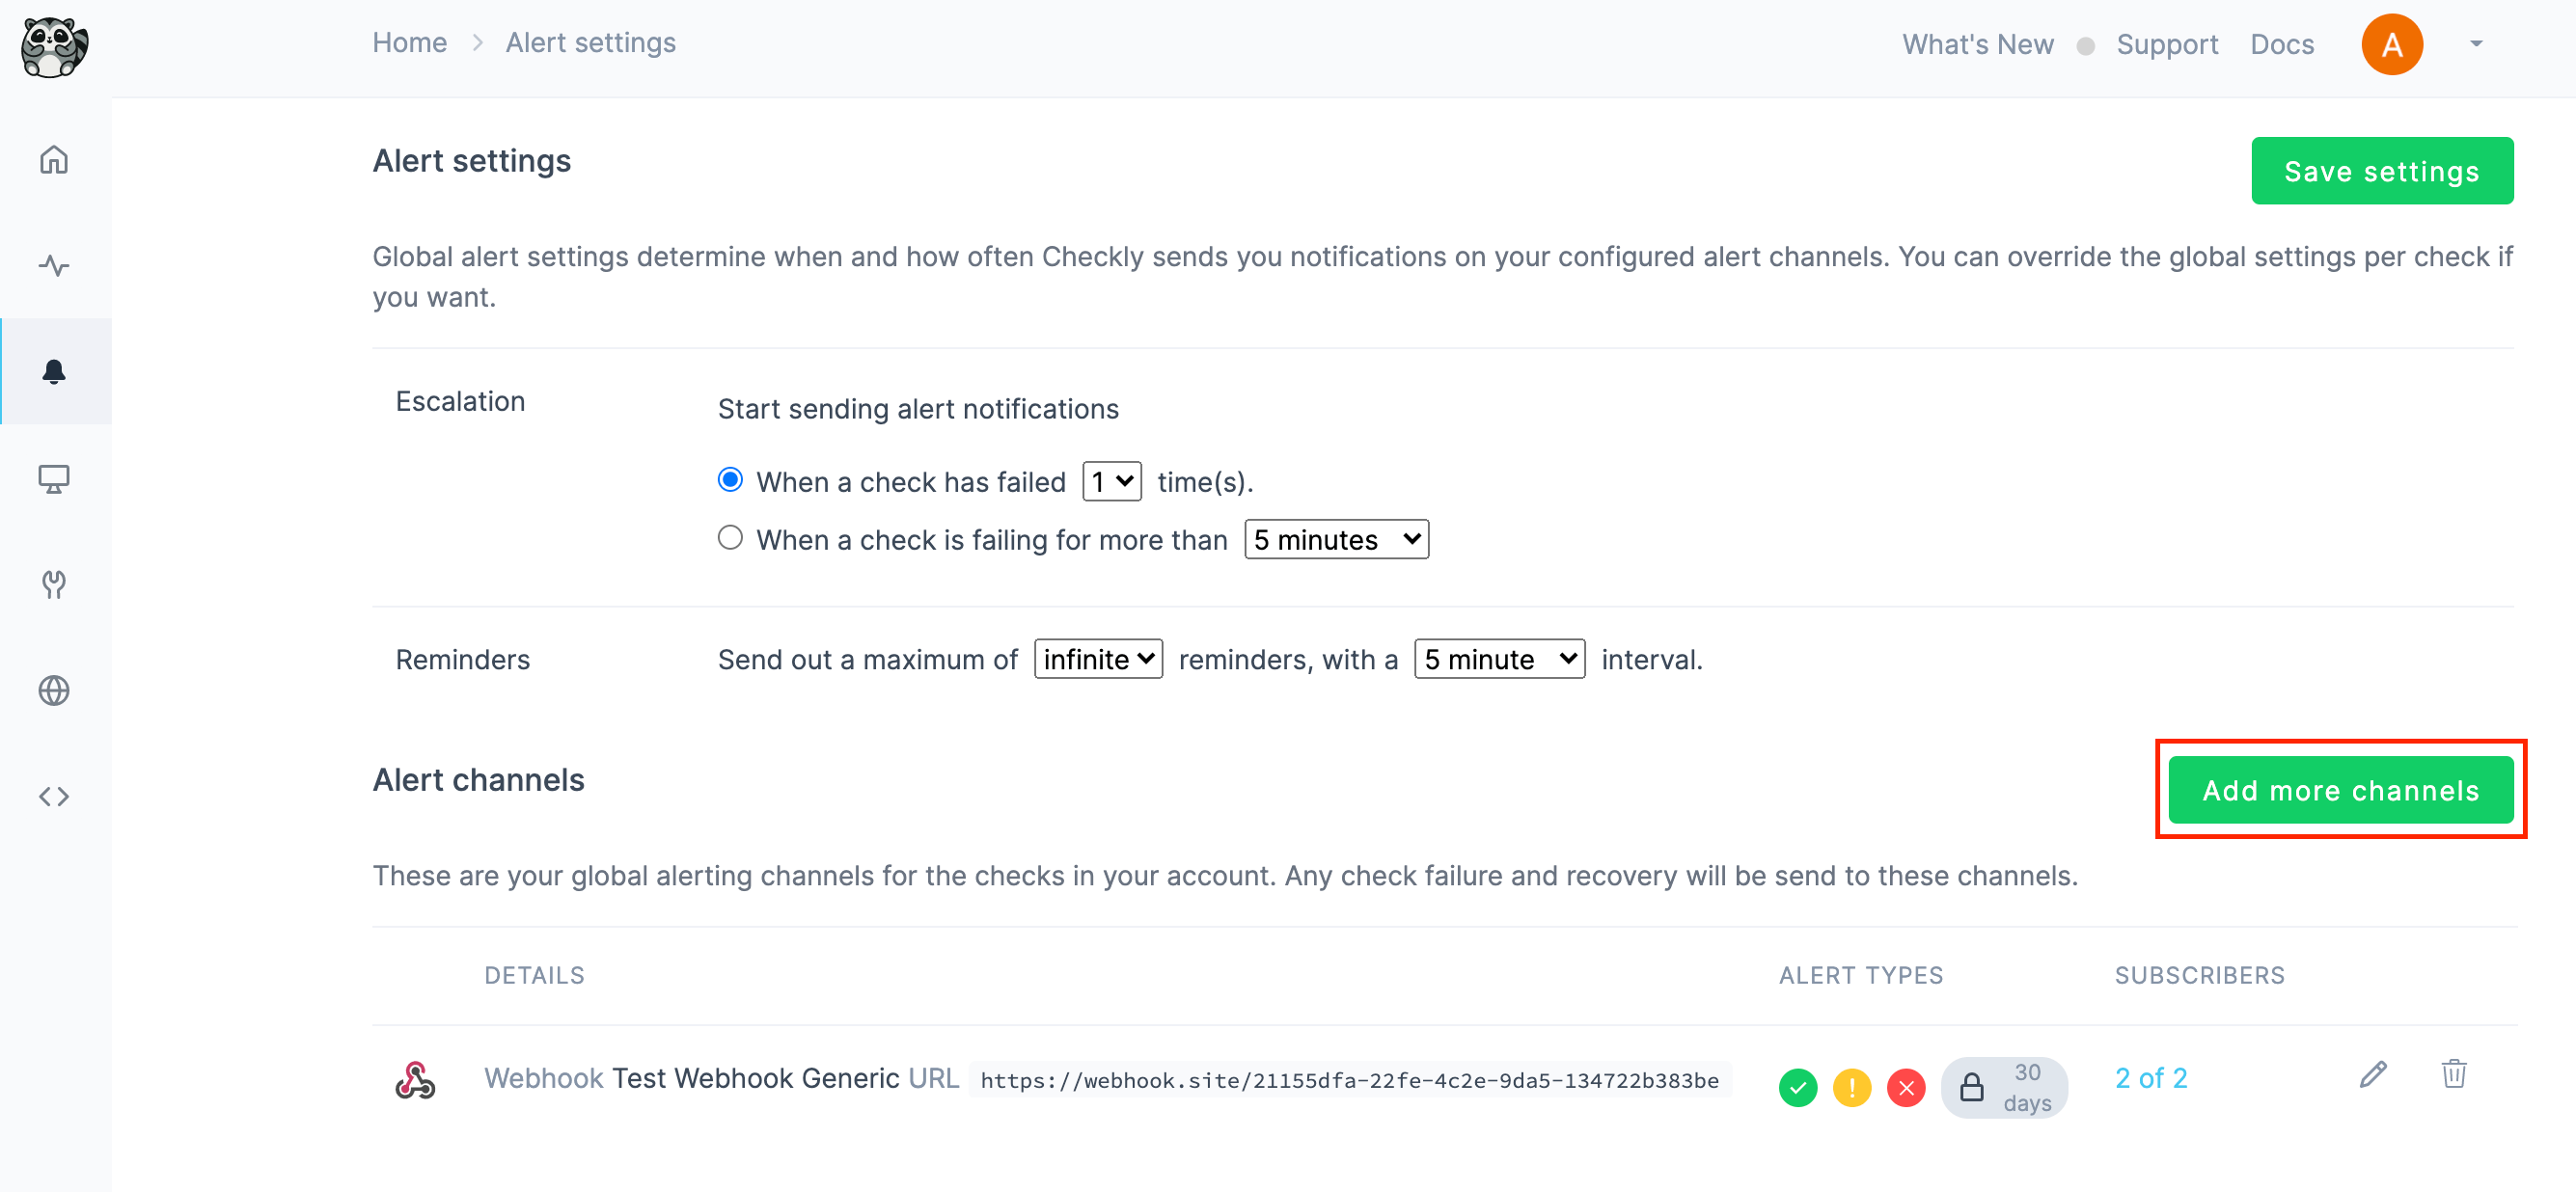
(1) In the app, navigate to Alert Settings on the sidebar

(2) Click on Add more channels to add the Webhook. Additionally, configure other Alert Settings that are available on this page based on your requirements

(3) Select Add channel for Webhook

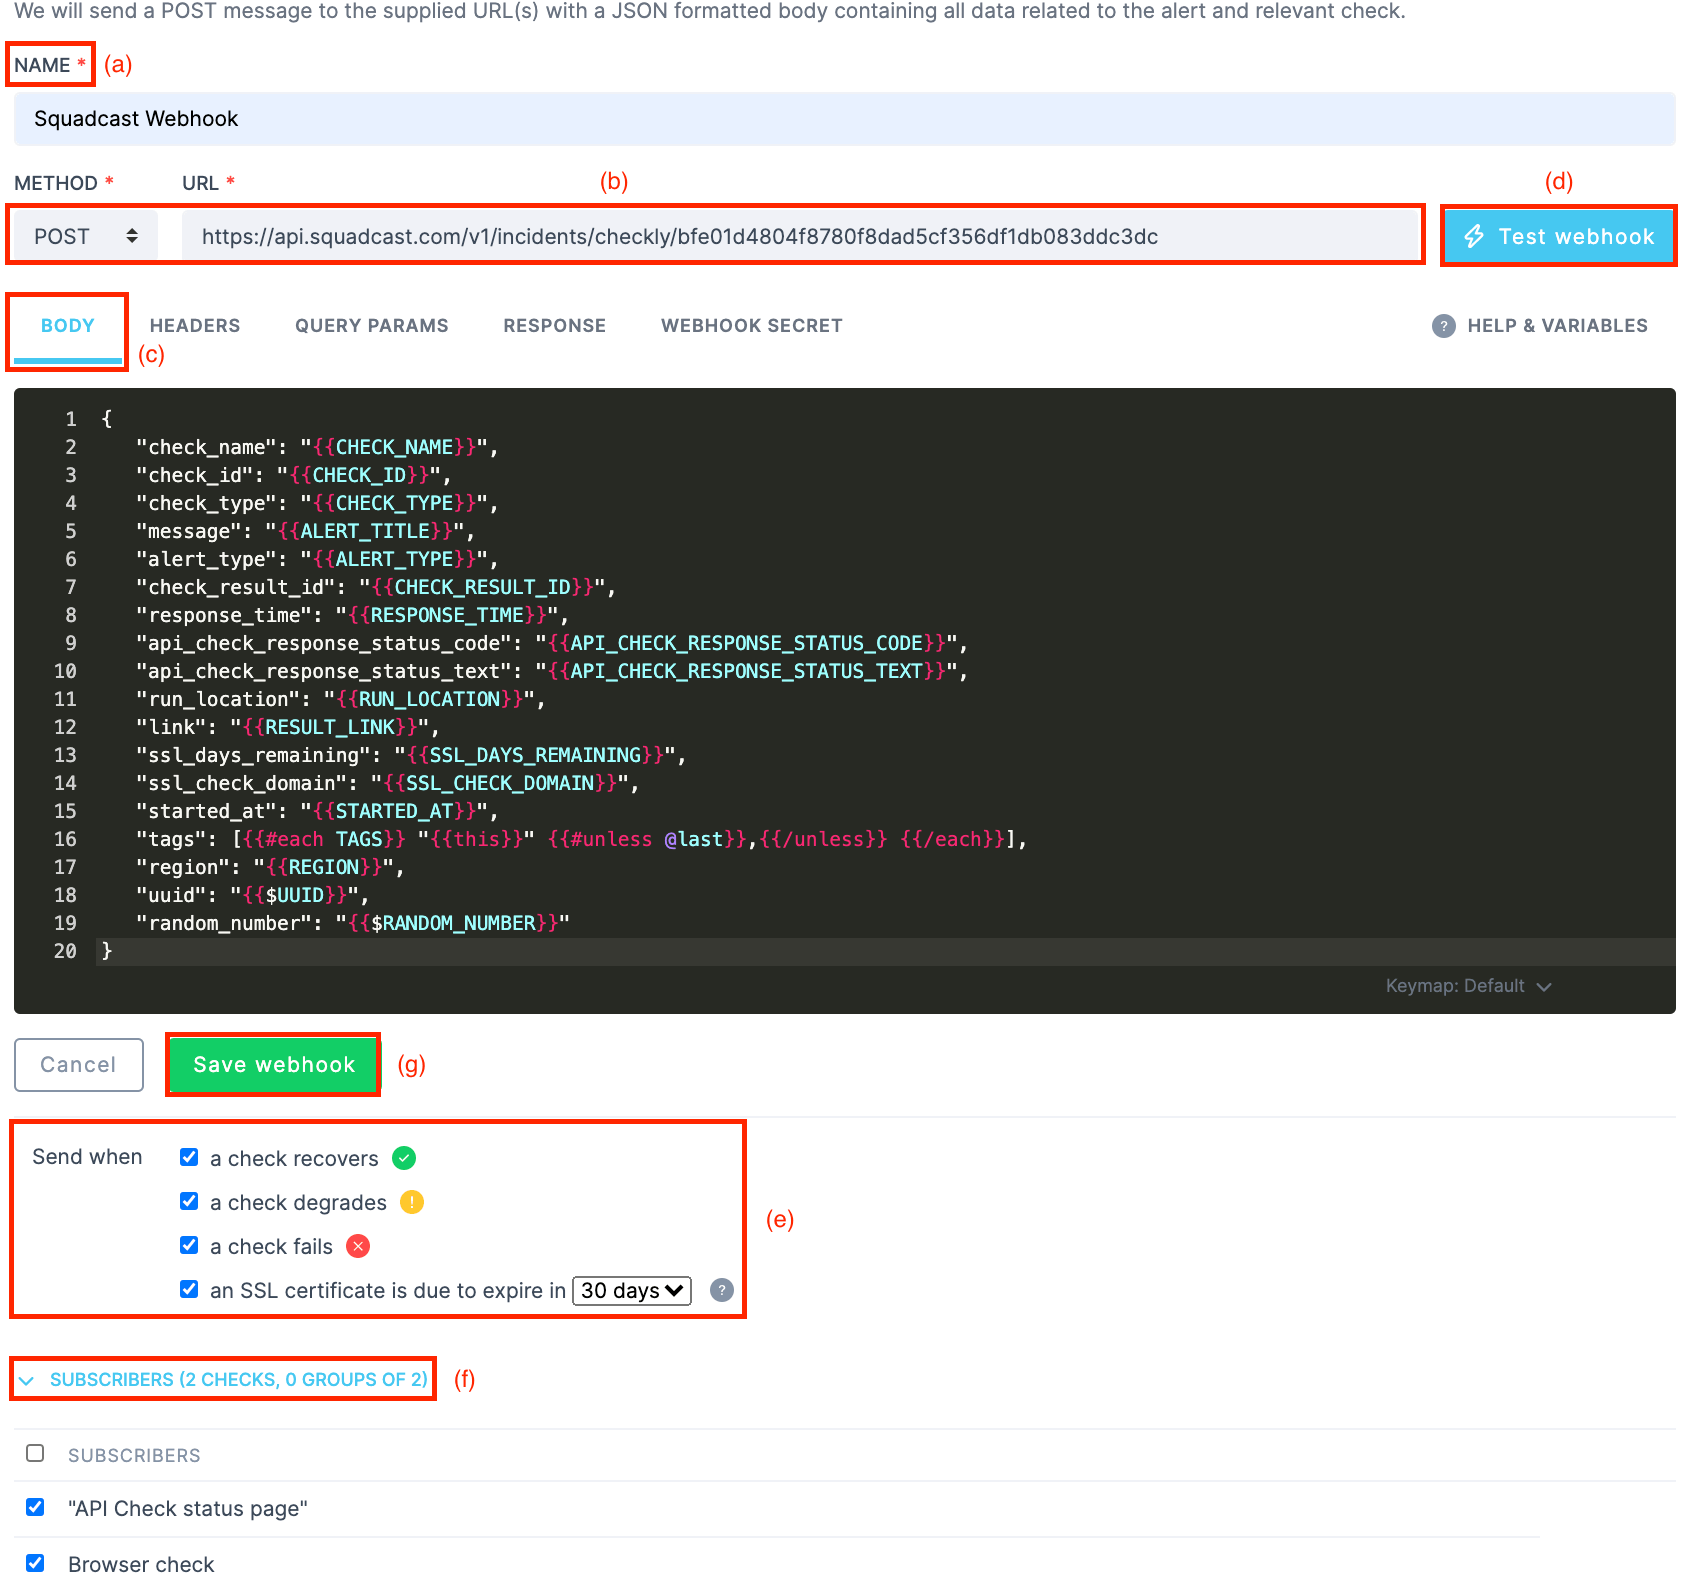
(4) Fill in the details as indicated below:
(a) Give it a meaningful name, such as Squadcast Webhook
(b) Choose POST from the Method drop-down and paste the Webhook URL copied from Squadcast in the URL placeholder
(c) Copy and paste the below template in Body
{
    "check_name": "{{CHECK_NAME}}",
    "check_id": "{{CHECK_ID}}",
    "check_type": "{{CHECK_TYPE}}",
    "message": "{{ALERT_TITLE}}",
    "alert_type": "{{ALERT_TYPE}}",
    "check_result_id": "{{CHECK_RESULT_ID}}",
    "response_time": "{{RESPONSE_TIME}}",
    "api_check_response_status_code": "{{API_CHECK_RESPONSE_STATUS_CODE}}",
    "api_check_response_status_text": "{{API_CHECK_RESPONSE_STATUS_TEXT}}",
    "run_location": "{{RUN_LOCATION}}",
    "link": "{{RESULT_LINK}}",
    "ssl_days_remaining": "{{SSL_DAYS_REMAINING}}",
    "ssl_check_domain": "{{SSL_CHECK_DOMAIN}}",
    "started_at": "{{STARTED_AT}}",
    "tags": [{{#each TAGS}} "{{this}}" {{#unless @last}},{{/unless}} {{/each}}],
    "region": "{{REGION}}",
    "uuid": "{{$UUID}}",
    "random_number": "{{$RANDOM_NUMBER}}"
}
Important:
(1) Checkly auto-reformats the content copied from above that you paste which ruptures the template syntax, resulting in the failure of the Test webhook option and hence, alert propagation to Squadcast. Please ensure the copied content is edited to match the syntax in the screenshot below.

(2) It is recommended to add the Header Content-Type as application/json.

(d) Now, you can verify if the integration works fine by clicking on Test webhook which will create an incident in Squadcast
(e) In the Send when section, choose a check fails, a check recovers without fail. The other two options, a check degrades and an SSL certificate is due to expire in a few days are optional, based on your requirement
(f) Select the checks and groups that you want to add to this webhook channel as Subscribers
(g) Save webhook configuration

That is it, you are now good to go! Whenever an alert is triggered in Checkly, an incident will be created automatically in Squadcast. When an alert is resolved in Checkly, the corresponding incident will get auto-resolved in Squadcast.