Freshservice
This document will help you integrate Freshservice with Squadcast.
Freshservice extends digital capabilities and delivers exceptional employee experiences with an intuitive, scalable, no code solution.
Route detailed ticket alerts from Freshservice to the right users in Squadcast.
How to integrate Freshservice with Squadcast
In Squadcast: Using Freshservice as an Alert Source
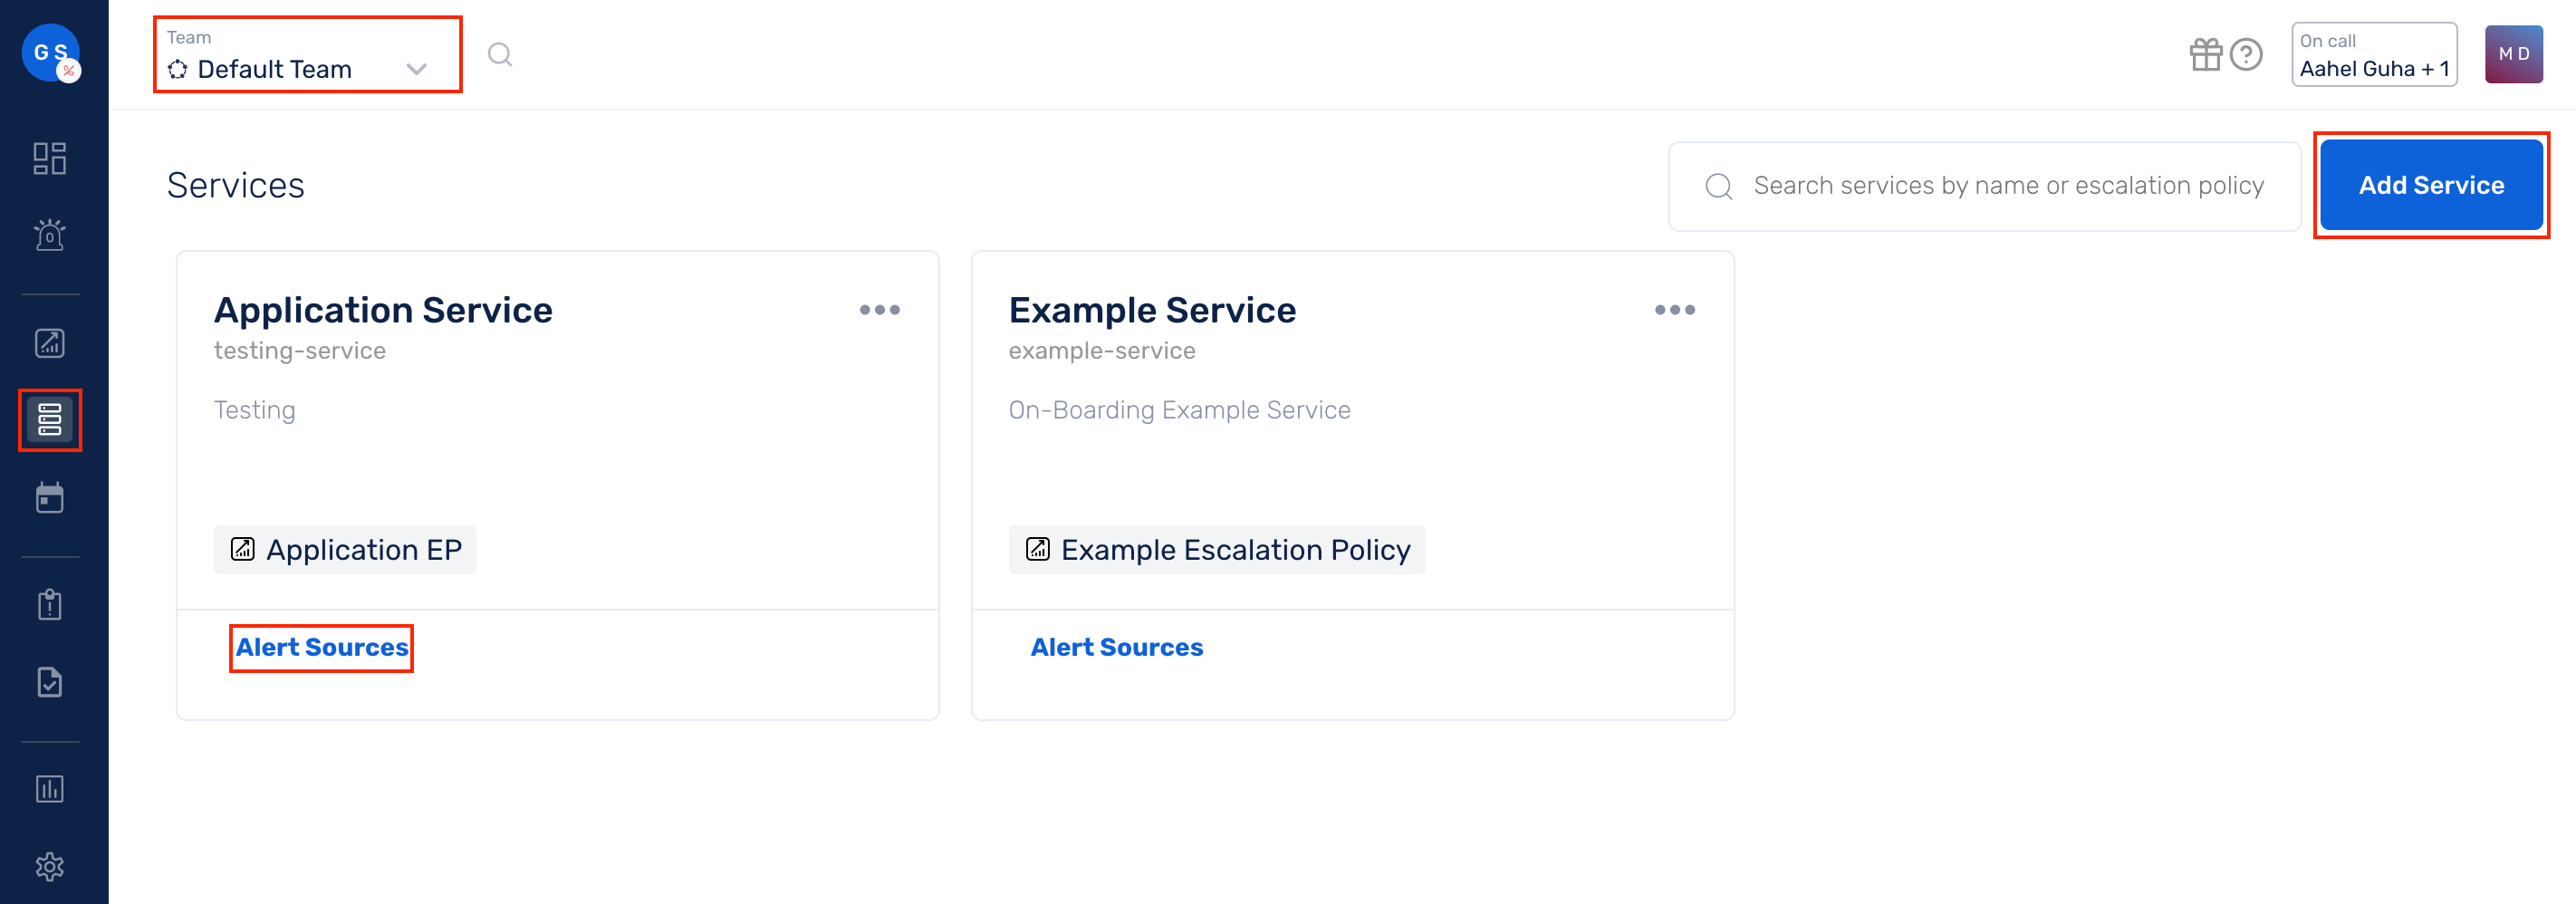
(1) From the navigation bar on the left, select Services. Pick the applicable Team from the Team-picker on the top. Next, click on Alert Sources for the applicable Service
(2) Search for Freshservice from the Alert Source drop-down and copy the Webhook URL
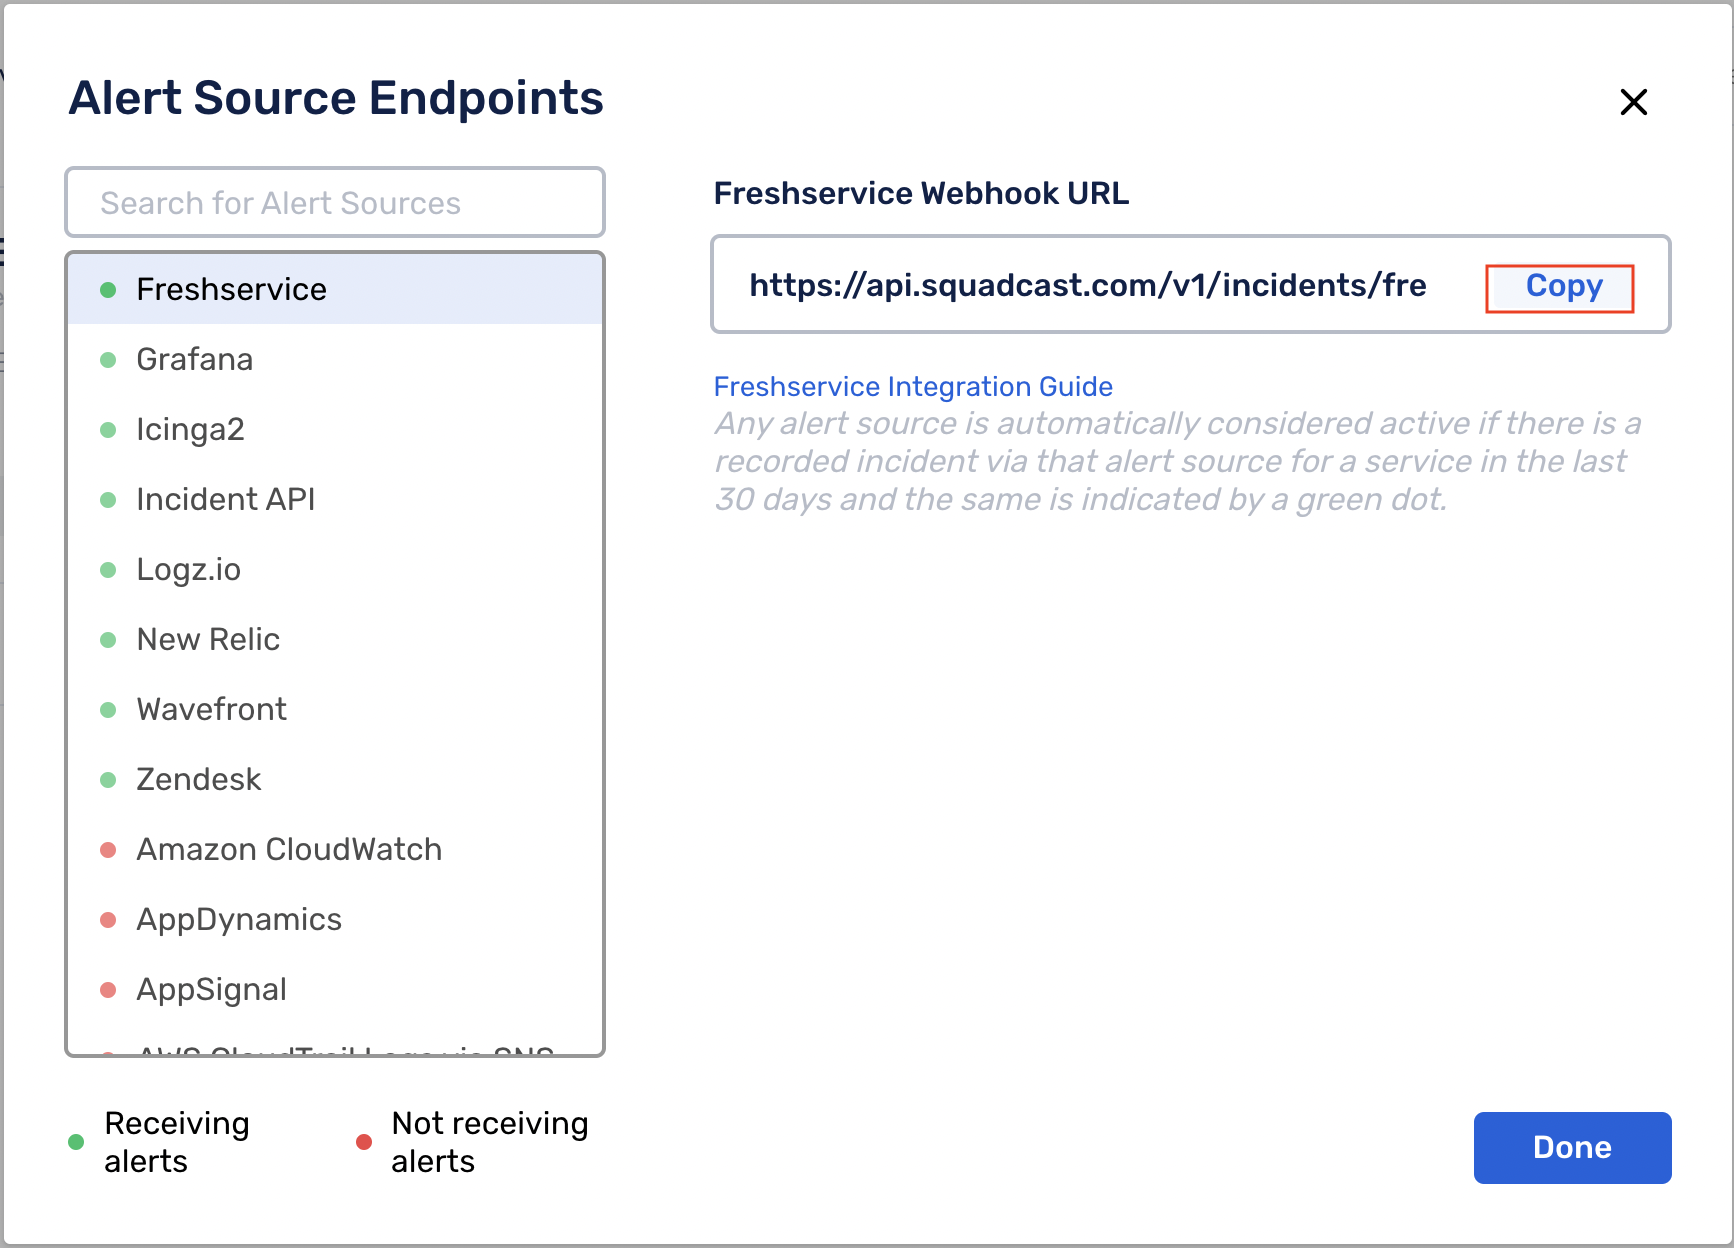
For an Alert Source to turn active (indicated by a green dot - Receiving alerts against the name of the Alert Source in the drop-down), you can either generate a test alert or wait for a real-time alert to be generated by the Alert Source.
An Alert Source is active if there is a recorded incident via that Alert Source for the Service in the last 30 days.
In Freshservice: Create a Squadcast webhook alert
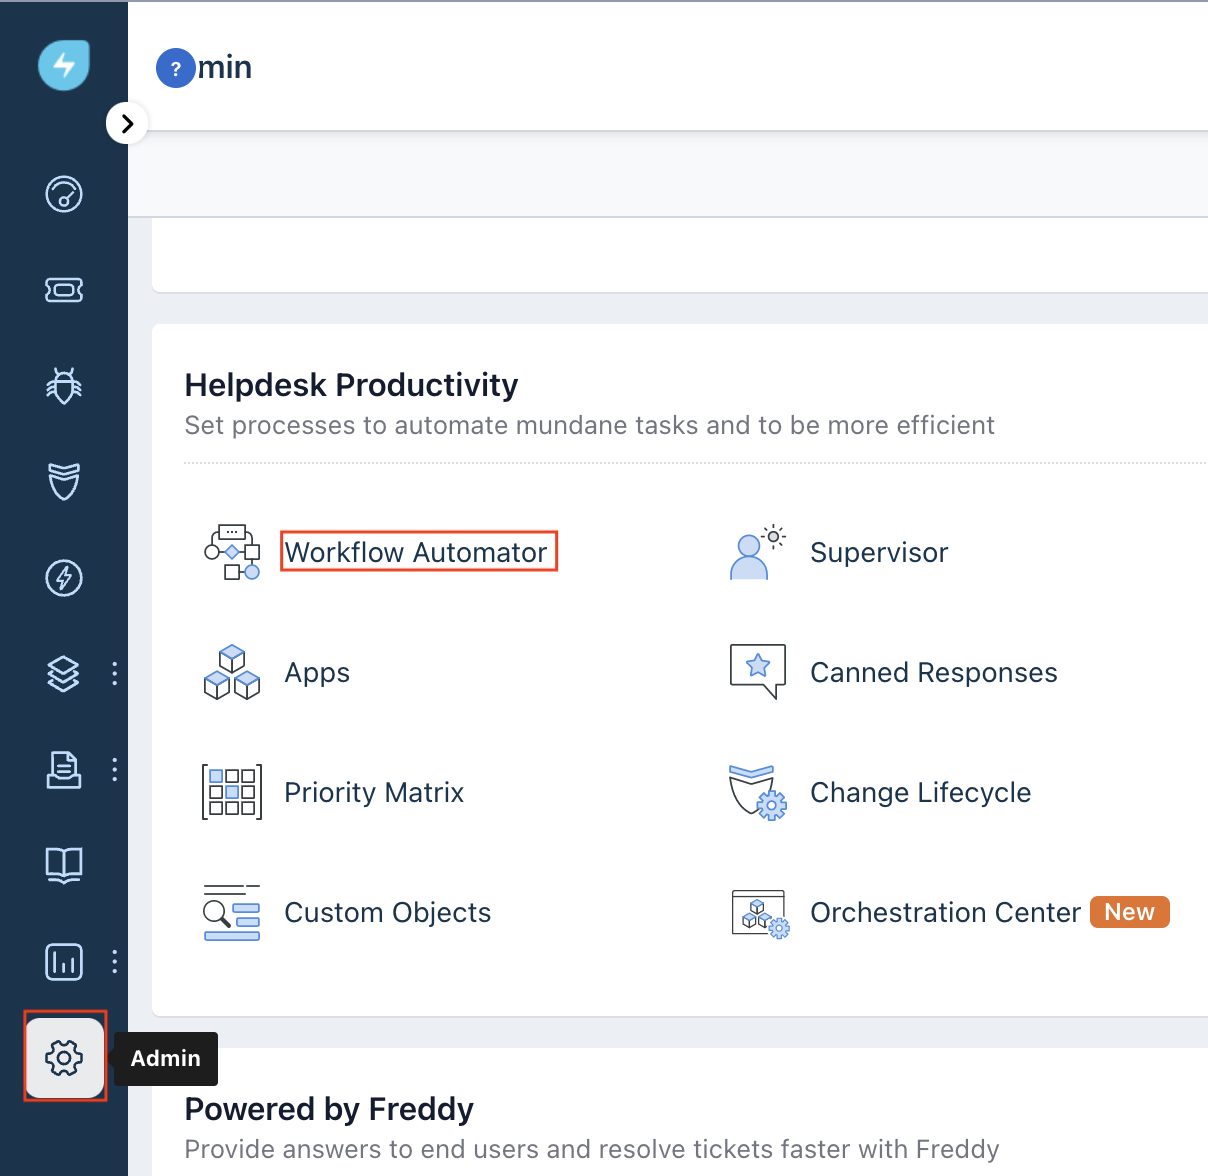
(1) In the app, go to Admin > Workflows Automator to create the webhook
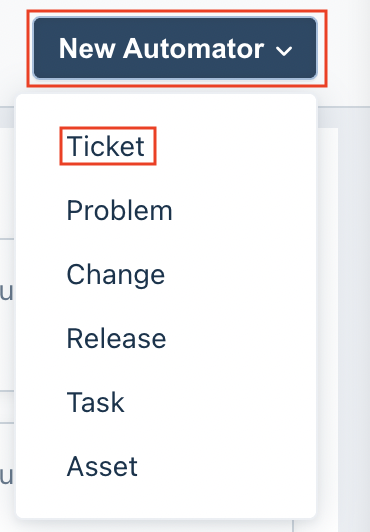
(2) Click on New Automator and select the suitable category from the drop-down. Here, we have selected Ticket
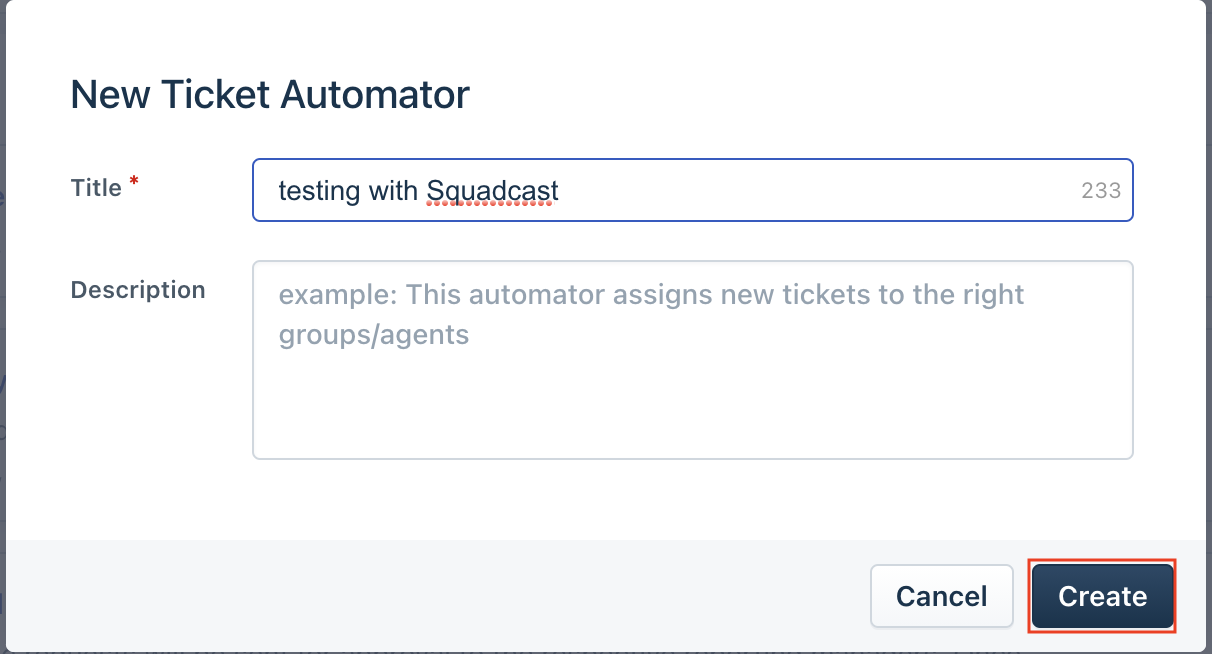
(3) Provide a Title and an optional Description. Next, click on Create
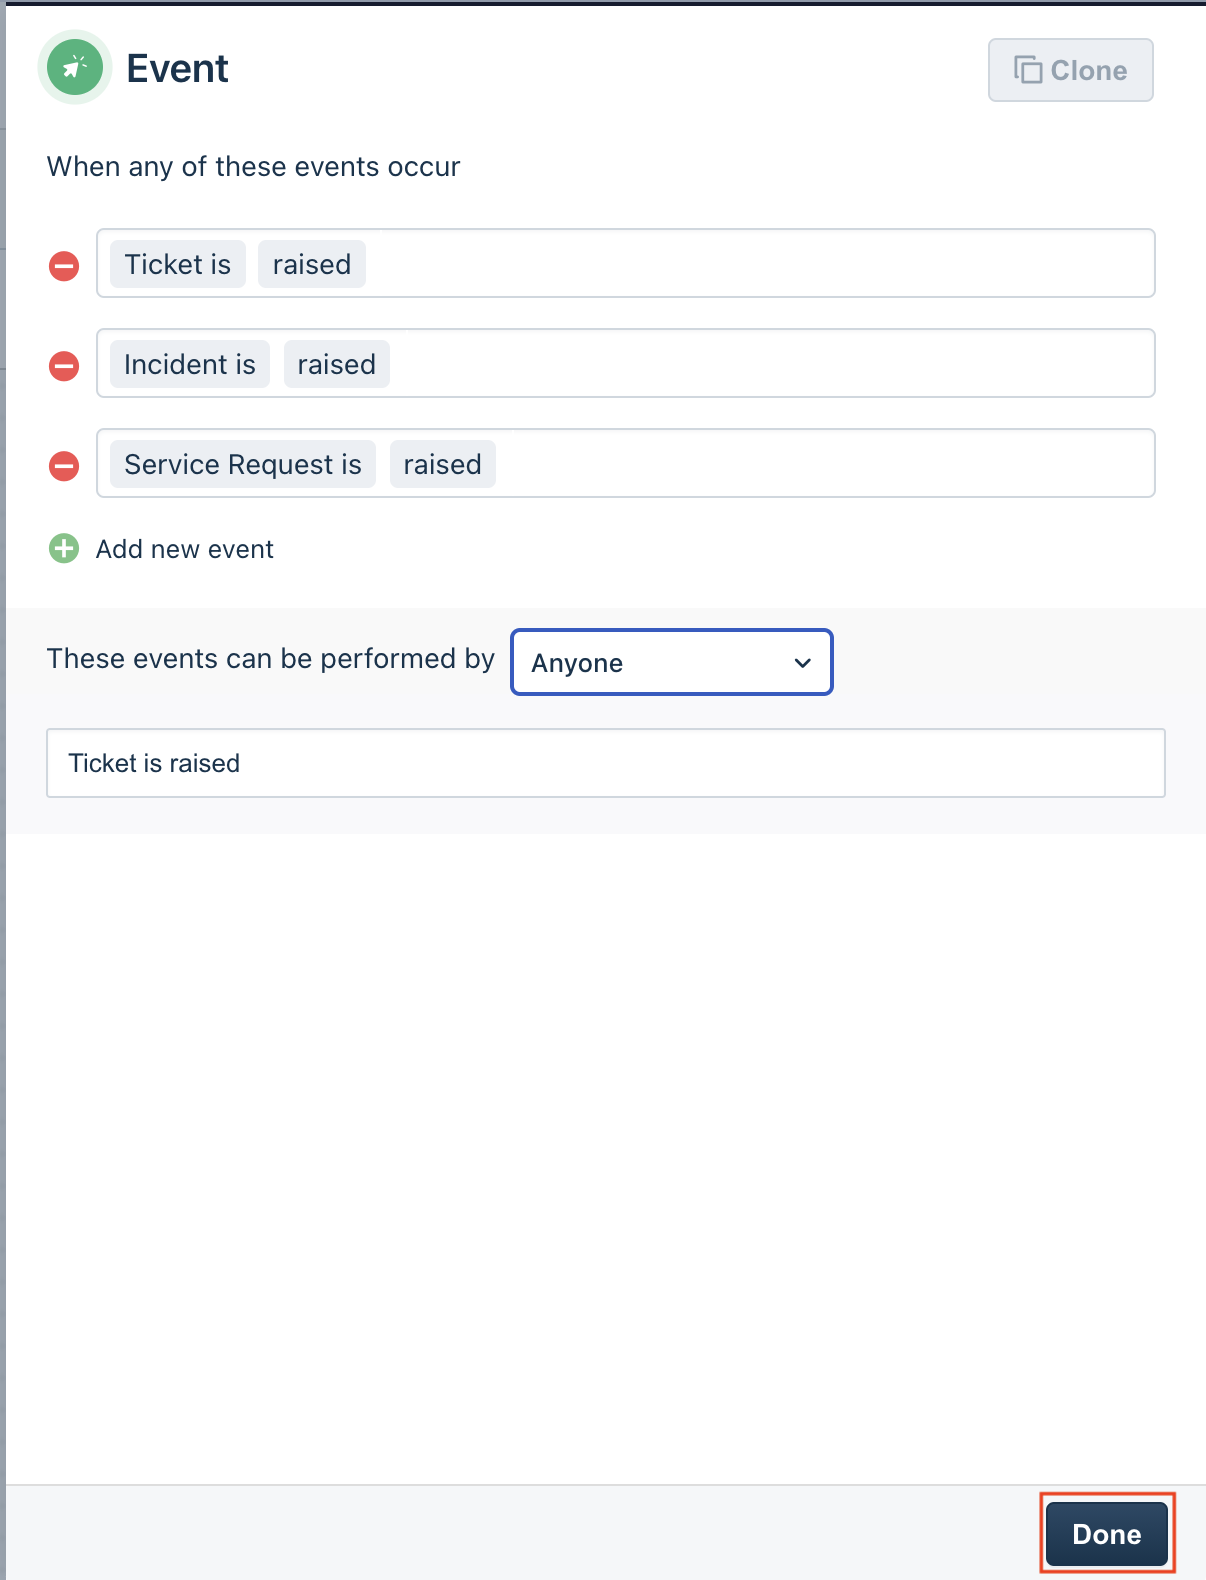
(4) In the Events section, you can select and add the Events of your choice. Here, we have added 3 Events as shown in the screenshot. Then, click on Done
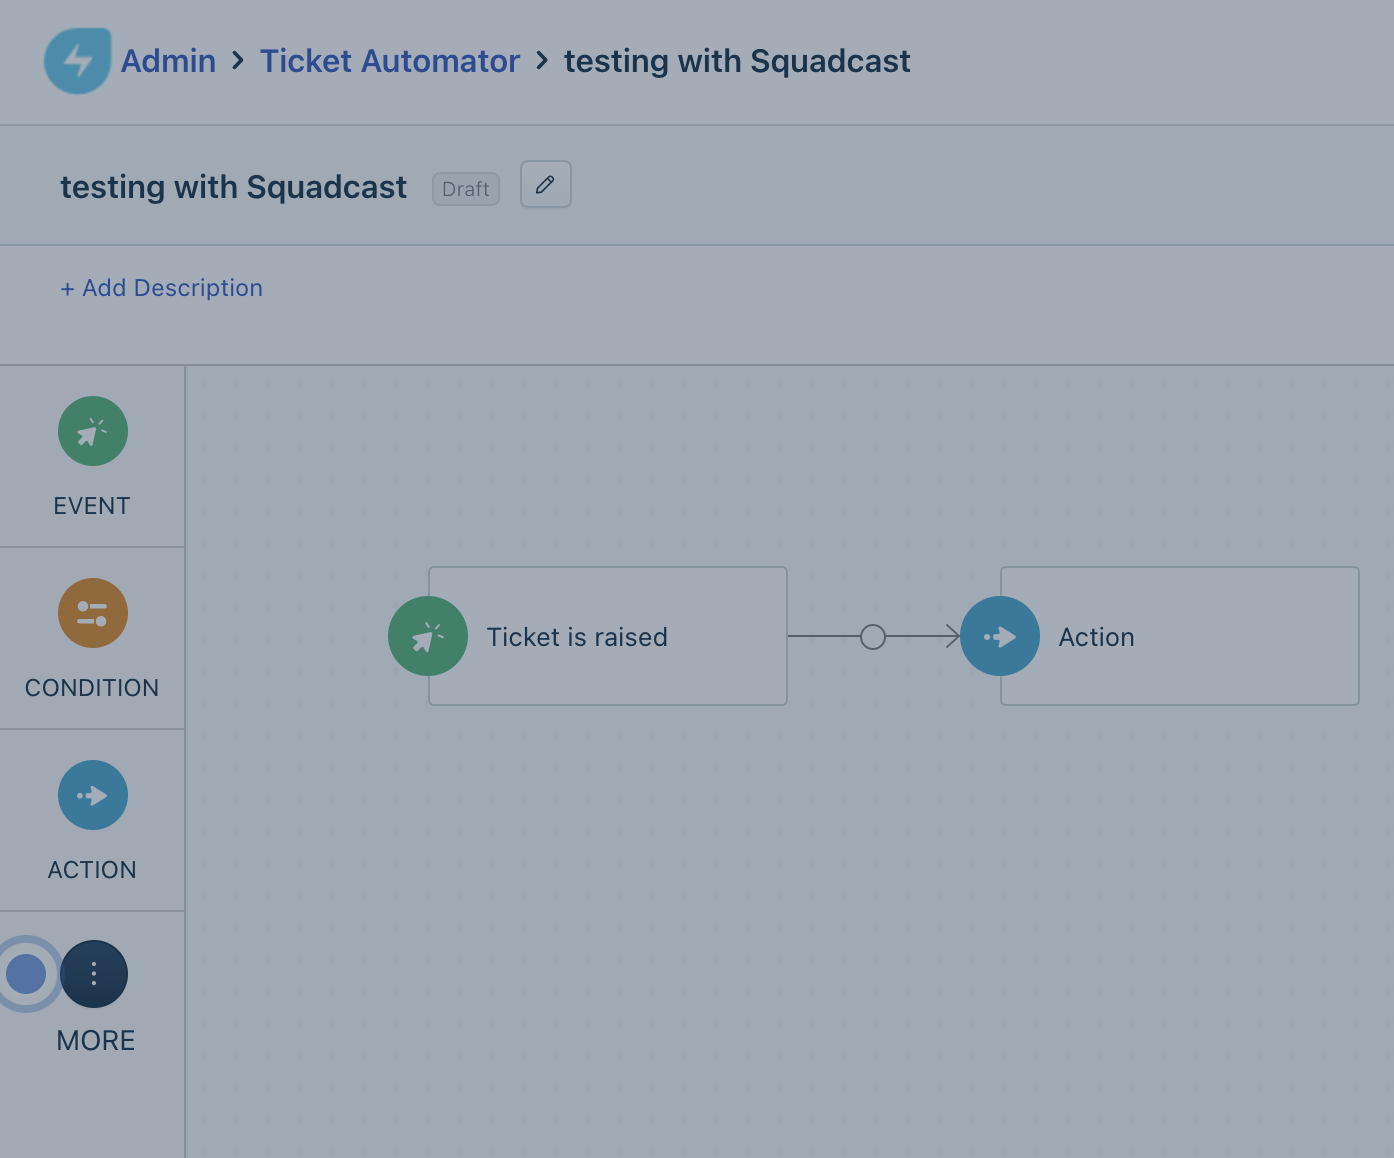
(5) Drag ACTION from the menu on the left on to the screen
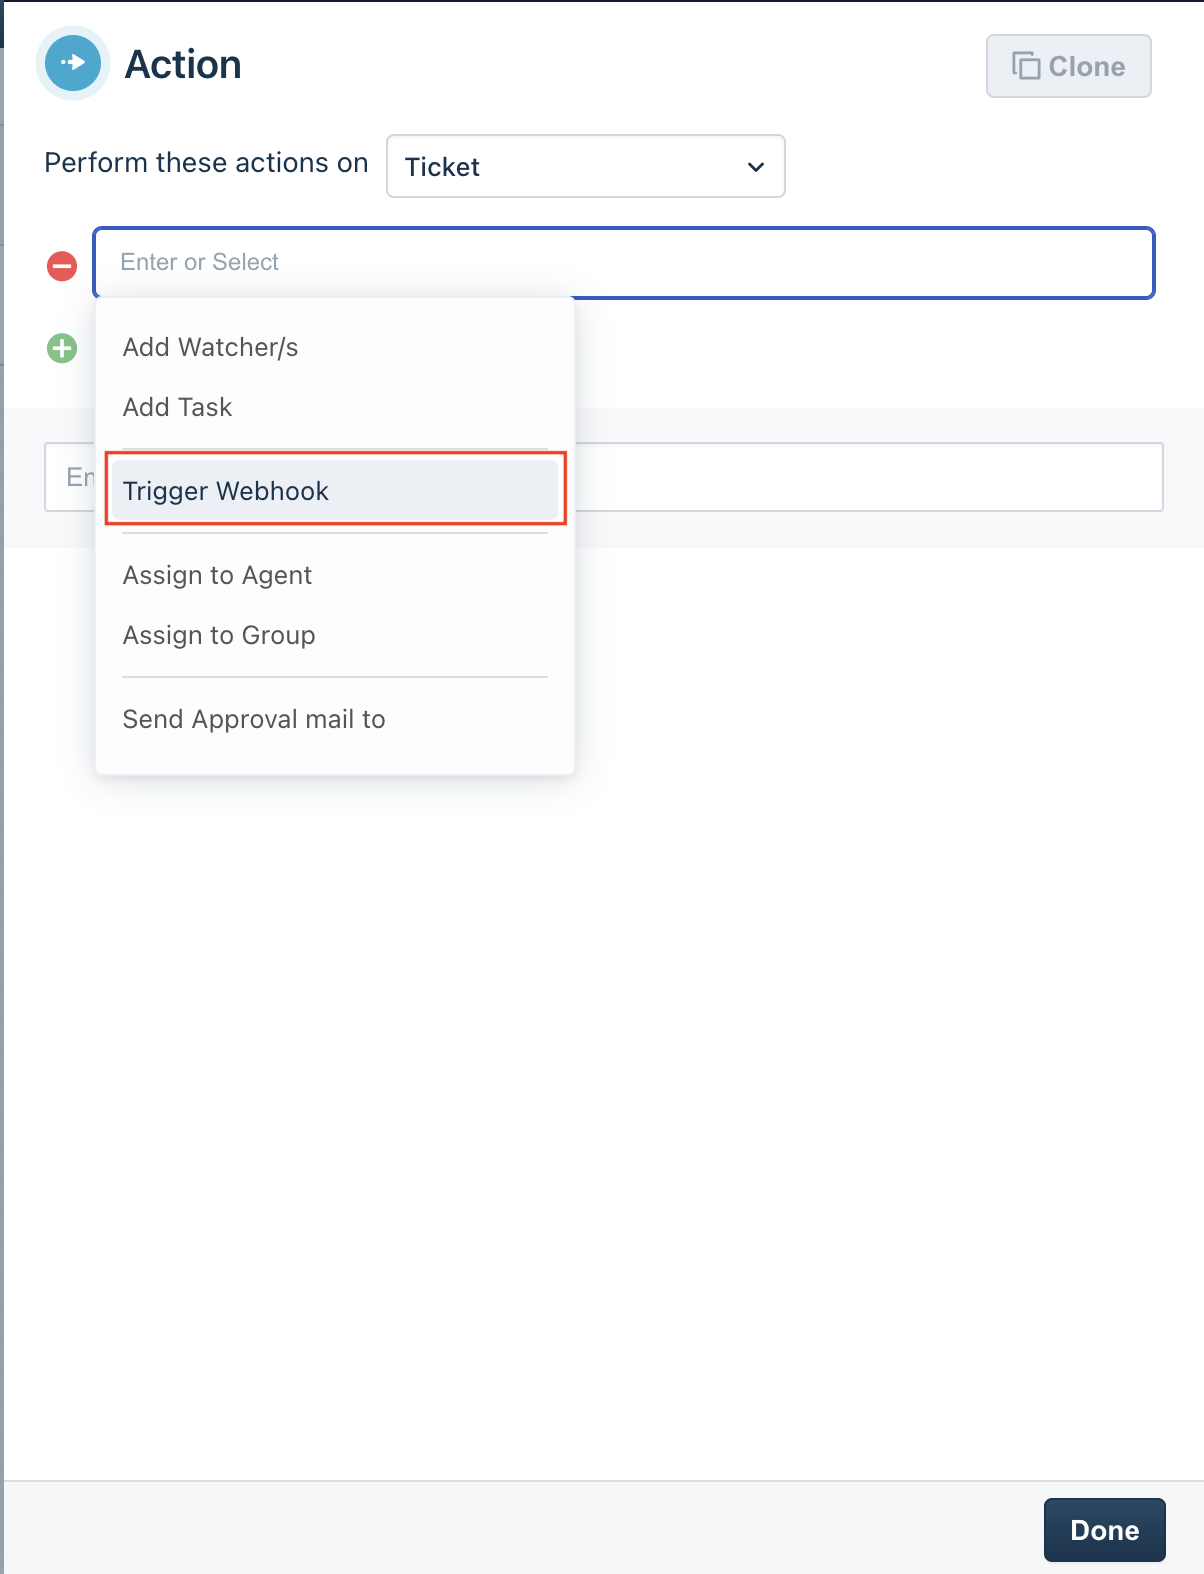
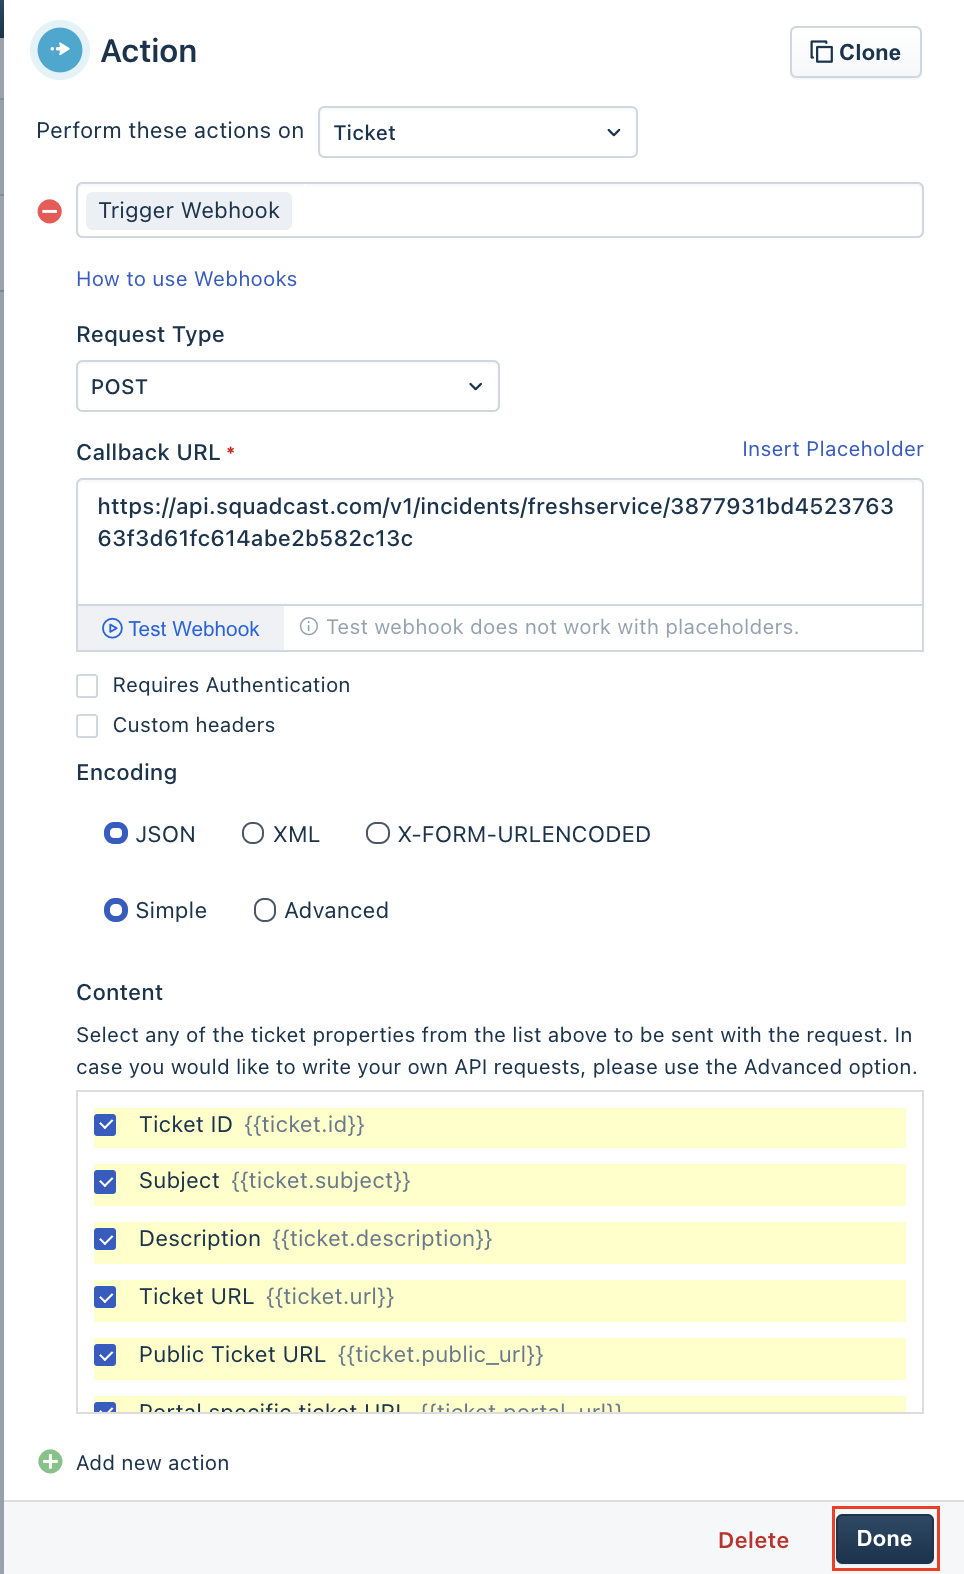
(a) From the drop-down for Perform these actions on, select Ticket
(b) Then, from the next drop-down, select Trigger Webhook
(c) Choose Request Type as POST
(d) In Callback URL paste the previously copied Squadcast webhook URL here
(e) Choose Encoding as JSON and Simple
(f) In Content, you can select all of the available fields to send complete information as the alert to Squadcast.
As the bare minimum, please select the below:
ticket_status
ticket_id
ticket_priority
ticket_subject
ticket_due_by_time
ticket_description
ticket_source
ticket_department_name
ticket_category
ticket_url
ticket_portal_url
approval_url
approval_portal_url
ticket_group_name
associated_asset_names
ticket_tags
ticket_agent_email
ticket_agent_name
ticket_requester_name
ticket_requester_email
ticket_requester_phone
(g) Then, click on Done
Note:
The Test Webhook option sends empty data on the configured Callback URL. As a result, since no data is available in the alert payload, no incident is created in Squadcast for it. Please create a test ticket post configuring this webhook as indicated in this document to see a test incident created for it in Squadcast, to ensure that the configuration is working as expected.
(6) Click on Activate
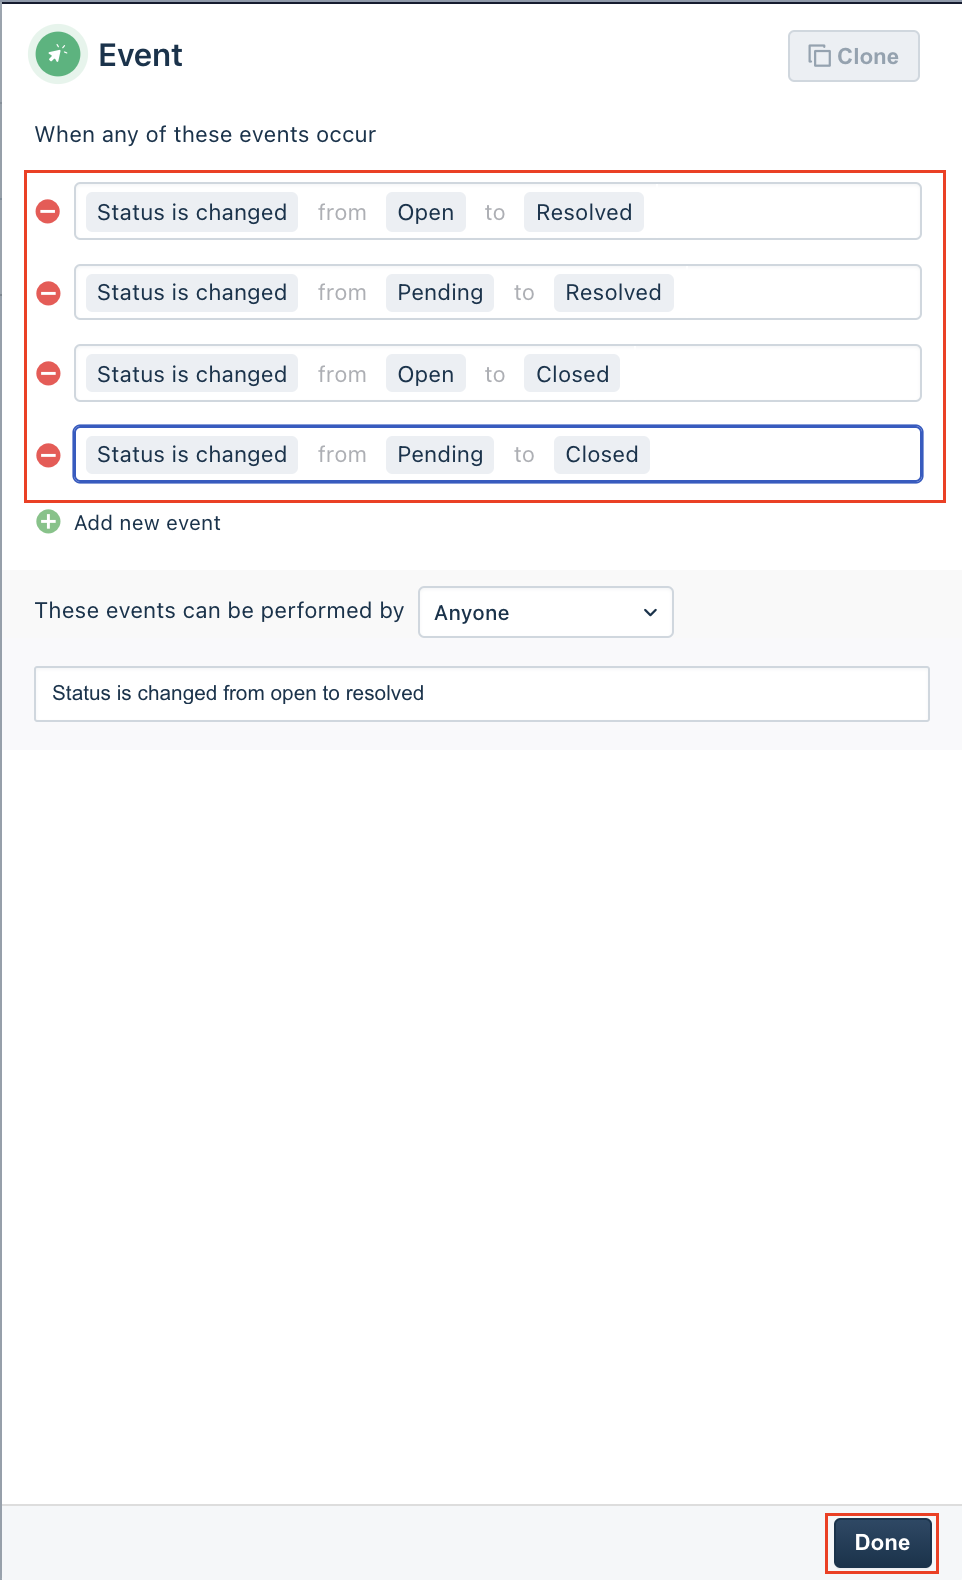
(7) Do the following for sending resolve alerts to Squadcast:
(a) Follow steps 1-3
(b) Fill in the form as shown in the screenshot below:
(c) Follow steps 5 and 6
(8) Next, to create the alert, follow the steps below:
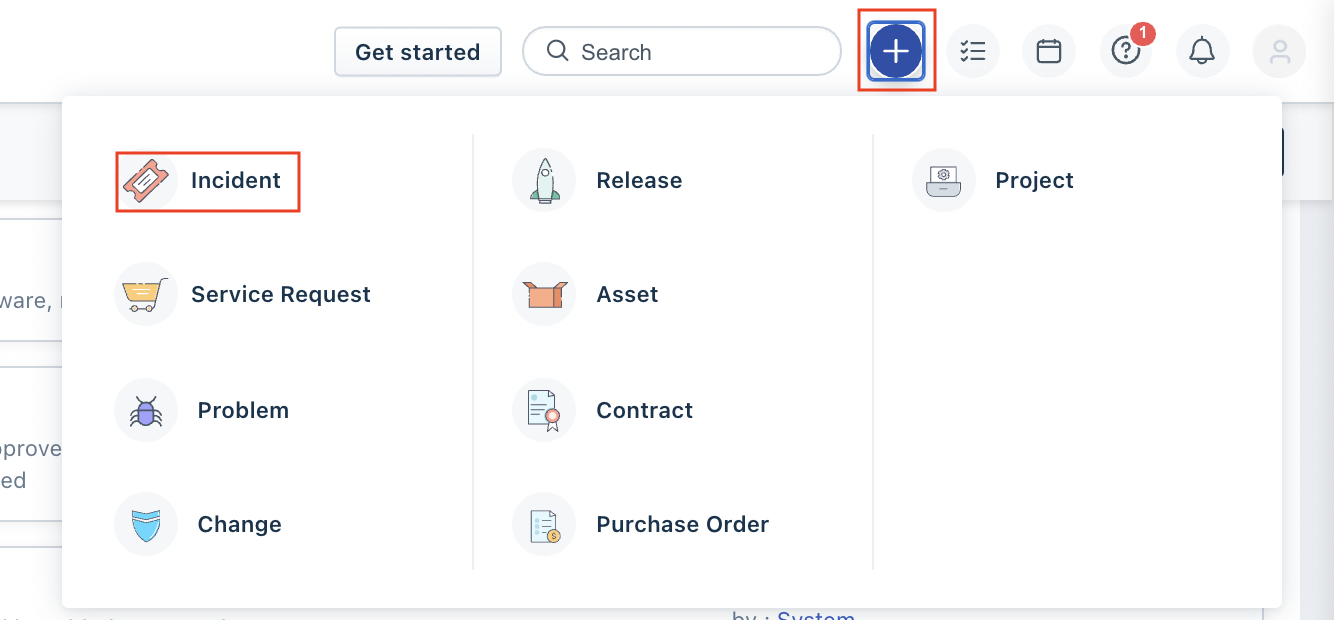
(a) Click on ➕(plus) icon and select any of the available options in the drop-down. Here, we have selected Incident
(b) Fill the form and click on Save
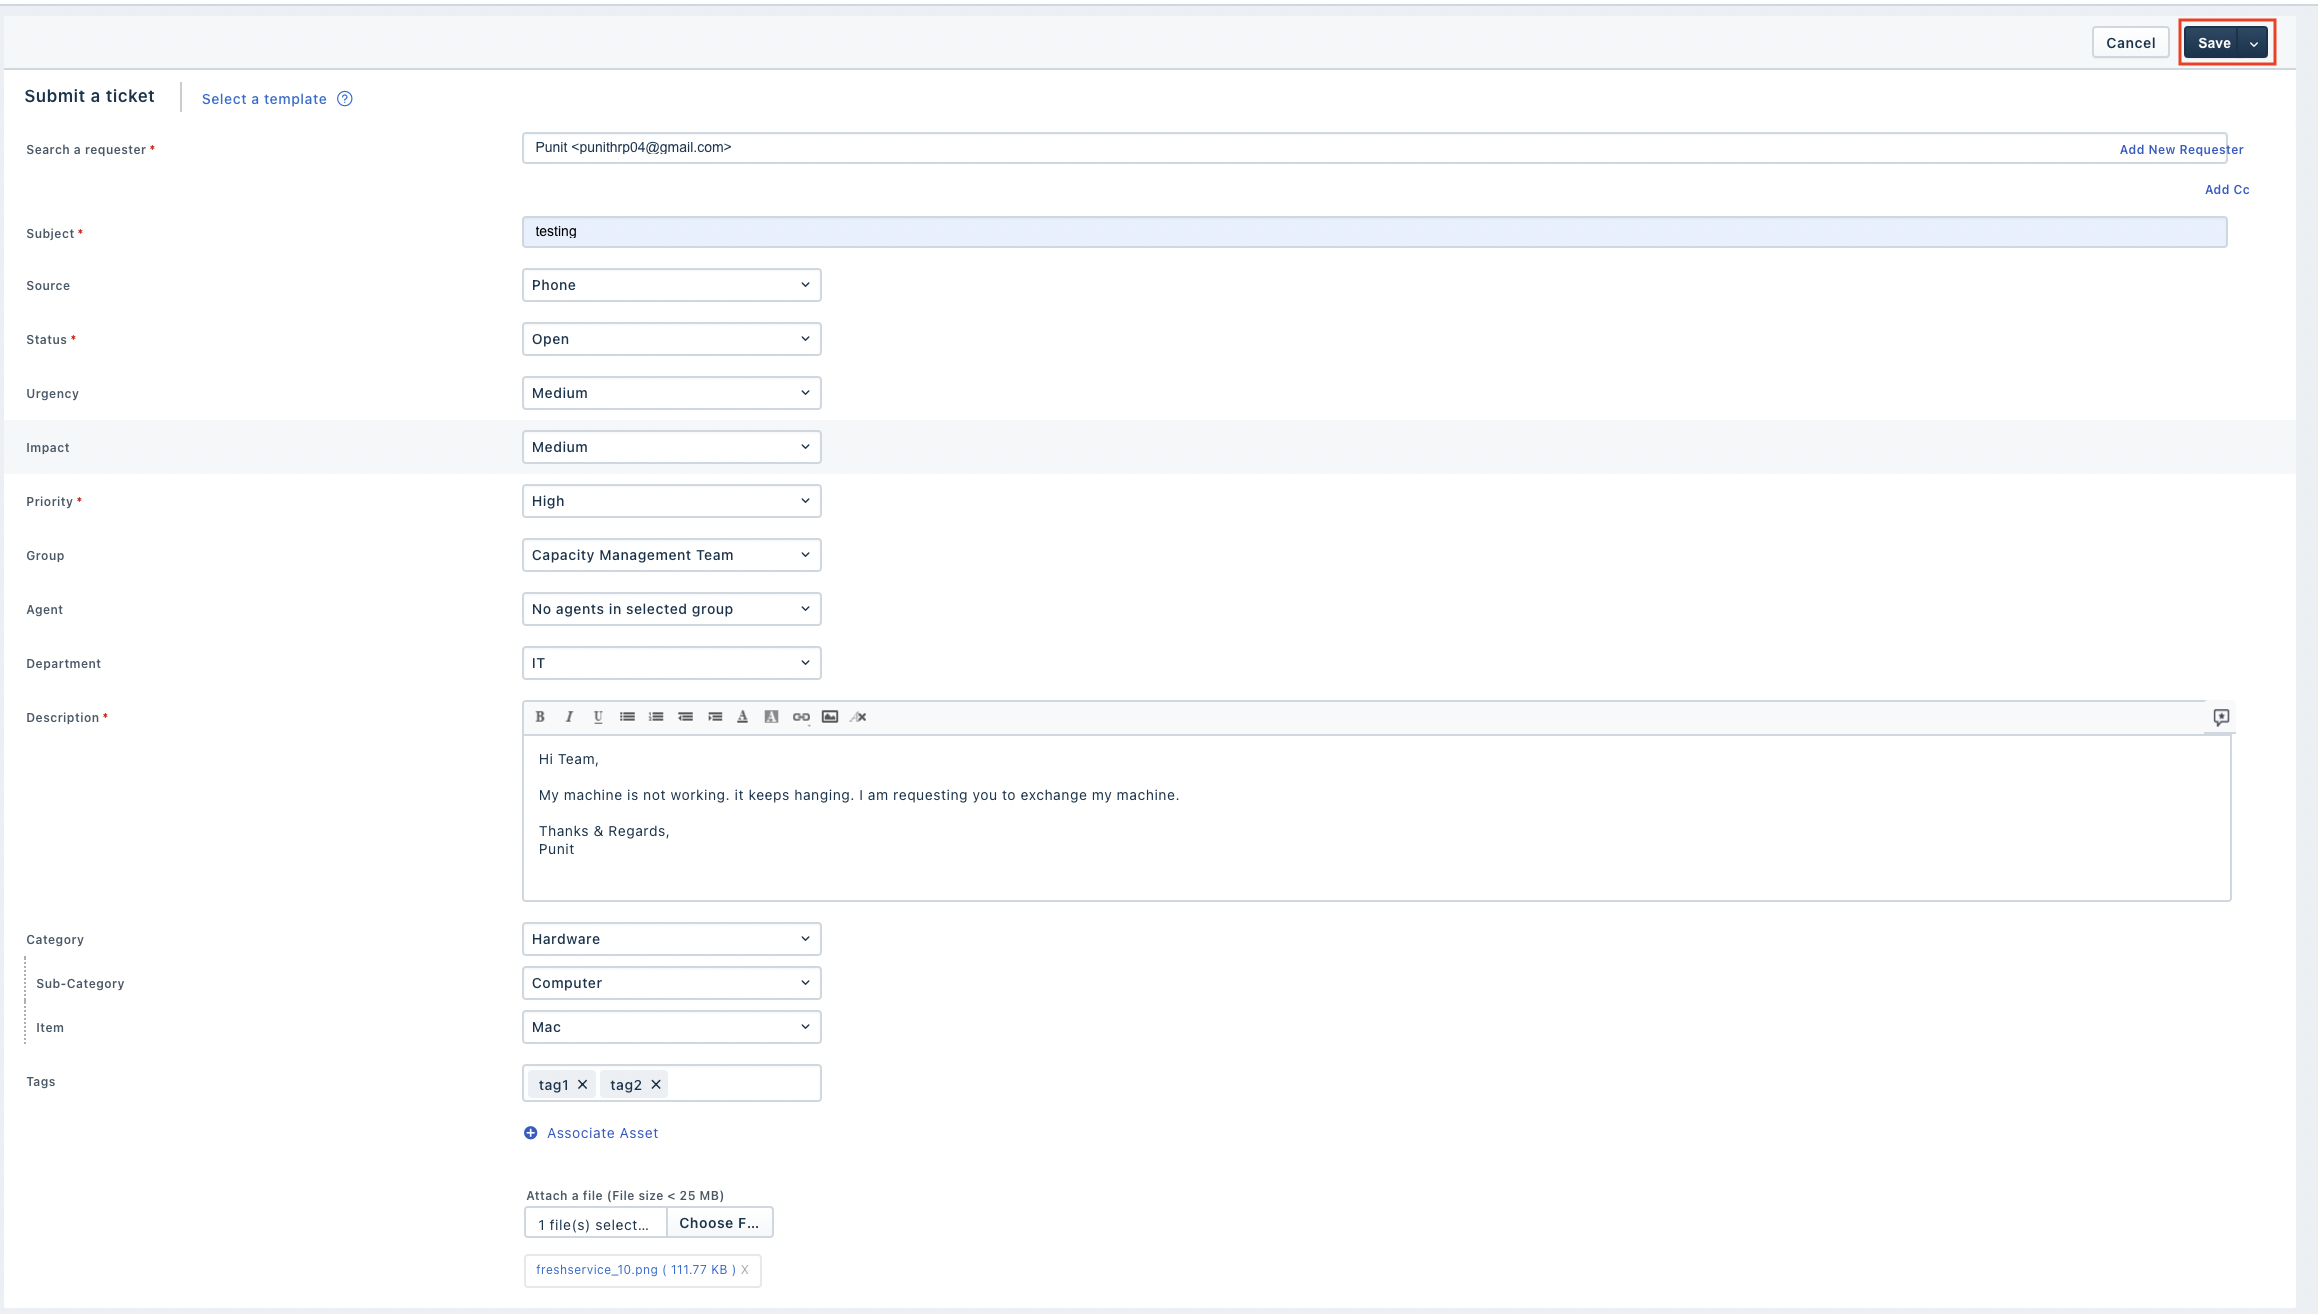
- Status
Open-> to trigger incident at Squadcast - Status
Resolved-> to resolve incident at Squadcast - Status
Closed-> to resolve incident at Squadcast
Note:
If you have configured Custom Statuses in Freshservice and want to use one of the configured Custom Statuses for ticket creation/resolution (in turn, triggering/resolving corresponding incidents in Squadcast), kindly reach out to support@squadcast.com for further details on this.
That is it, you are now good to go! Whenever a ticket is created with Open status, an incident will be created in Squadcast. When the ticket is either Solved or Closed in Freshservice, the corresponding incident will automatically get resolved in Squadcast as well.