Amazon OpenSearch
Amazon OpenSearch is a distributed, open-source search and analytics suite used for a broad set of use cases like real-time application monitoring, log analytics, and website search.
Route detailed alerts from Amazon OpenSearch to the right users in Squadcast.
Amazon OpenSearch can also be integrated through Amazon Cloudwatch. Please find the documentation here.
Using Amazon OpenSearch as an Alert Source
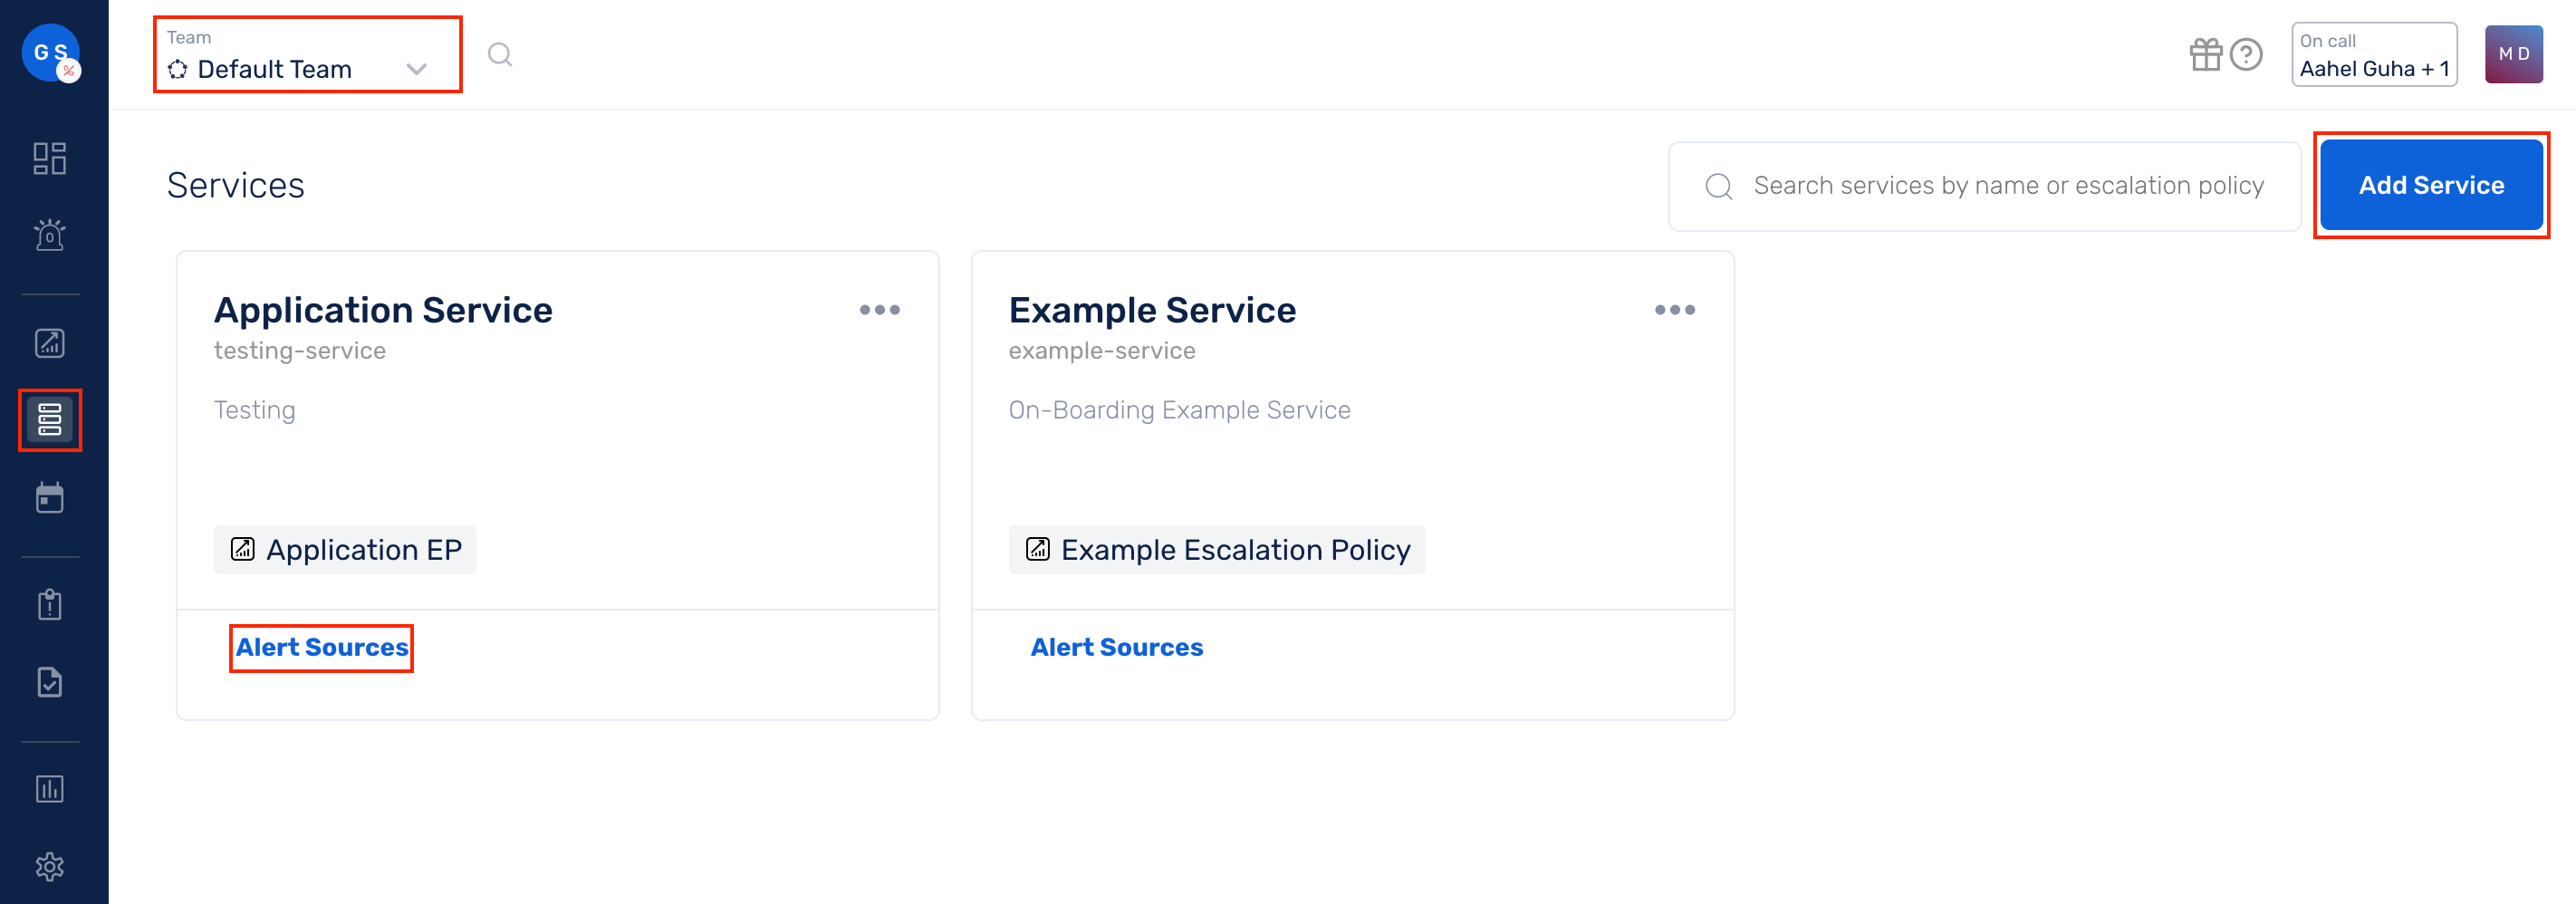
(1) From the navigation bar on the left, select Services. Pick the applicable Team from the Team-picker on the top. Next, click on Alert Sources for the applicable Service
(2) Search for Amazon OpenSearch from the Alert Source drop-down and copy the Webhook URL
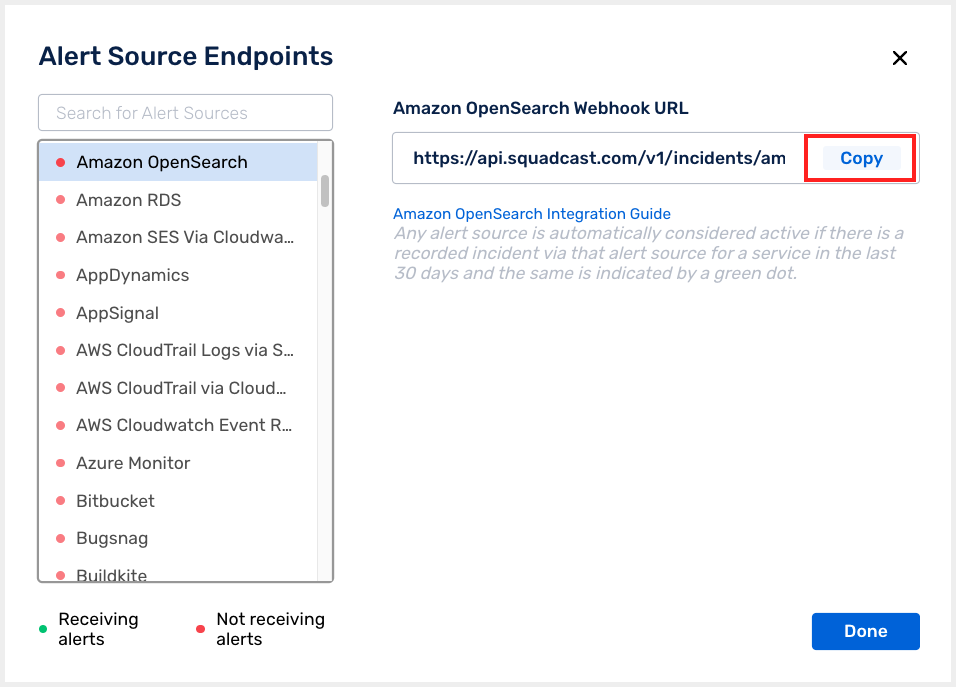
For an Alert Source to turn active (indicated by a green dot - Receiving alerts against the name of the Alert Source in the drop-down), you can either generate a test alert or wait for a real-time alert to be generated by the Alert Source.
An Alert Source is active if there is a recorded incident via that Alert Source for the Service in the last 30 days.
Create a Squadcast Webhook Integration in Amazon OpenSearch
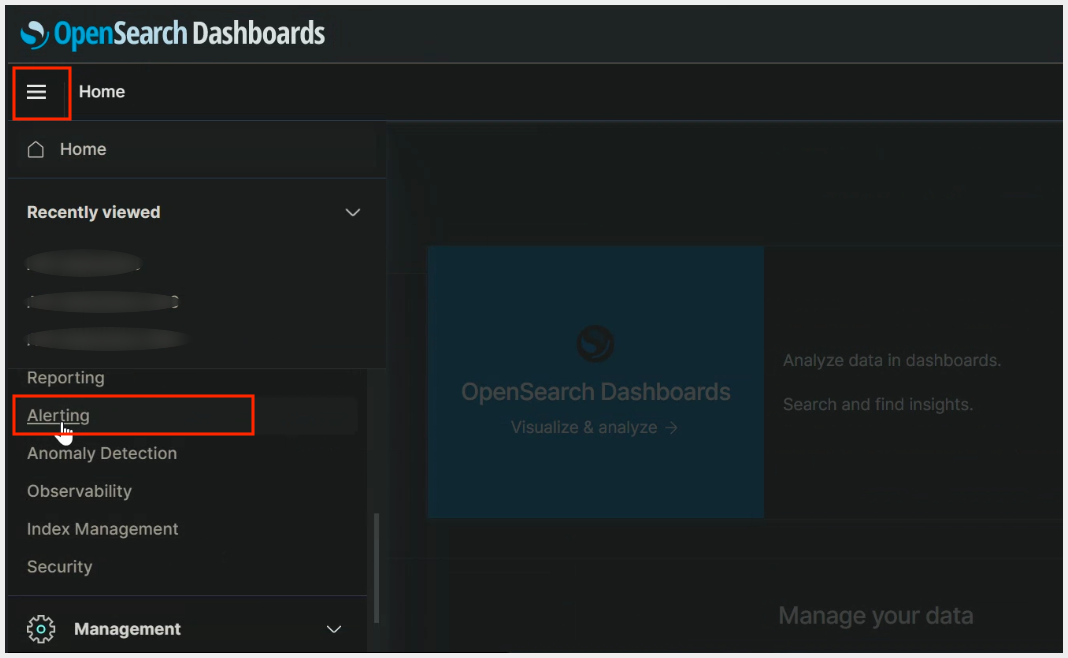
(1) Login to your Amazon OpenSearch dashboard and select Alerting
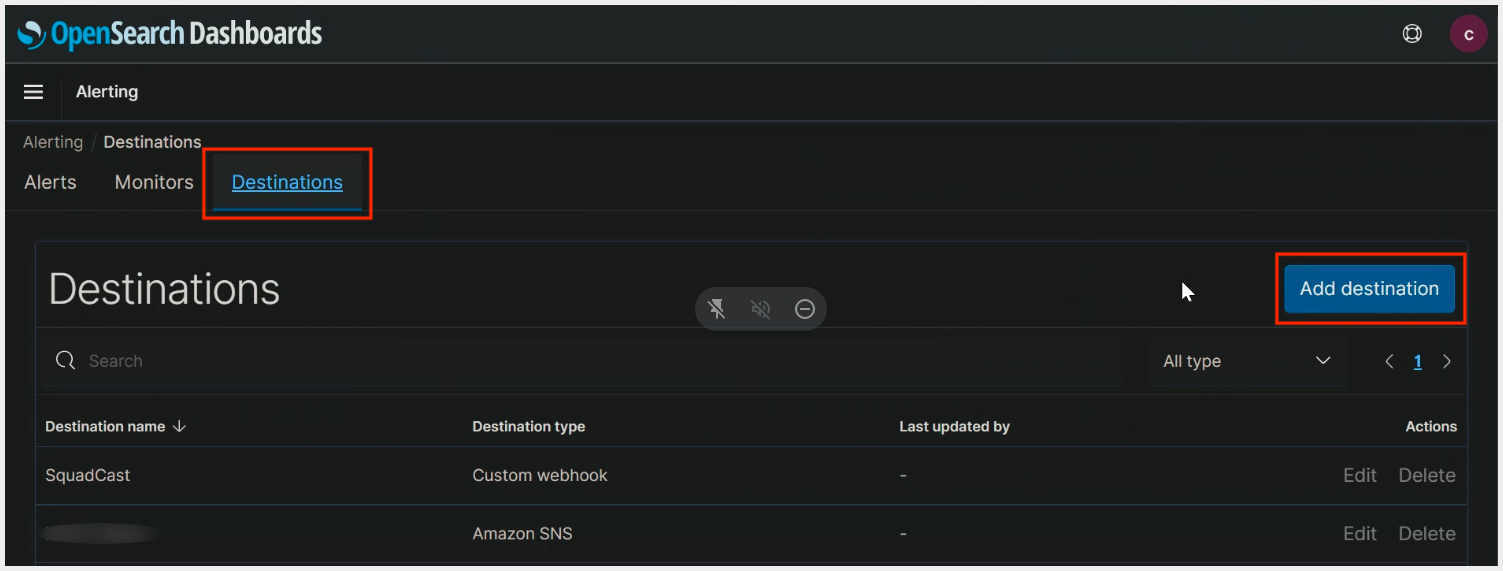
(2) (a) Navigate to Destinations and click on Add destination.
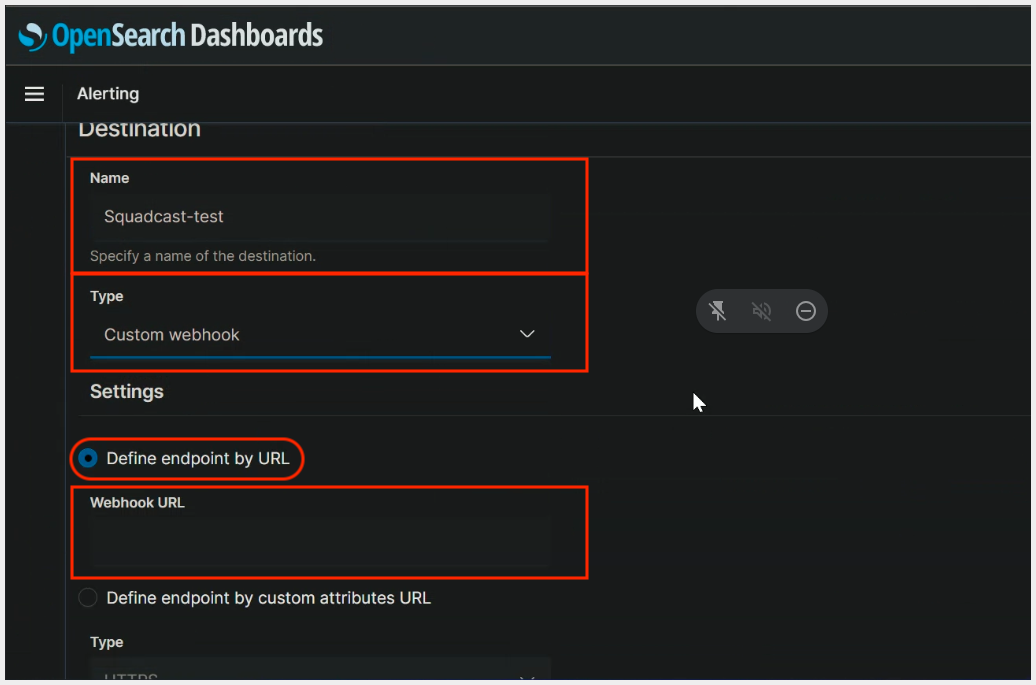
(b) Put in the Name, select Custom webhook as Type and under Settings, select Define endpoint by URL. Then paste the previously copied Squadcast Webhook URL in the placeholder for Webhook URL and click on Save
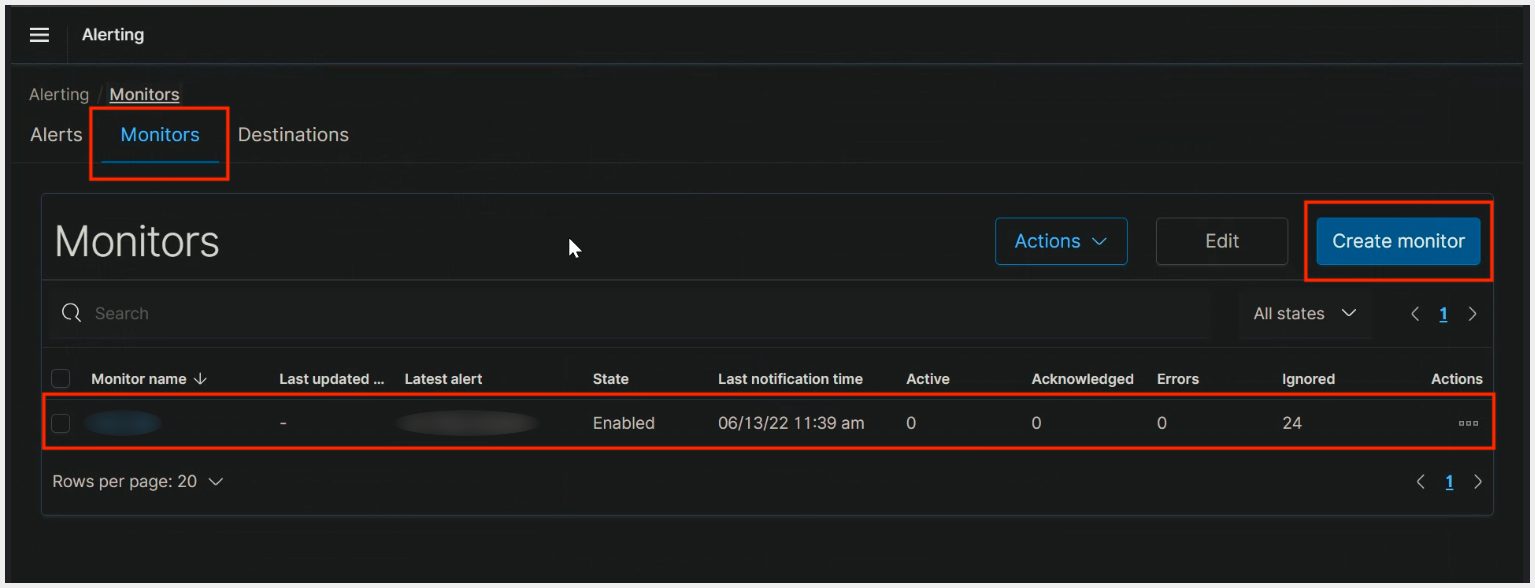
(3) (a) Under Alerting, navigate to Monitors. Then either click on Create Monitor or edit a pre-existing monitor. Click on Add Trigger

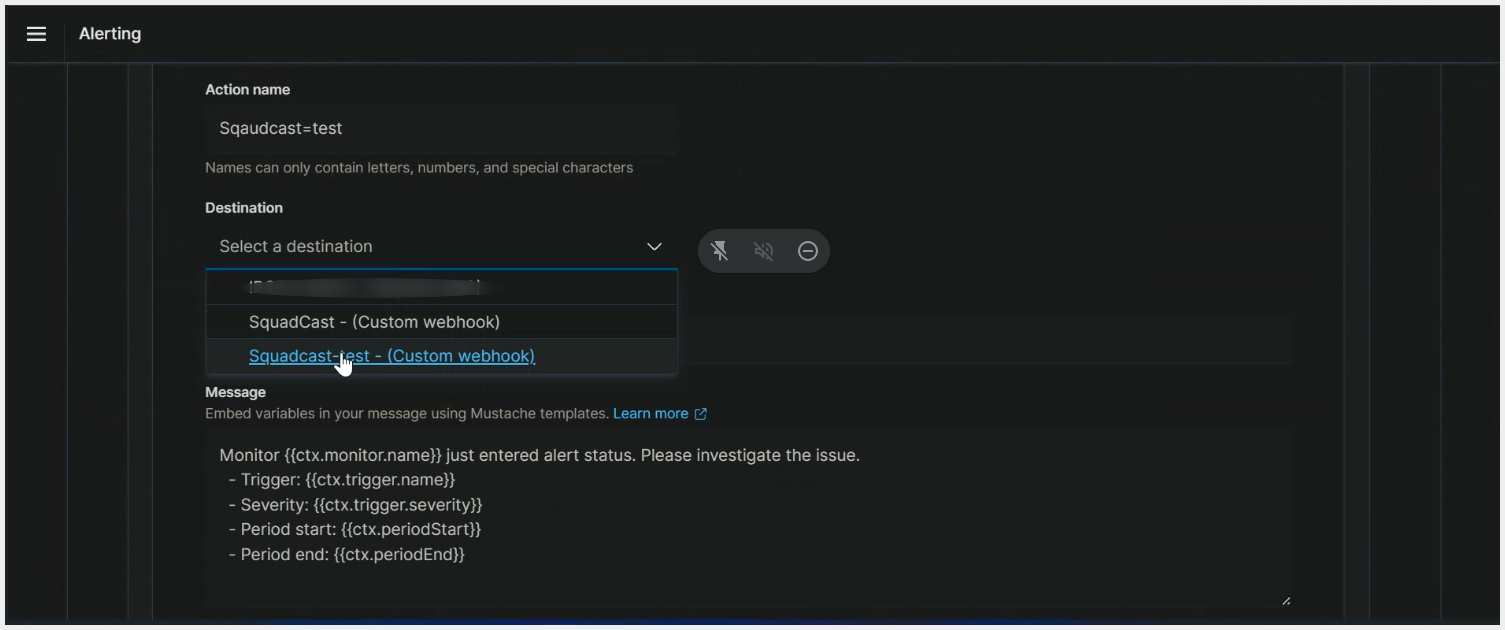
(b) Put in the Action name, select the previously created Destination. Paste the payload mentioned below under the Message box and save it
{
    "message" : "Monitor {{ctx.monitor.name}} just entered alert status. Please investigate the issue ",
    "trigger" : "Trigger: {{ctx.trigger.name}}",
    "severity" : "Severity: {{ctx.trigger.severity}}",
    "start" : "Period start: {{ctx.periodStart}}",
    "end" : "Period end: {{ctx.periodEnd}}"
}
Note: Custom User Defined Variables
Users can define custom variables under the Message box :
{ “custom” : { “key” : “value” , . . . , “key” : “value” } }
Replace the [key] & [value] with proper values and add at the end of the variables mentioned in Step 3 (b). This is how it might look like.
Eg. :
{
    "message" : "Monitor {{ctx.monitor.name}} just entered alert status. Please investigate the issue ",
    "trigger" : "Trigger: {{ctx.trigger.name}}",
    "severity" : "Severity: {{ctx.trigger.severity}}",
    "start" : "Period start: {{ctx.periodStart}}",
    "end" : "Period end: {{ctx.periodEnd}}",
    "custom" : {
        "trigger" : "Trigger: {{ctx.trigger.name}}",
        "severity" : "Severity: {{ctx.trigger.severity}}",
        "start" : "Period start: {{ctx.periodStart}}",
        "end" : "Period end: {{ctx.periodEnd}}"
    }
}
That’s it, you are good to go! Your Amazon OpenSearch integration is now complete. Whenever Amazon OpenSearch fires an alert, an incident will be created in Squadcast for it.