Zabbix
This document will help you integrate Zabbix with Squadcast.
Zabbix is a mature, enterprise-level platform that allows you to monitor large-scale IT environments comprising servers, networks, applications and services. Route detailed monitoring alerts from Zabbix to the right users in Squadcast.
How to integrate Zabbix with Squadcast
In Squadcast: Using Zabbix as an Alert Source
(1) From the navigation bar on the left, select Services. Pick the applicable Team from the Team-picker on the top. Next, click on Alert Sources for the applicable Service
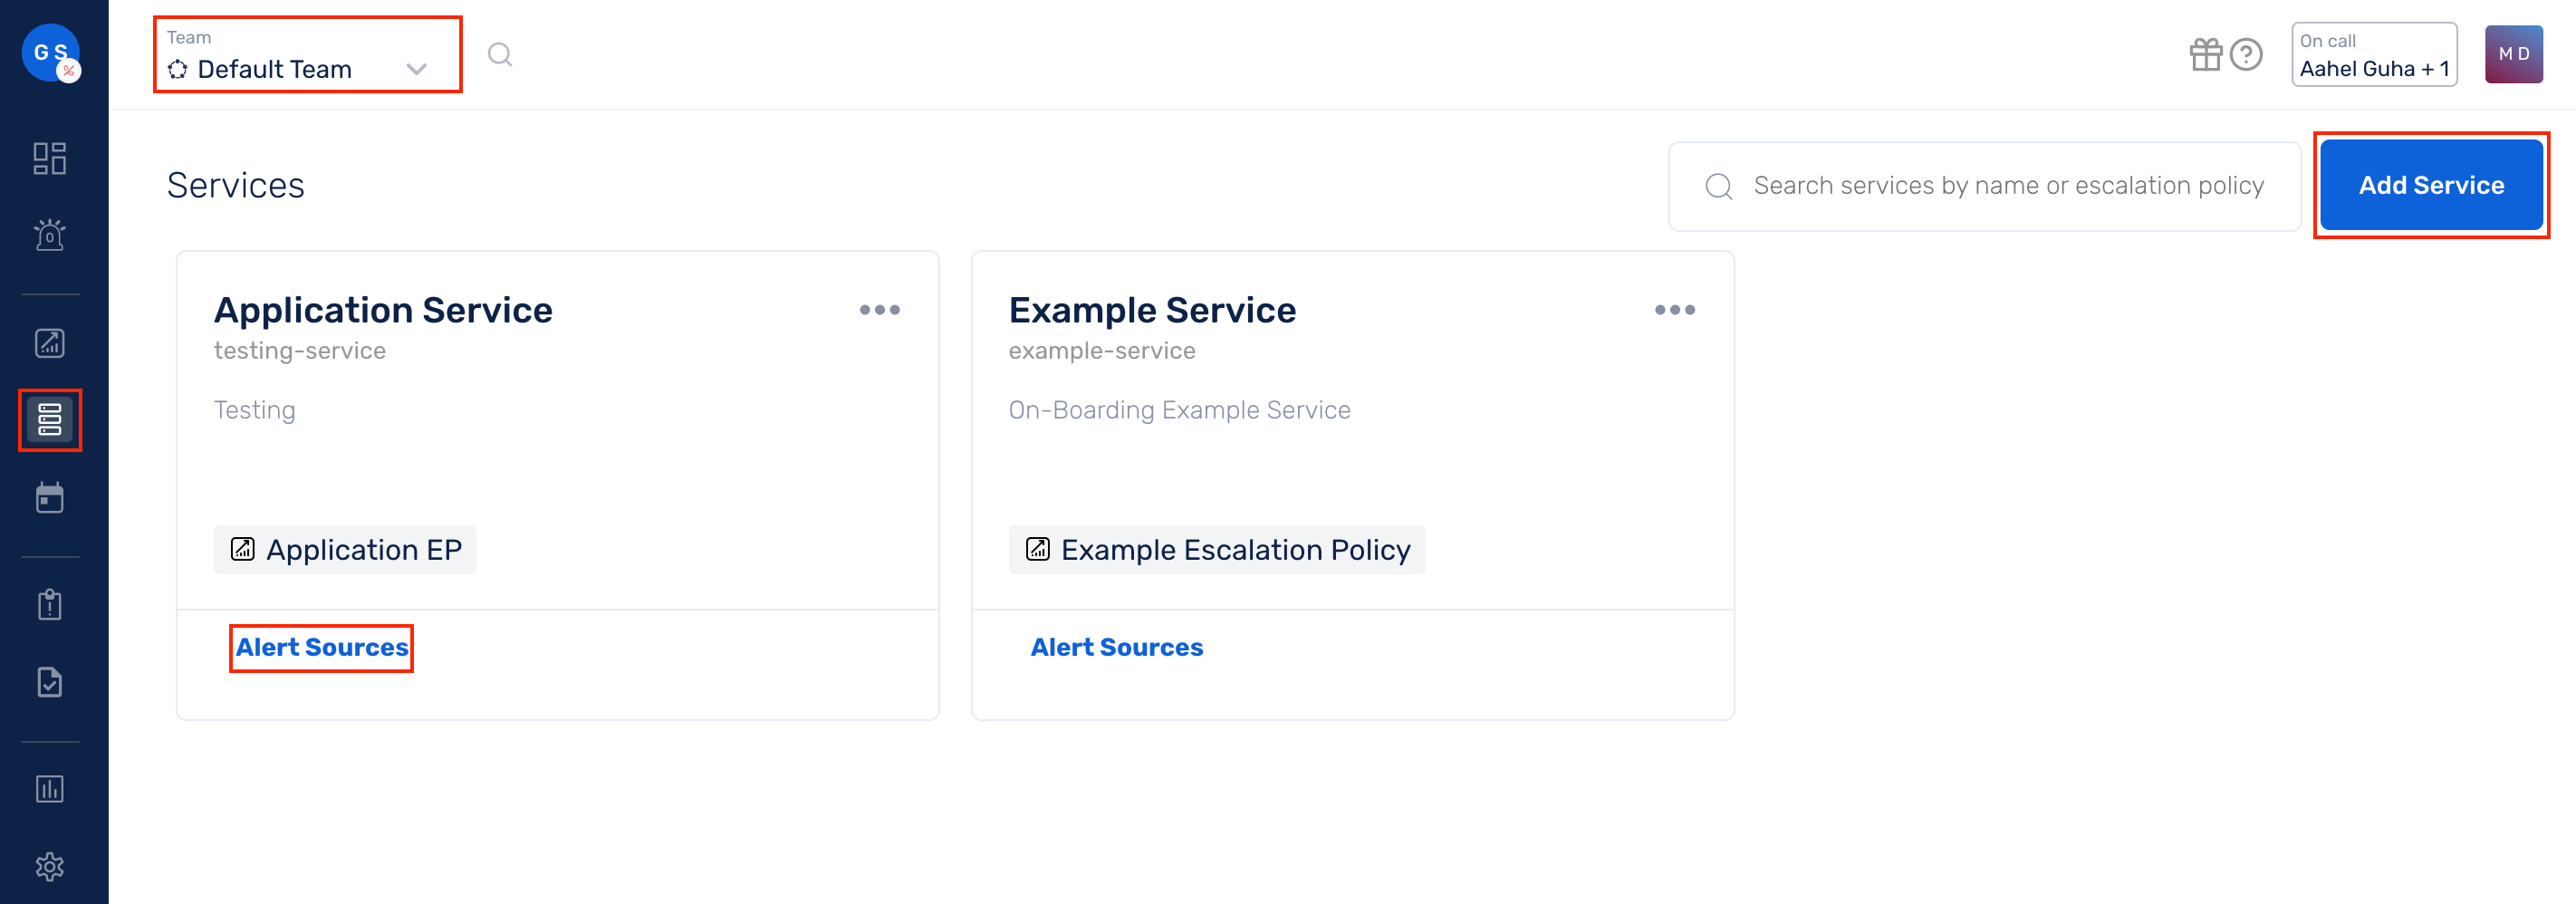
(2) Search for Zabbix from the Alert Source drop-down and copy the Webhook URL
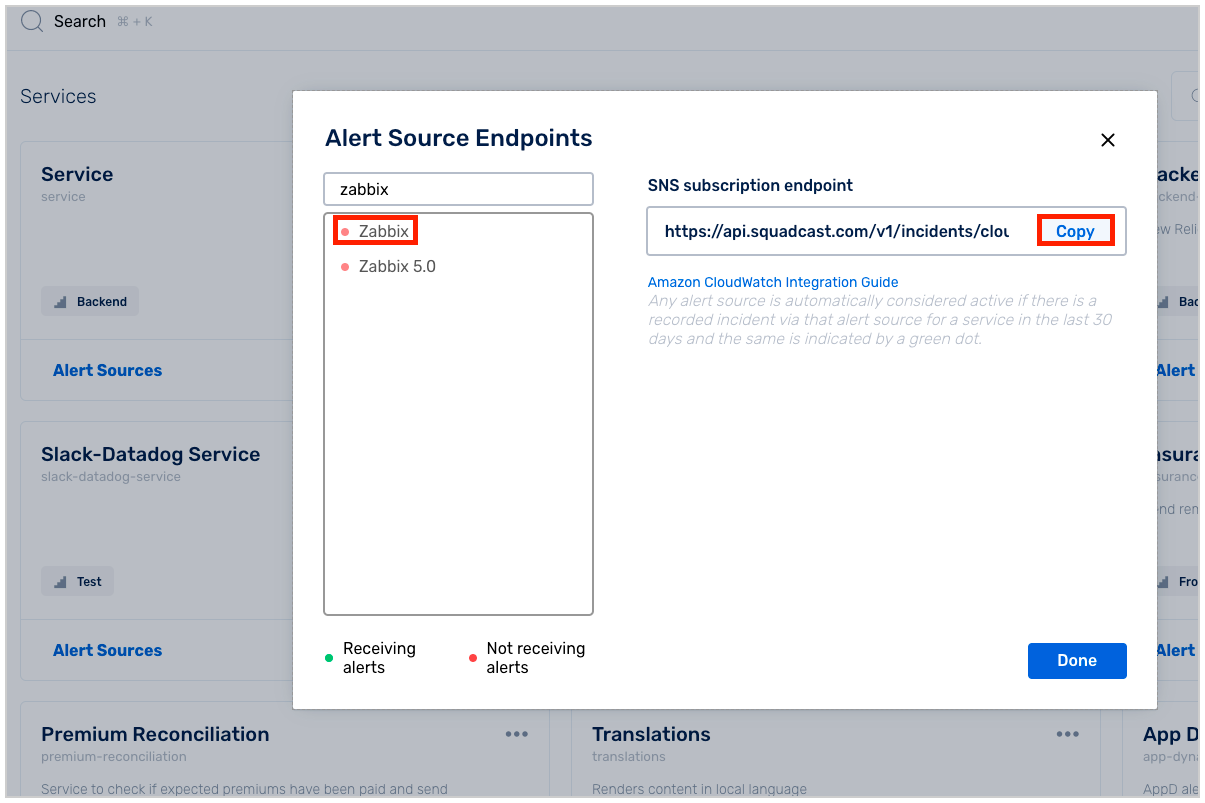
For an Alert Source to turn active (indicated by a green dot - Receiving alerts against the name of the Alert Source in the drop-down), you can either generate a test alert or wait for a real-time alert to be generated by the Alert Source.
An Alert Source is active if there is a recorded incident via that Alert Source for the Service in the last 30 days.
In Zabbix: Create a Squadcast Webhook
(1) Navigate to Zabbix’s AlertScriptsPath directory. This is usually /etc/zabbix/alert.d or /usr/local/share/zabbix/alertscripts.
Check your zabbix_server.conf file to see how this option is configured.
(2) In this directory, run the following command:
sudo wget https://raw.githubusercontent.com/squadcastHub/squadcast-zabbix-script/master/sq-zabbix.py
Once the file is downloaded, ensure that it has executable permissions for your Zabbix user. If not then please provide the same using the following command:
chmod +x sq-zabbix.py
The Squadcast script for Zabbix requires Python 3 to be installed on the machine running Zabbix. Any other version of Python (other than Python 3) will not support this script.
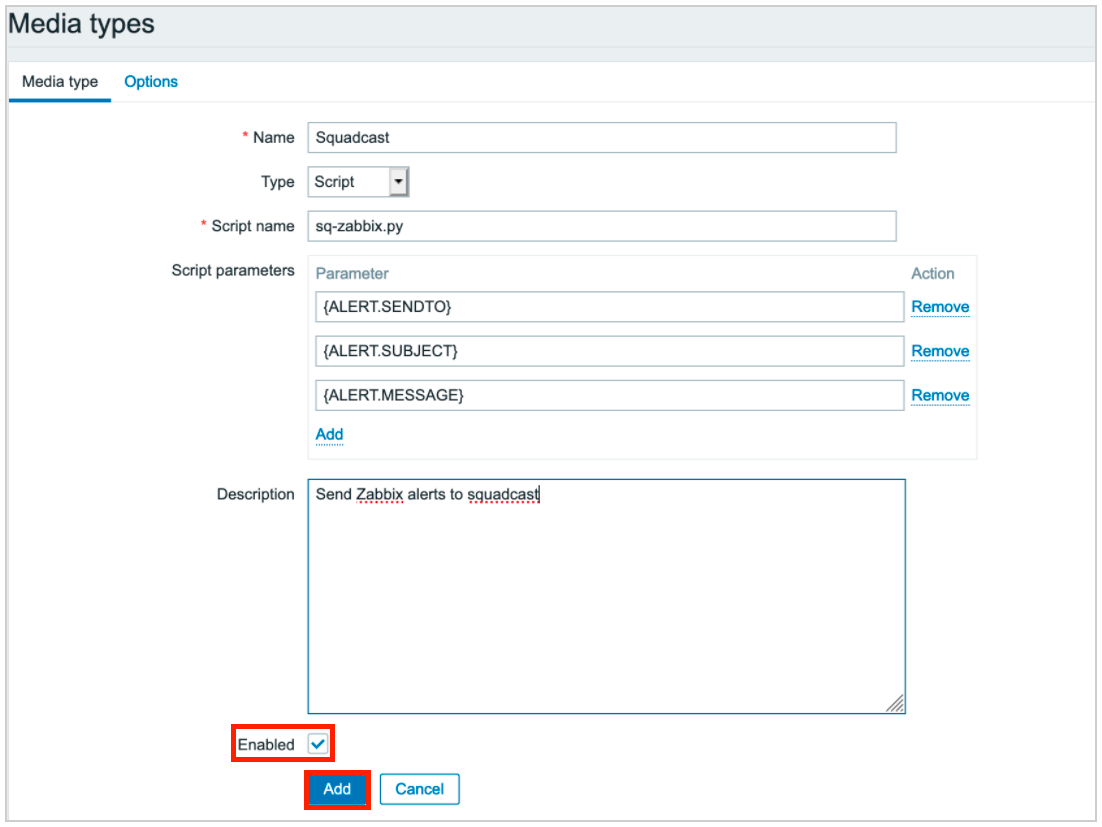
(3) Head over to the Administration tab and then click on Media types. Click on Create Media type to create a new Media Type with the following configuration
Name: Squadcast
AlertType: Script
Script Name: sq-zabbix.py
Script Parameters:
    {ALERT.SENDTO}
    {ALERT.SUBJECT}
    {ALERT.MESSAGE}
Additionally, ensure Enabled checkbox is selected and then click on Add
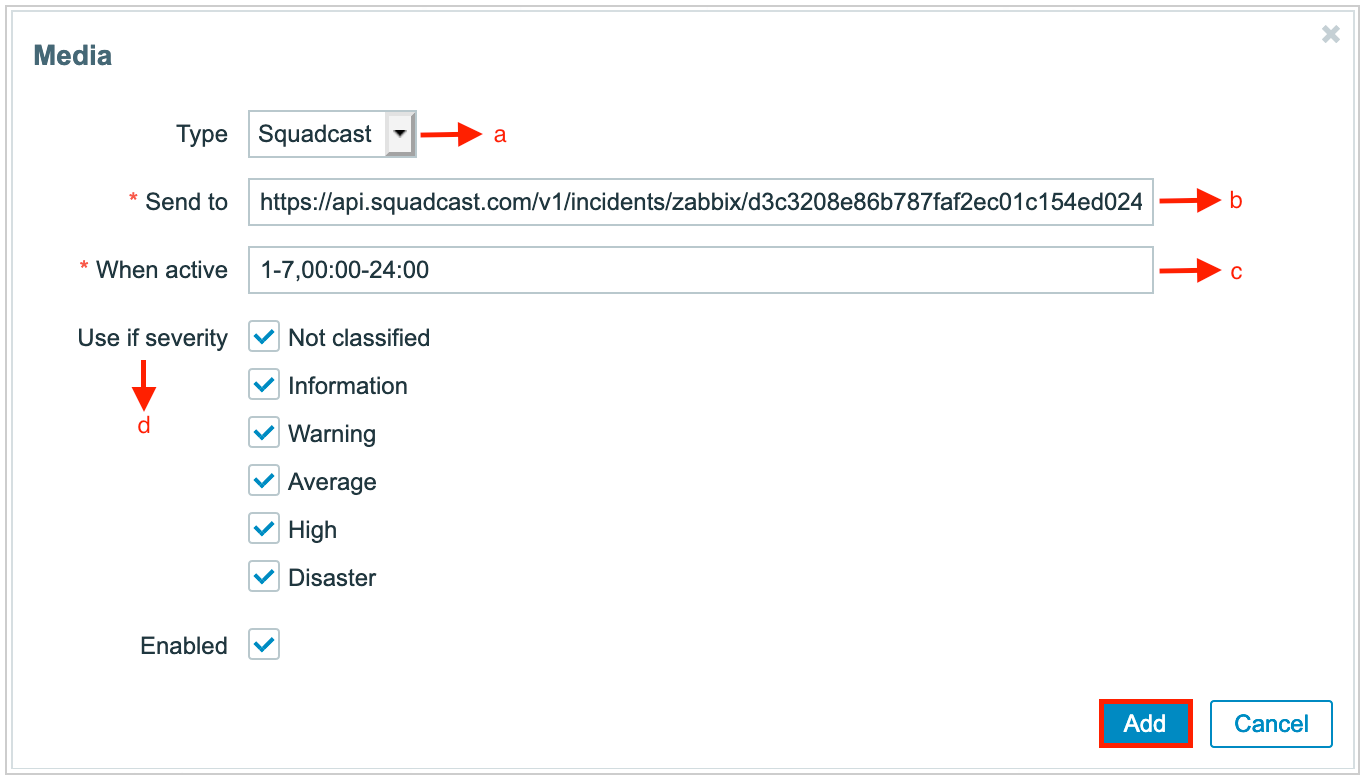
(4) Now you can add this Media Type to any User/s of Zabbix. To do so, navigate to Administration tab and select Users from the drop-down. Here, select Media tab and click on Add
- Type: Either pick Squadcast or add a name, such as Squadcast
- Send to: Paste the copied Zabbix Webhook URL from Squadcast
- When active: Specify suitable values
- Use if severity: Select appropriate checkboxes
- Click on Add to save the Media for the User
(5) Make sure you click on Update button in the Media page to save these details

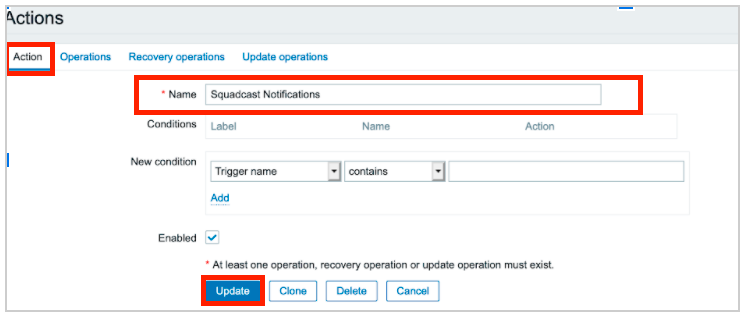
(6) Navigate to the Configuration tab and click on Actions. Click on Create Action and enter a meaningful name, such as Squadcast Notifications
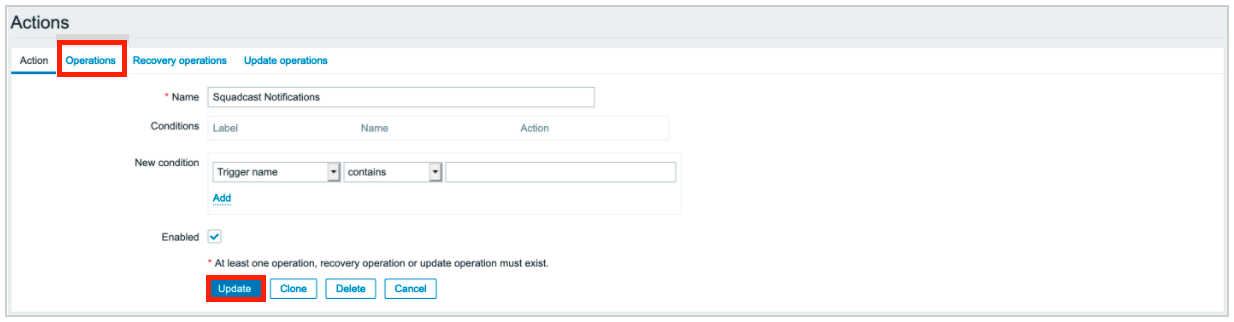
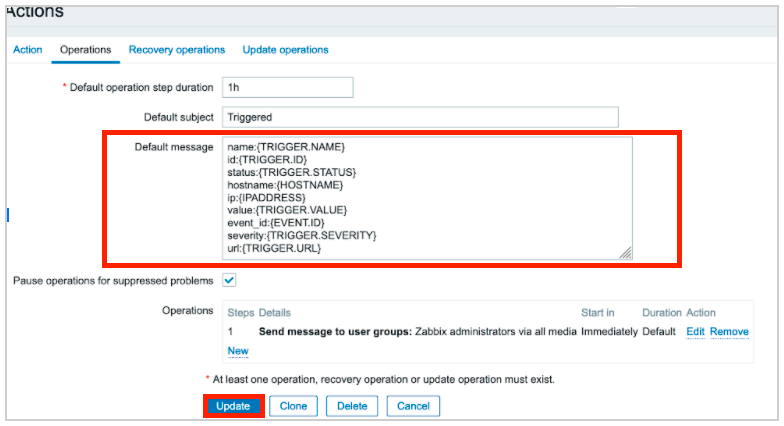
(7) Switch to Operations” tab on the same page and configure the parameters as per your requirements
Copy-paste the following in the ‘Default Message’ field:
name:{TRIGGER.NAME}
id:{TRIGGER.ID}
status:{TRIGGER.STATUS}
hostname:{HOSTNAME}
ip:{IPADDRESS}
value:{TRIGGER.VALUE}
event_id:{EVENT.ID}
severity:{TRIGGER.SEVERITY}
url:{TRIGGER.URL}
Note: Custom User Defined Incident Message
Users can define custom Incident Message under Default Message. The variable can be added in the format mentioned below :
CustomIncidentMessage:[IncidentMessage]
Replace the [IncidentMessage] with proper values and add at the end of the variables mentioned in Step 7. This is how it might look like :
name:{TRIGGER.NAME}
id:{TRIGGER.ID}
status:{TRIGGER.STATUS}
hostname:{HOSTNAME}
ip:{IPADDRESS}
value:{TRIGGER.VALUE}
event_id:{EVENT.ID}
severity:{TRIGGER.SEVERITY}
url:{TRIGGER.URL}
CustomIncidentMessage:{TRIGGER.NAME}
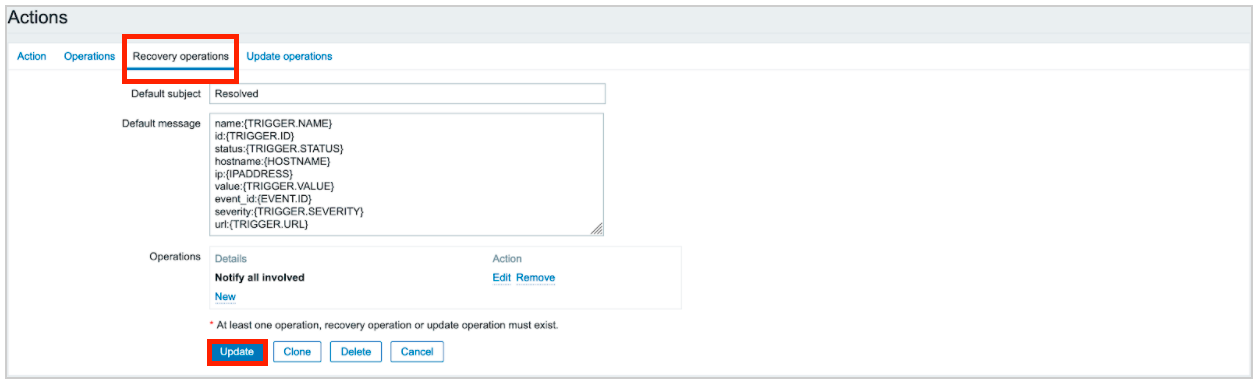
(8) Similarly, switch to Recovery operations tab and configure the following: Copy-paste the following in the ‘Default Message’ field:
name:{TRIGGER.NAME}
id:{TRIGGER.ID}
status:{TRIGGER.STATUS}
hostname:{HOSTNAME}
ip:{IPADDRESS}
value:{TRIGGER.VALUE}
event_id:{EVENT.ID}
severity:{TRIGGER.SEVERITY}
url:{TRIGGER.URL}
(9) Finally click on Add to save Squadcast Notifications
That’s it, our Zabbix integration is now good to go! Whenever Zabbix fires an alert, an incident is created in Squadcast for the same.
Q: If an alert gets resolved in Zabbix, does Zabbix send auto-resolve signals to Squadcast?
A: Yes, Zabbix sends alert auto-resolve signals to Squadcast, thus supporting auto-resolution of incidents in Squadcast.
The user whose media is configured to send alerts to Squadcast must belong to a user-group having read permission on the Host Group which needs to be monitored by Squadcast inorder to send the alerts.