Runbooks
Understanding Runbooks
A Runbook is a compilation of routine procedures and operations that are documented for reference while working on a critical incident. Sometimes, it can also be referred to as a Playbook.
Typically, organizations store their incident checklists in various places such as Google Docs, Notion, Confluence etc., and sometimes even stored in a physical notebook. Valuable time is lost in searching for these different checklists and following up on the list items while working on critical incidents.
In order to avoid delays, scrambling between multiple tools and tabs to find the right checklist, Squadcast brings to you Runbooks. This feature will help you access the relevant Runbook, associate it with incidents and assign tasks to relevant users.
Simple Runbooks are a checklist of tasks that need to be performed manually for an incident. These could either be procedures that need to be performed during the occurrence of a Sev1 incident, or technical/functional instructions to debug and fix a certain issue, along with the code that needs to be manually executed.
One can easily create Runbooks and use it as a reference once it is attached to an incident. Additionally, one can mark the progress against each step in the Runbook.
Note:
Simple Runbooks will be available for accounts in the Pro and Enterprise plans.
Creating Runbooks
RBAC Prerequisites
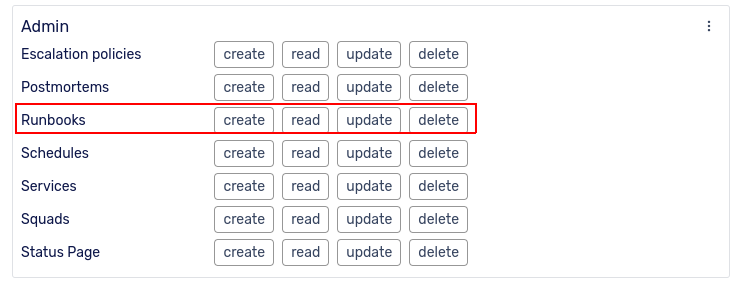
Runbooks are a Team-level entity and in order to create a Runbook, the user role should have the following Team-level Role permissions:
createpermission to create Runbooksreadpermission for viewing Runbooksupdatepermission for editing Runbooksdeletepermission for deleting Runbooks
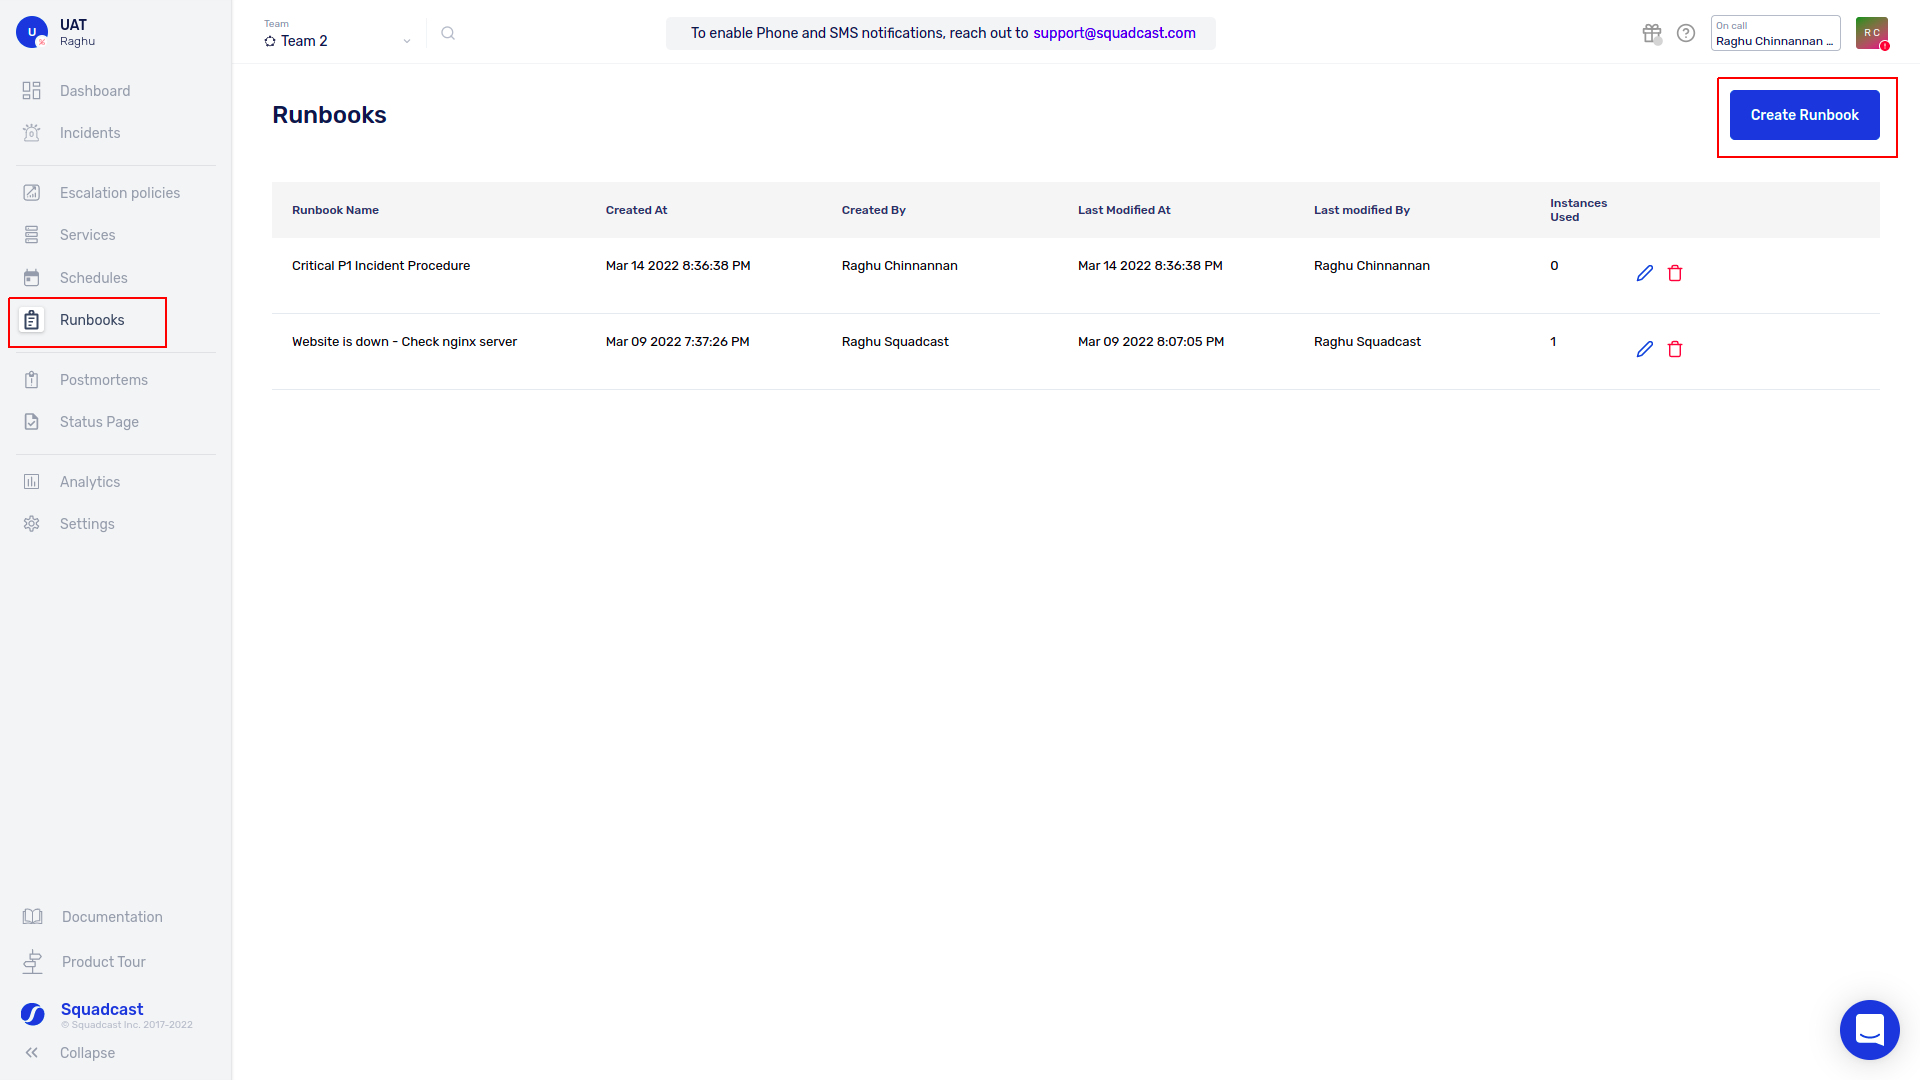
(1) To create a Runbook, the user needs to click on the Runbook menu on the left navigation bar and click on the Create Runbook button
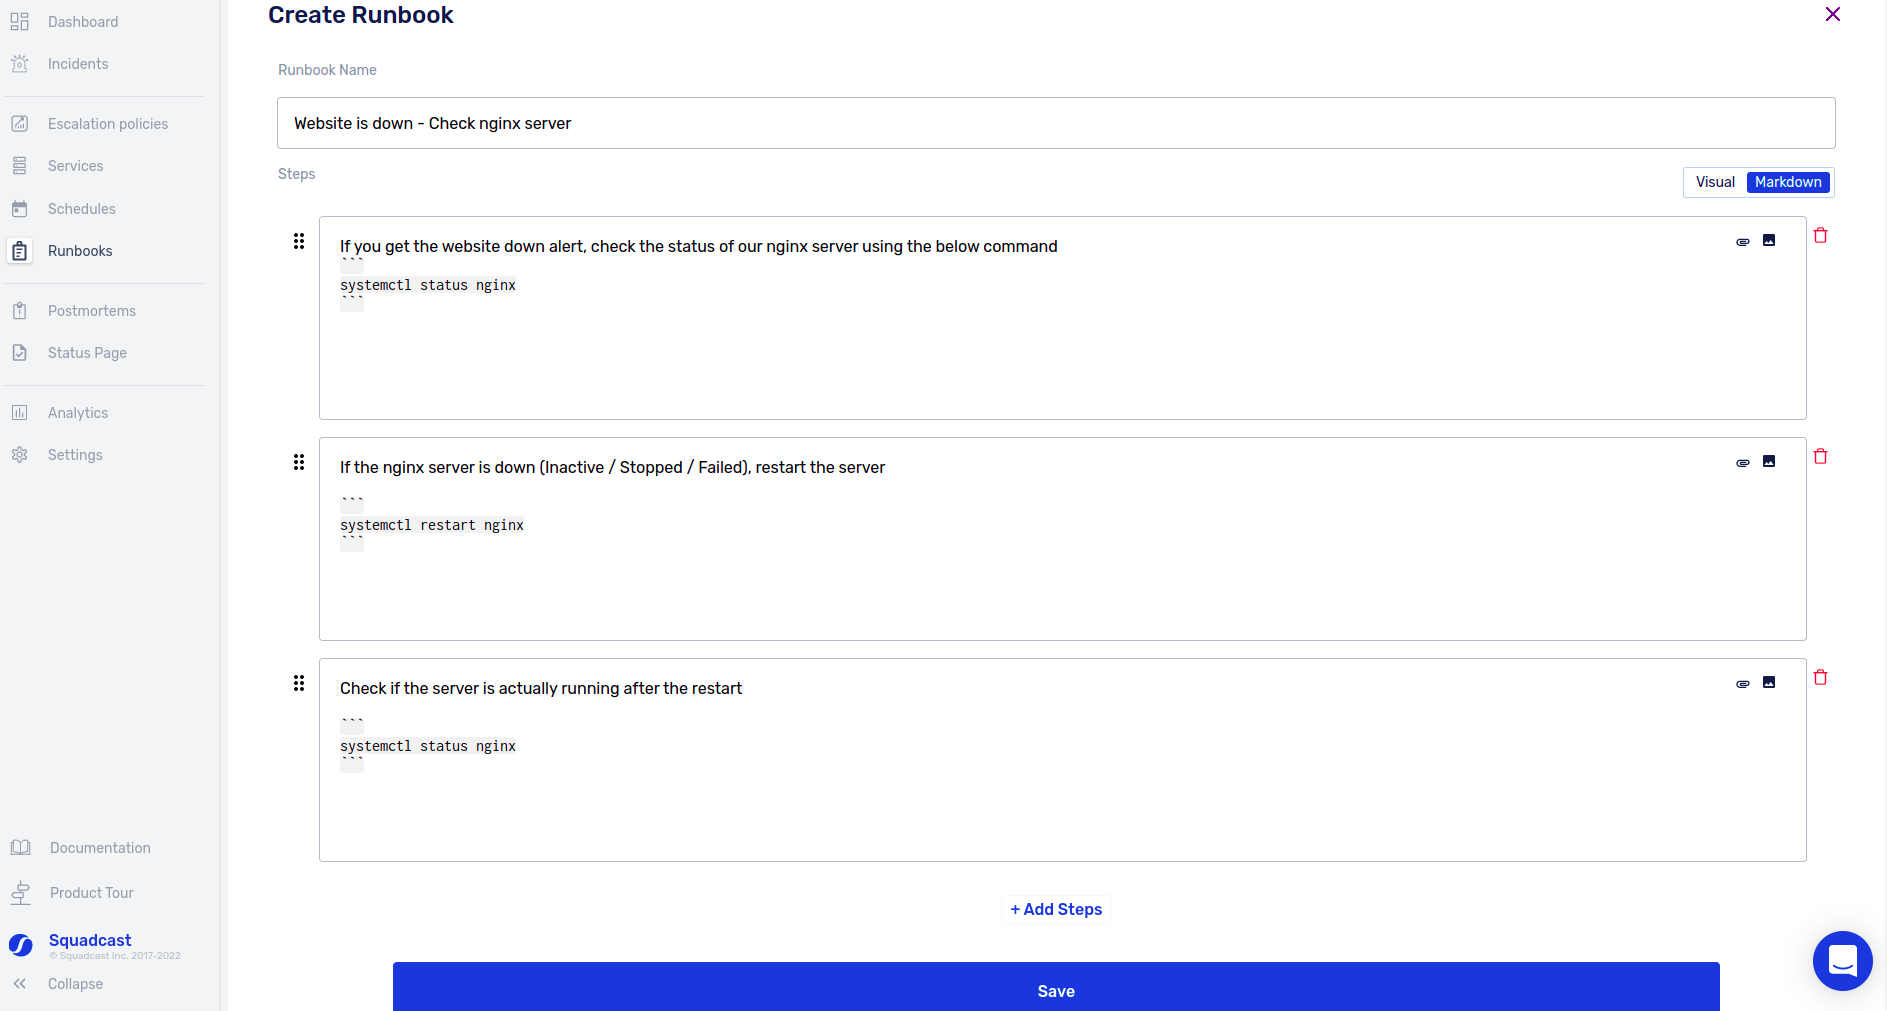
(2) In the Create Runbook page:
- Enter a Name for the Runbook
- Start adding steps for the Runbook by clicking on the + Add Step button
You can add as many steps as you like. Every step supports Markdown, hence you can use Markdown formatting features like Code Blocks, Bold, Italic, Ordered & Unordered List, Images & Links. You can manually upload images and attachments as well.
Although you can add all the series of actions within a single step, we recommend you add each action as a separate step. It would be helpful to mark the progress of each step by checking it done.
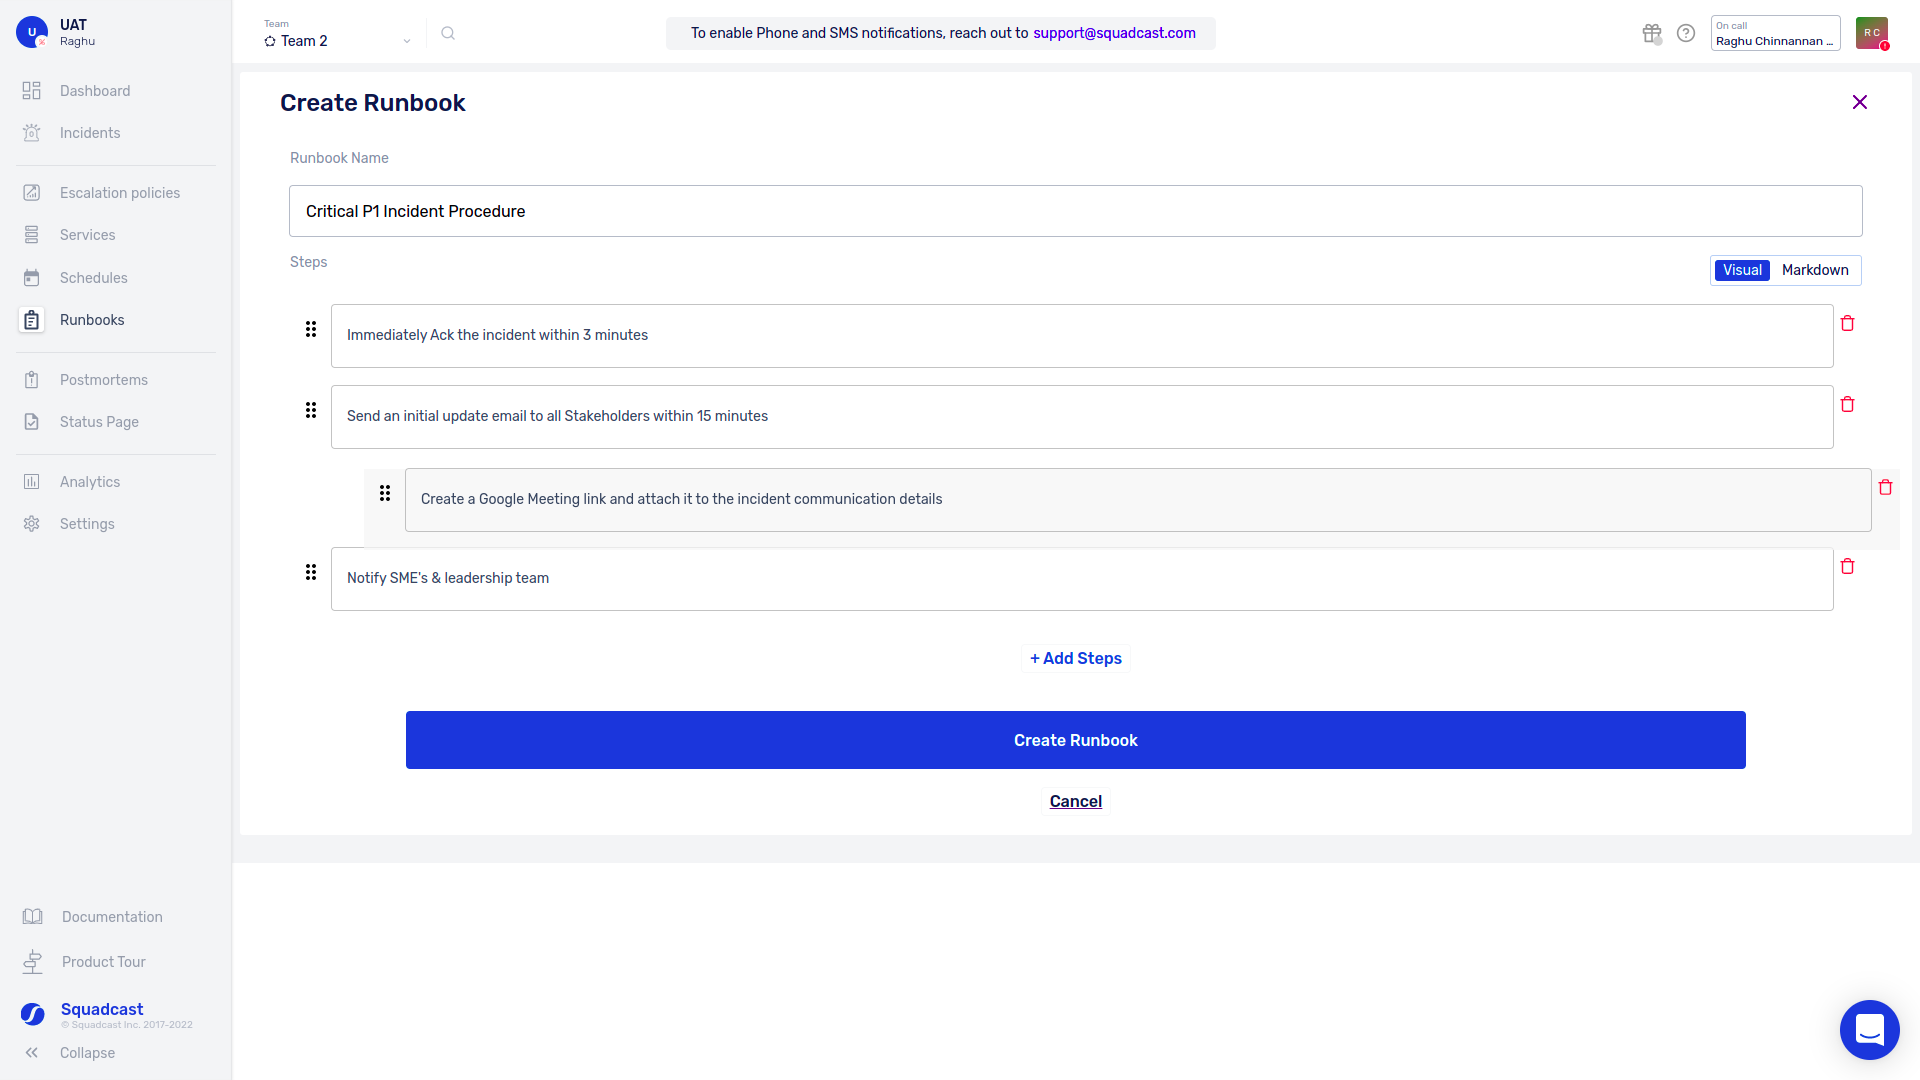
You can switch between the Edit mode & View mode (Preview) by using the Visual/Markdown option. You can also drag & drop each step to rearrange their order.
After adding all the details, click on the Save button and the Runbook is created.
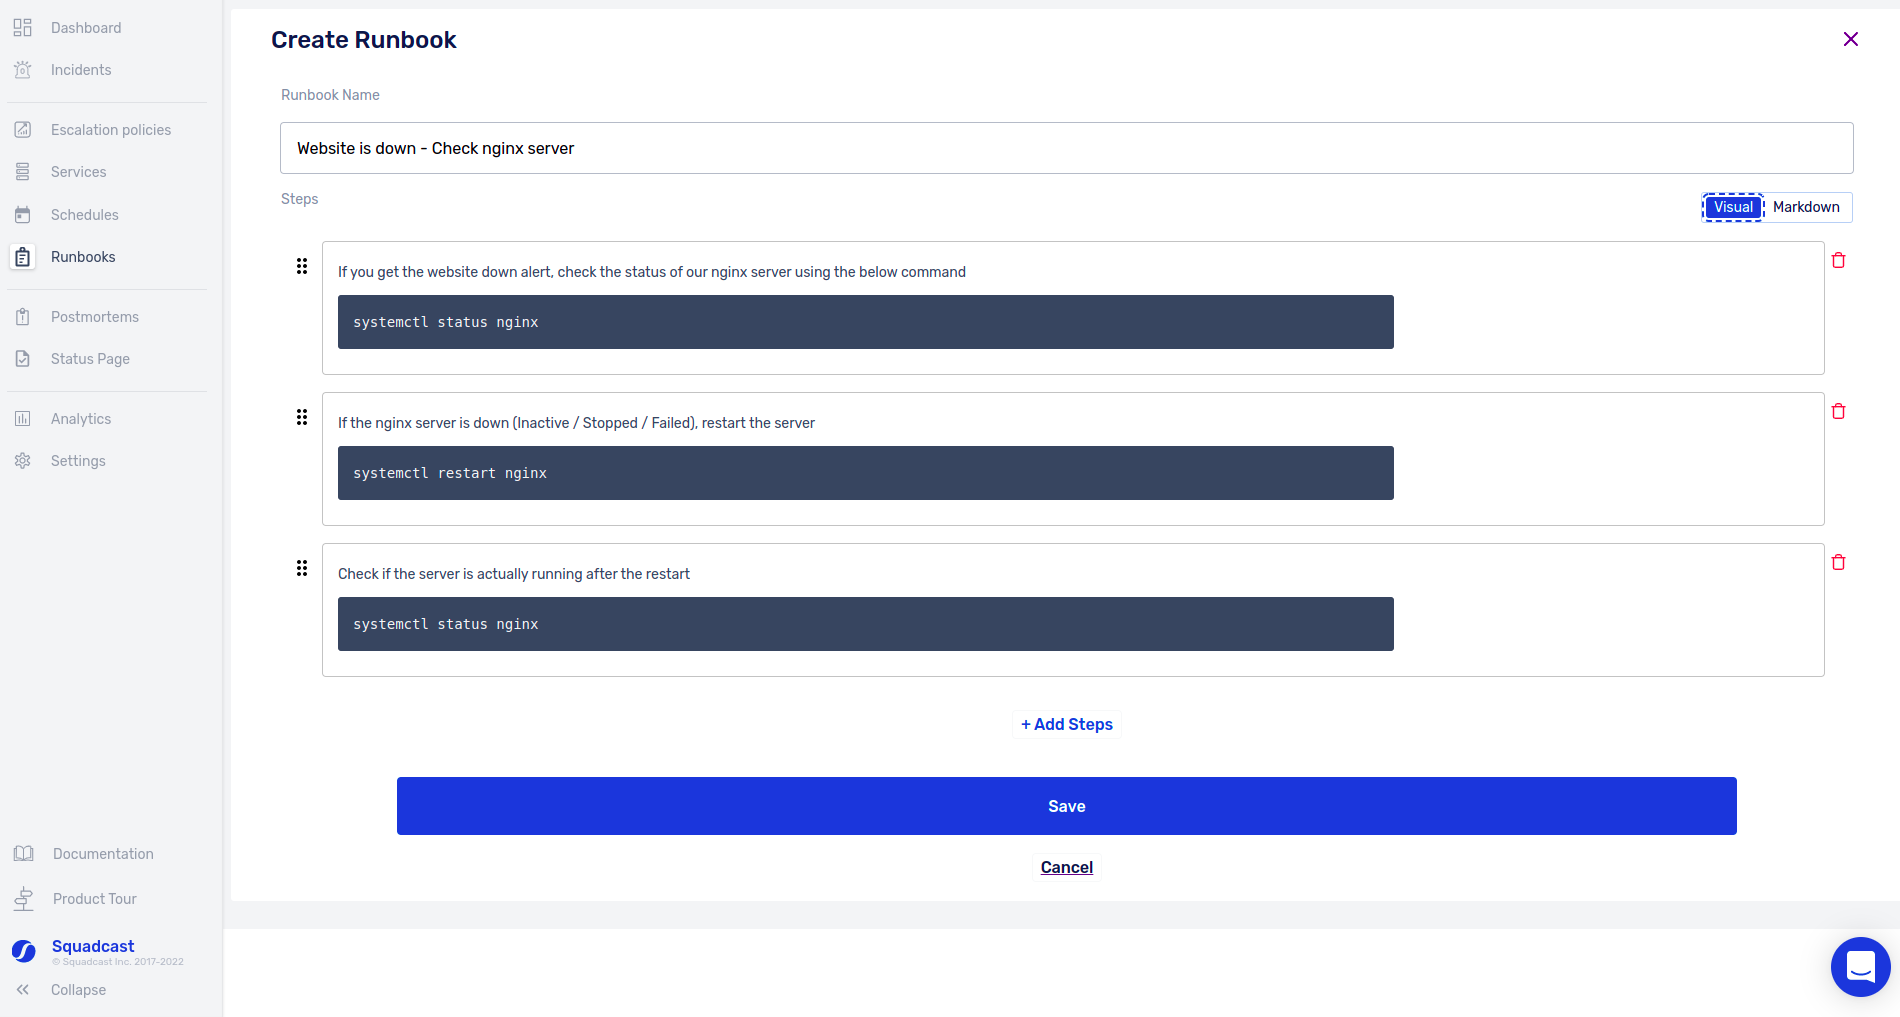
Once created, you can view, edit or delete an existing Runbook.
Note:
The Runbooks created here act as a template and any update to the Runbook will only get applied to subsequent incidents and not to any previously attached incidents.
Attaching Runbooks to Incidents
(1) Open an incident and click on the Runbooks & Tasks tab and then click on the Attach Runbook option
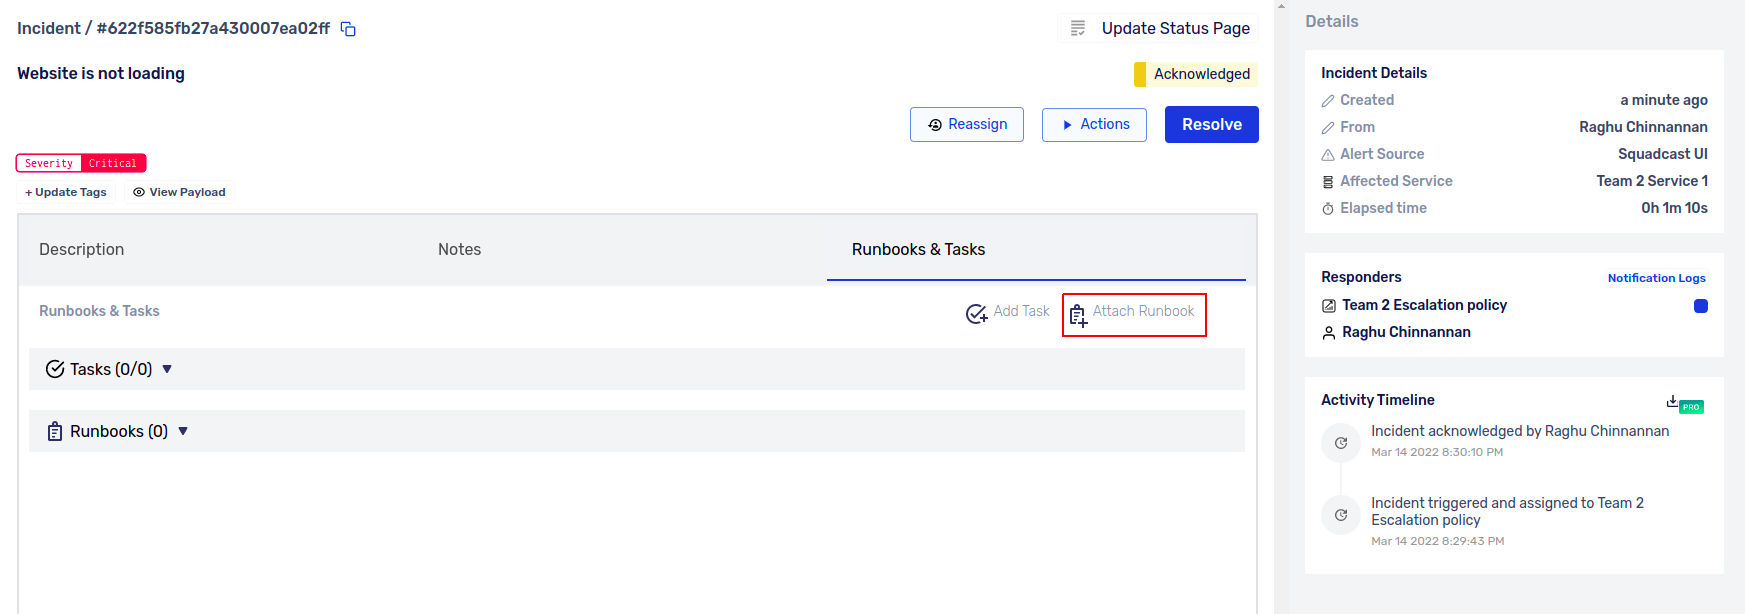
(2) Select the Runbook(s) that you want attached to the incident and click on the final Attach Runbooks button

You have the option to attach more than one Runbook to an incident.
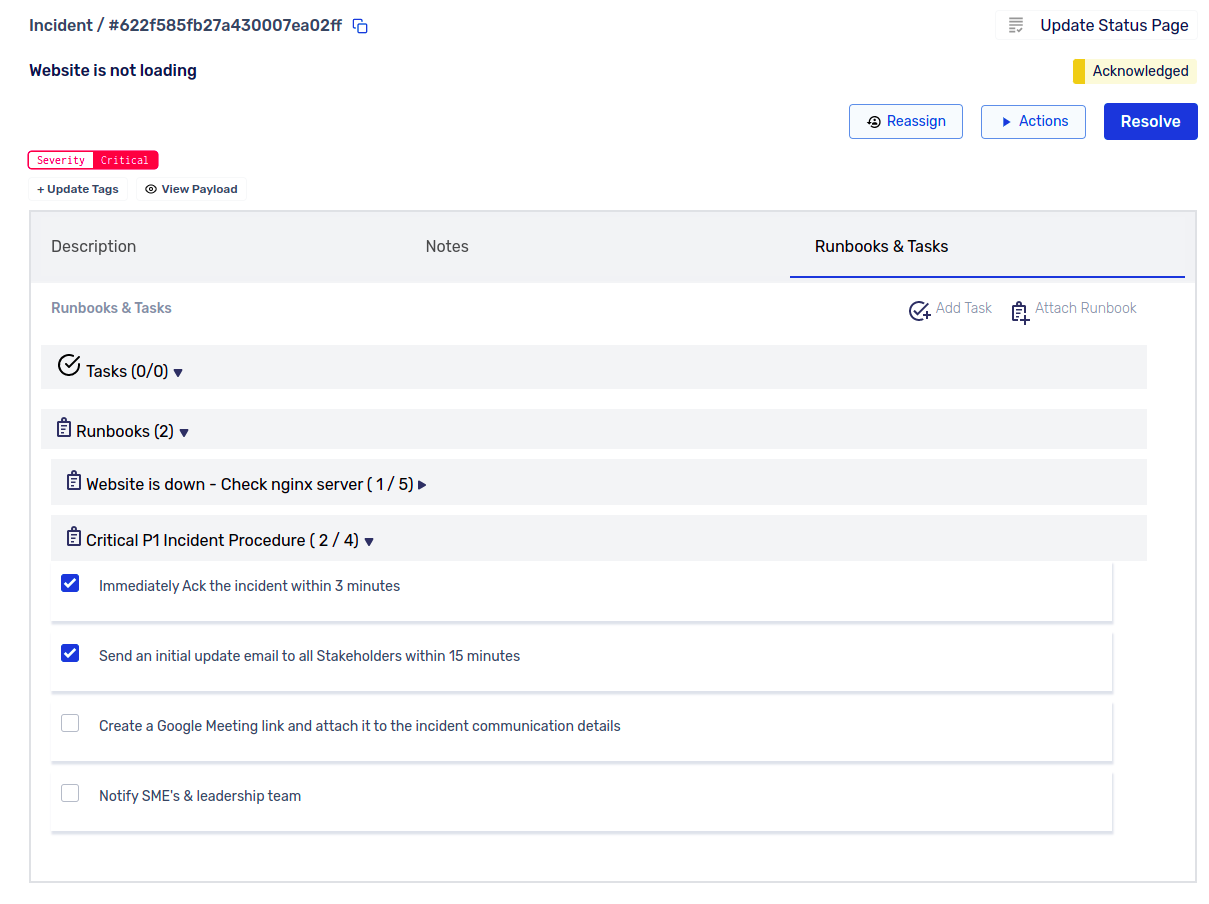
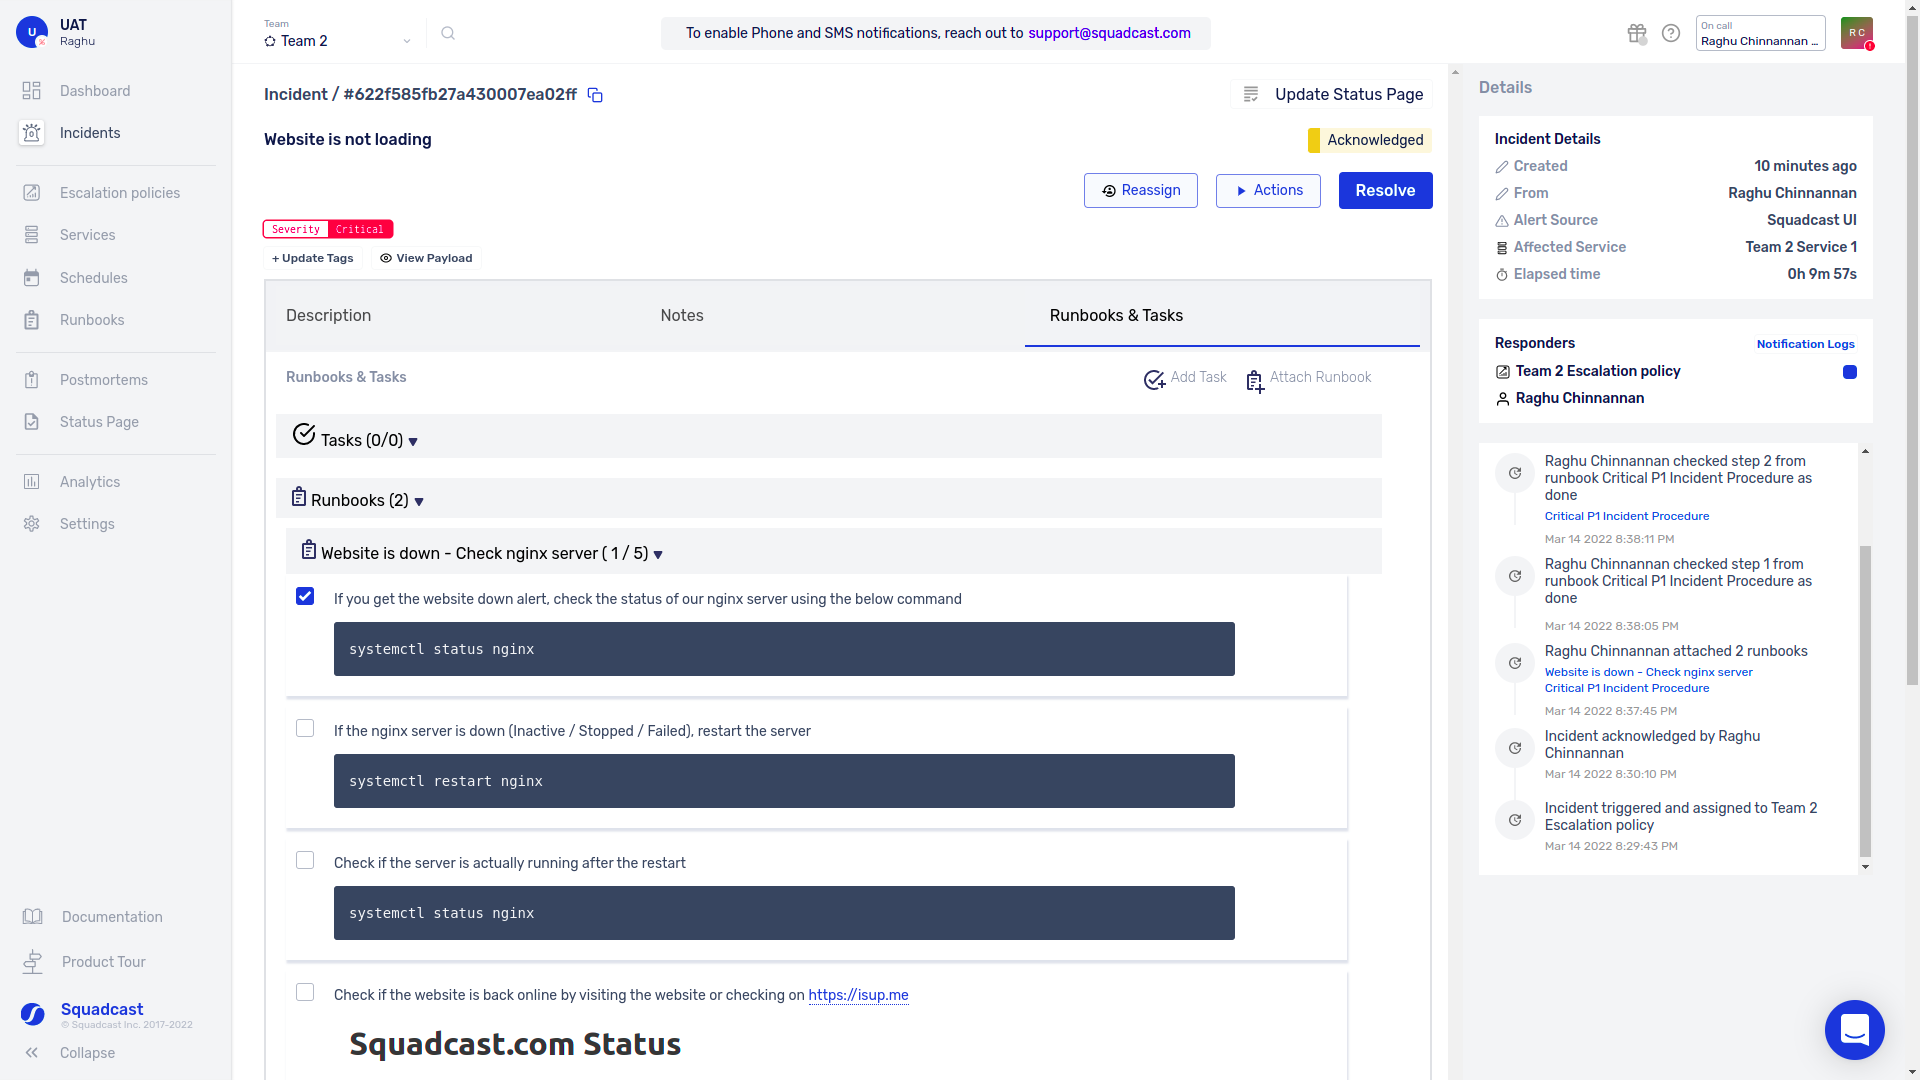
(3) The Runbook will be attached and listed. One can then follow the Runbook and perform the steps. They can also mark the completion of each step by checking the checkbox for each step
Note:
Every action on a Runbook, such as adding a Runbook, completing a step - all of it gets recorded in the Incident Timeline automatically.
Incident Tasks
Tasks are instructions or to-dos for other team members, or even follow-up tasks for an incident. The ability to have tasks associated with an incident comes in handy for critical incidents where most often than not, there would be a list of tasks that need to be completed even post incident closure, to ensure final fixes are in place.
Creating Tasks
(1) To create a task, click on the Add Task option under the Runbooks & Tasks tab
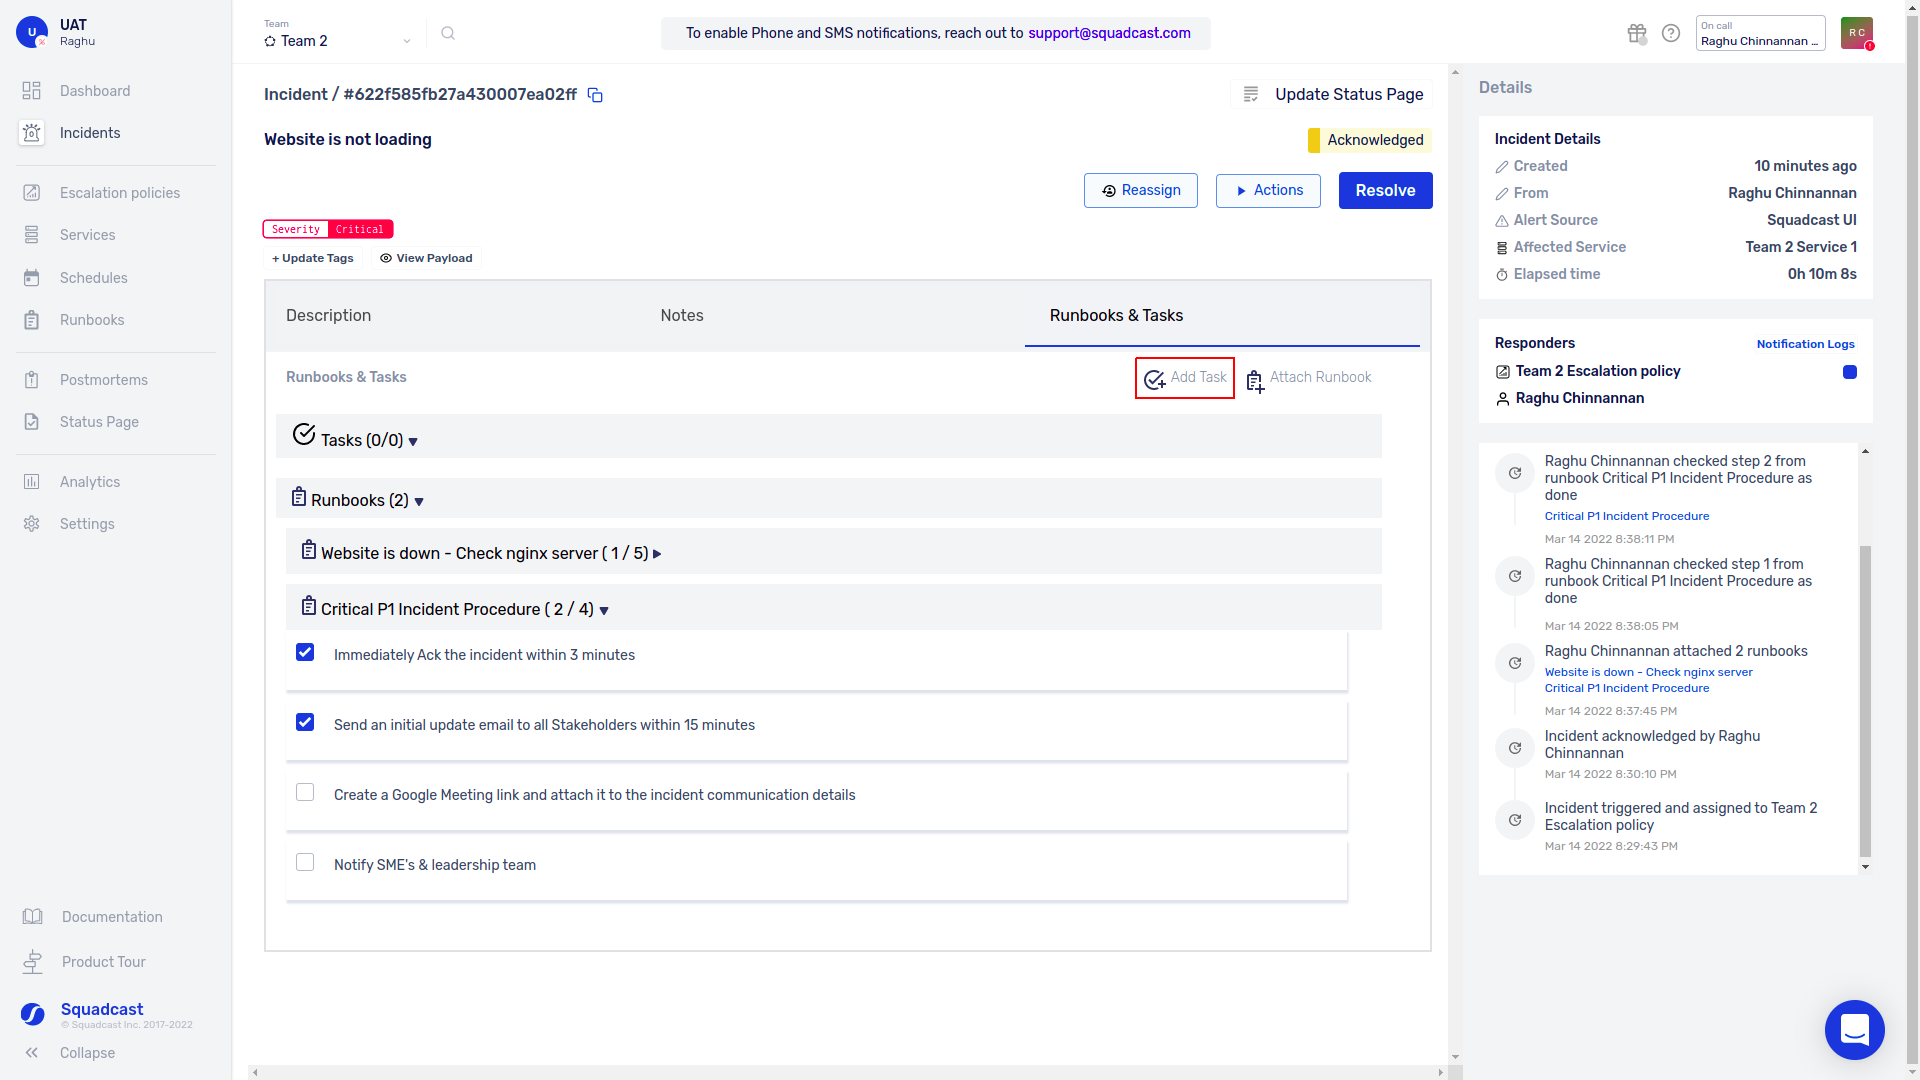
(2) Here, enter the details of the task. You can use Markdown formatting for it. Then, click on the final Add Task button to generate your task list

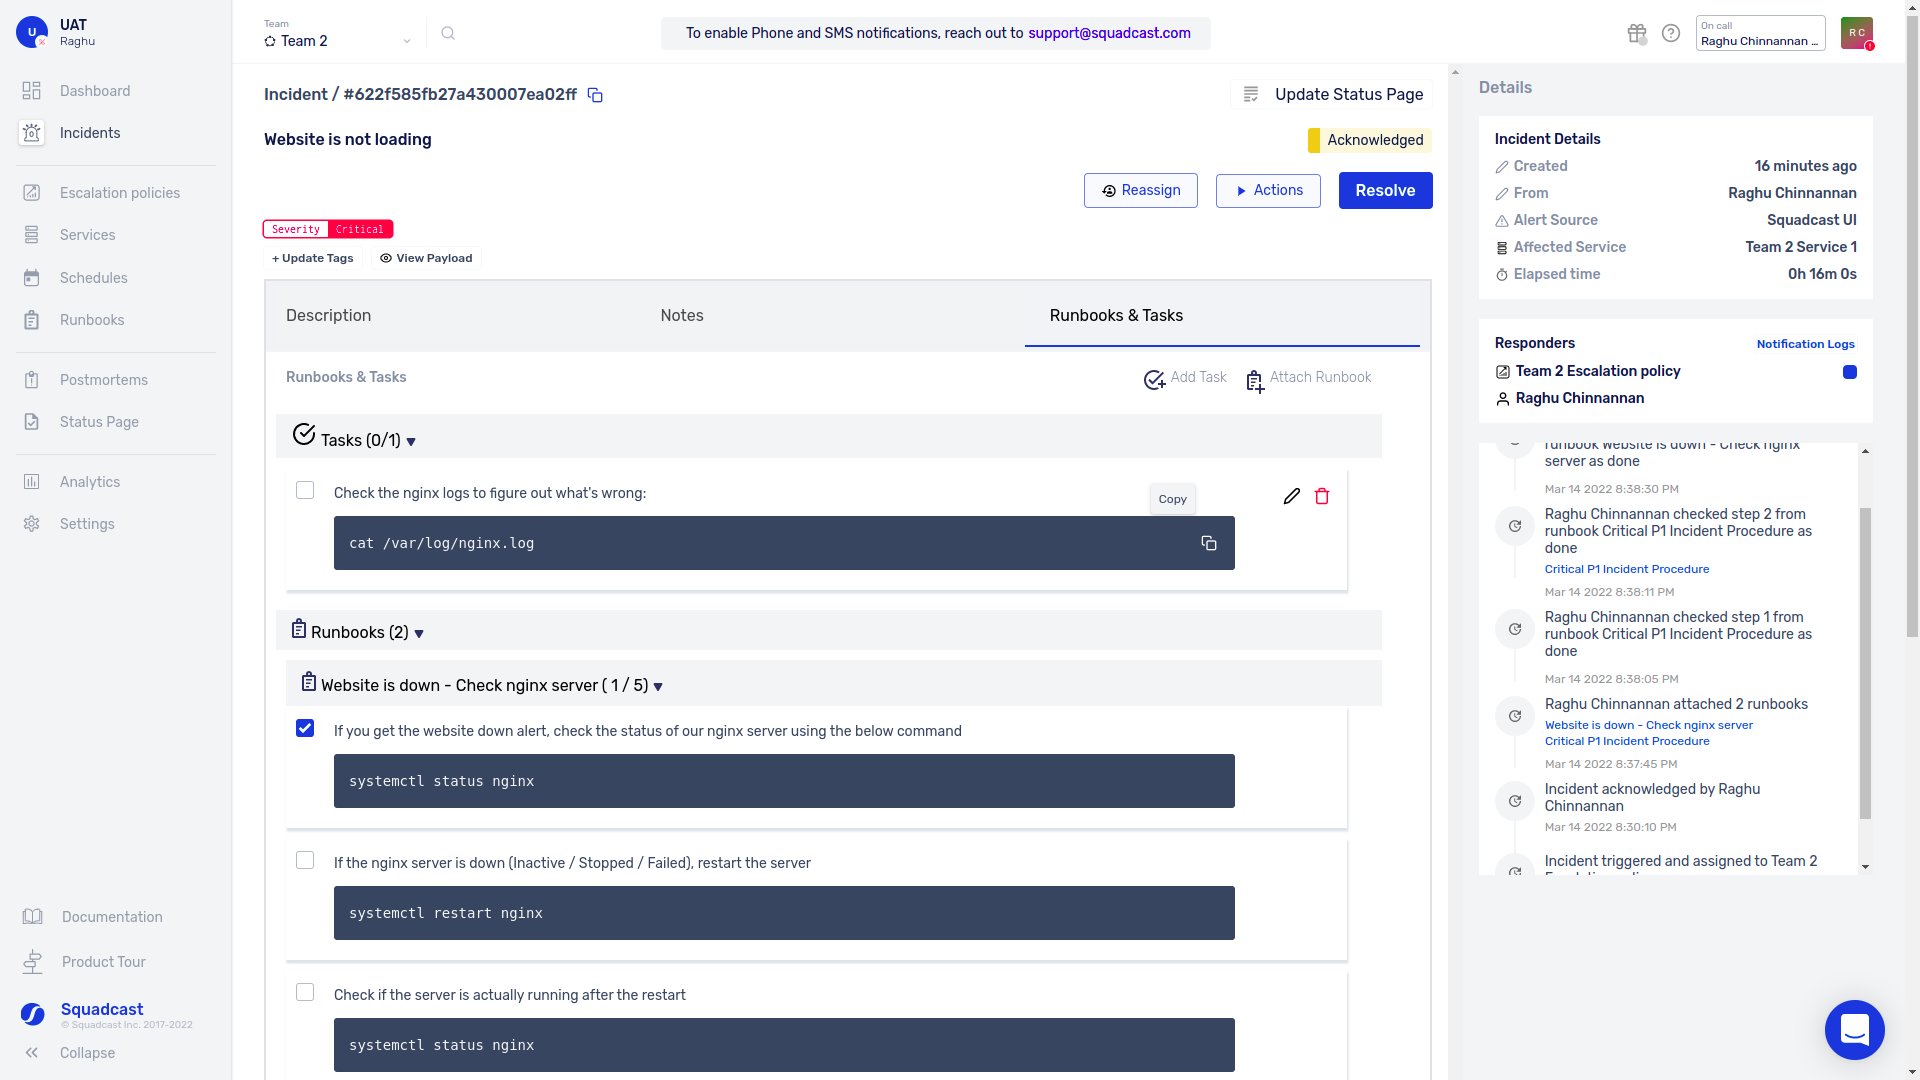
(3) Similar to Runbook actions, the tasks completion can also be marked using the checkbox
Note:
Every action around Tasks, creating them, marking them as complete - all of it gets recorded in the Incident Timeline automatically.
For any queries on Runbooks and Tasks, reach out to our Support Team and they will be happy to assist you.